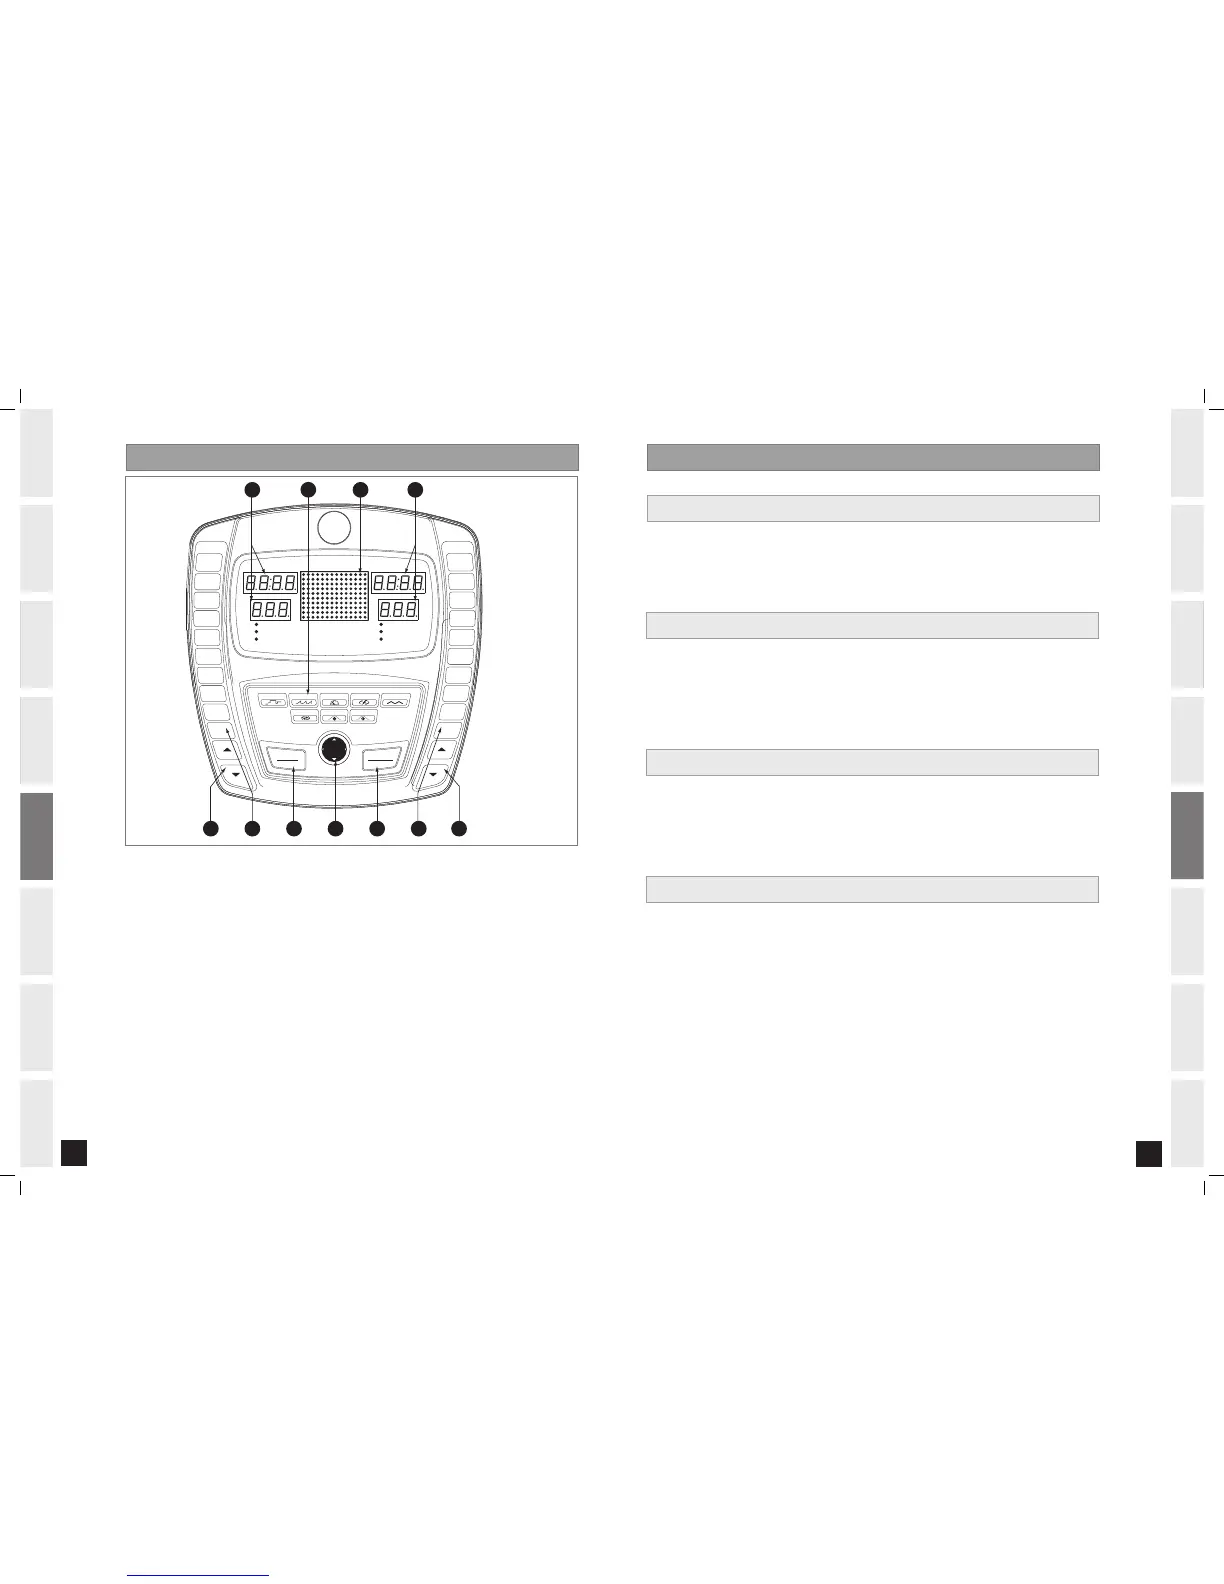
A) MONITOR DISPLAY: Speed, Time, Heart Rate, Distance, Calories, RPM, Watts and Resistance Level.
B) LARGE LED WINDOW: Display program profiles.
C) STOP: Press to pause/end your workout. Hold for 3 seconds to reset the treadmill.
D) START: Press to begin exercising, start your program, or resume exercising after a pause.
E) PROGRAMMING BUTTON: Used to select Program, Level, Time, and other options. Press to change display
feedback during workout.
During programming:
ARROWS: Scrolls through programs and adjusts program settings.
ENTER: Confirms setting and advances to next step.
BACK: Returns to previous step.
F) ONE-TOUCH LEVEL KEYS: Used to reach desired resistance level more quickly.
G) LEVEL ARROW KEYS: Used to adjust resistance level in small increments.
H) QUICK PROGRAM KEYS: Used to select programs more directly.
SCAN VIEWING WINDOWS
To have the display windows rotate continuously (Speed, Heart Rate, RPM, Calories, Level and Watts), hold the
ENTER button for 4-5 seconds. Press ENTER again to turn off scan feature.
2. 0AR - 3.0 AR C ONS OLE OPE RAT ION
1) Turn on Bike.
2) Press START button and begin exercising.
3) Program will automatically default to MANUAL (P1), the time will count up from 0:00, and the resistance
will default to level 1.
4) The resistance level can be adjusted during the workout.
1) Select a program using the PROGRAM QUICK KEY and press ENTER.
*NOTE: If you press START instead of ENTER, the program will begin and counts up from 0:00 for the MANUAL
and CONSTANT WATTS programs, and count down from 30:00 for all other programs. The level defaults to 1.
2) Select a LEVEL using the ARROW KEYS on the programming button and press ENTER.
3) Set TIME using the ARROW KEYS on the programming button and press ENTER.
4) Press START to begin the program.
QUICK START
SELECTING PROGRAMS
1) Select CUSTOM PROGRAM using the PROGRAM QUICK KEY and press ENTER.
2) Set TIME using the ARROW KEYS on the programming button and press ENTER.
3) Set the RESISTANCE LEVEL PROFILES using the ARROW KEYS on the programming button and
press ENTER after each RESISTANCE LEVEL PROFILE is set to the desired level (repeat until
all 15 segments are chosen).
*NOTE: if BACK is pressed on the programming button, it will take you back to previous
segment.
4) Press START to begin the program.
*NOTE: To reset the memory press and hold the ENTER button for 5 seconds.
SELECTING CUS TOM PROGRAM
SELECTING CON STAN T WATT S PROGRAM
1) Select CONSTANT WATTS PROGRAM using the PROGRAM QUICK KEY and press ENTER.
2) Set TIME using the ARROW KEYS on the programming button and press ENTER.
3) Select desired WATTS using the ARROW KEYS on the programming button and press ENTER.
4) Press START to begin the program.
*NOTE: To reset the memory press and hold the ENTER button for 5 seconds.
 Loading...