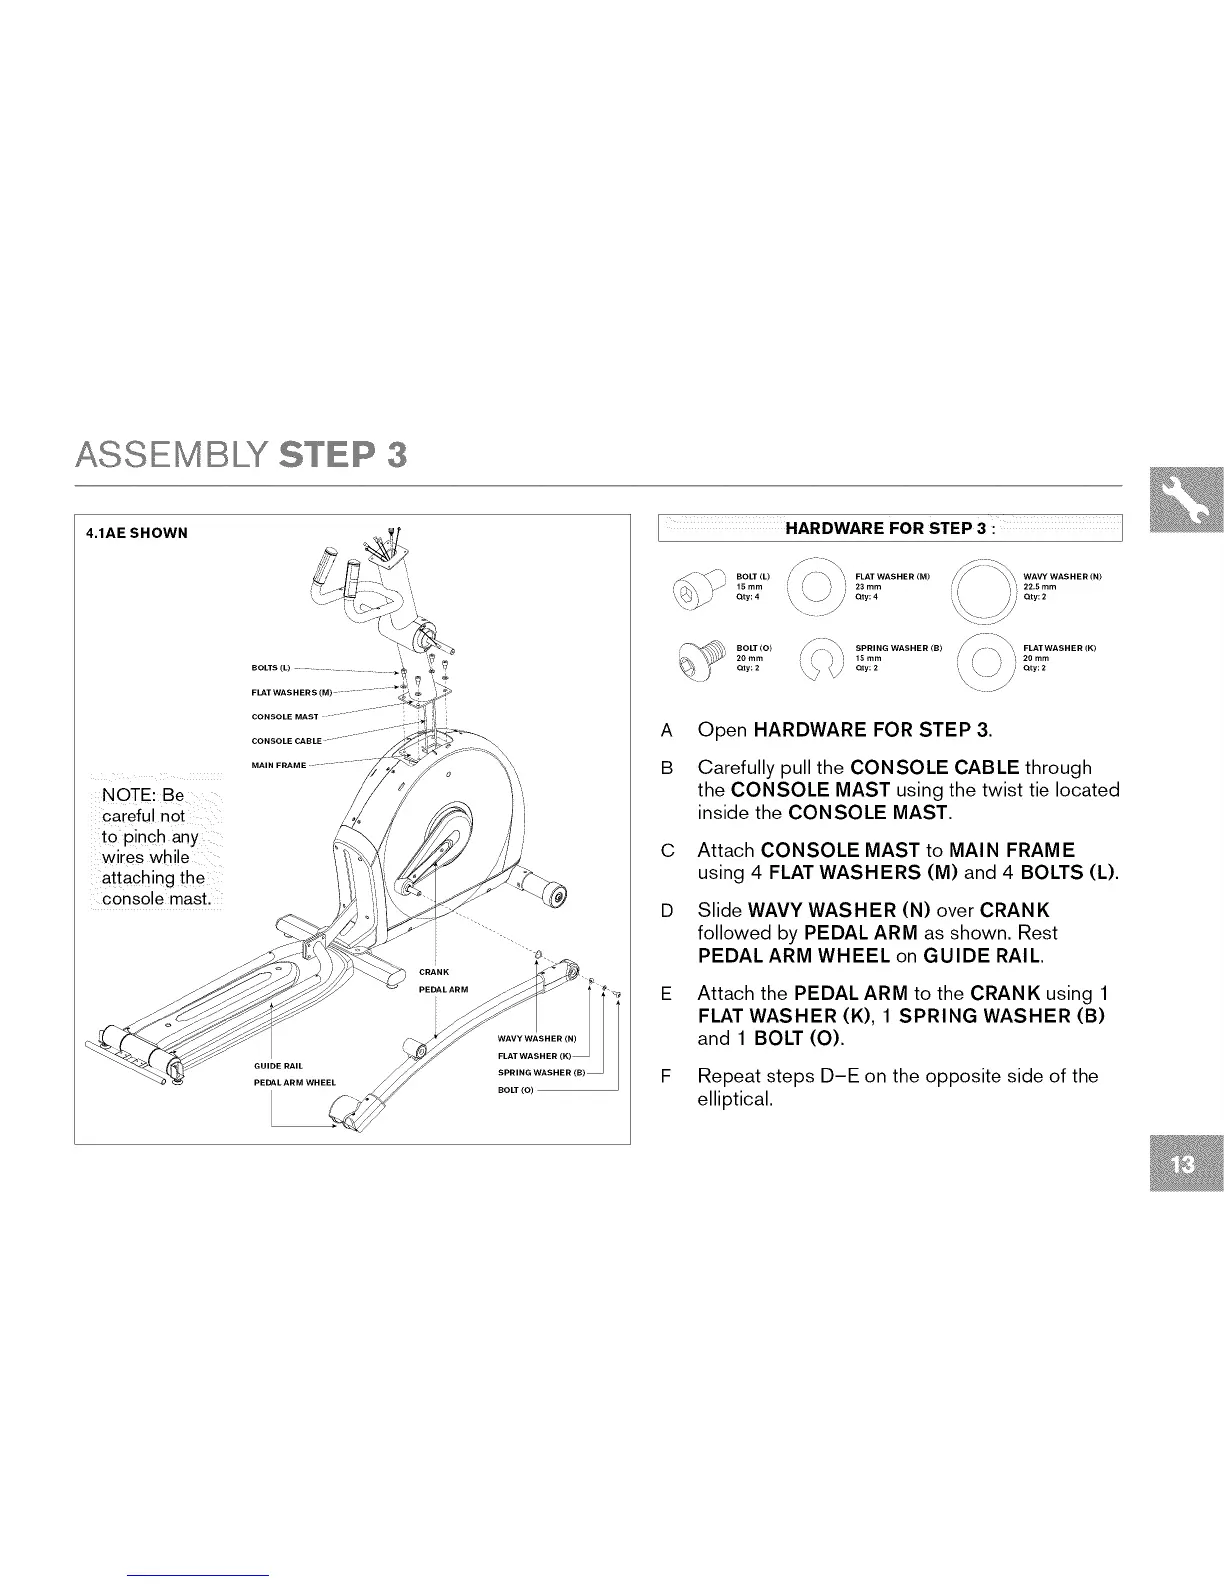
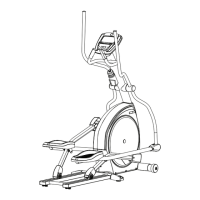
ASSEMBLY STEP 3
4.1AESHOWN
NOTE: Be
careful not
to pinch any
wires while
attaching the
console mast.
BOLTS(L) ............... _@
GUIDE RAIL
PEDAL ARM WHEEL
l
.......... N,]i
FLAT WASHER (K)
SPRING WASHER (B)
BOLT(O)
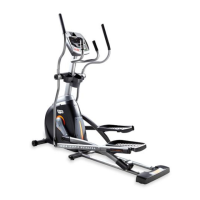
HARDWARE FOR STEP 3 : 1
BOLT(L) / _ ............. (M) ......... (N)
BOLT(O) "4 ,X ............ (B) _, F ......... (K)
' '; 15ram
2O mm i, Qty; 2 ',
Qty; 2 _ /' Qty: 2
A Open HARDWARE FOR STEP 3.
B Carefully pull the CONSOLE CABLE through
the CONSOLE MAST using the twist tie located
inside the CONSOLE MAST.
C Attach CONSOLE MAST to MAIN FRAME
using 4 FLAT WASHERS (M) and 4 BOLTS (L).
Slide WAVY WASH ER (N) over CRANK
followed by PEDAL ARM as shown. Rest
PEDAL ARM WHEEL on GUIDE RAIL.
Attach the PEDAL ARM to the CRANK using 1
FLAT WASHER (K), 1 SPRING WASHER (B)
and 1 BOLT (O).
Repeat steps D-E on the opposite side of the
elliptical.