EasyManua.ls Logo

afloia FILLO - User Manual

afloia FILLO
12 pages
Print Icon
To Next Page IconTo Next Page
Loading...
AIR
PURIFIER
Thank
you very
much
for
using
our
products.
Please
read
the
user
manual
carefully
before
use,
and
keep
it
for
future
reference.
Vi
Zhongshan
Invitop
Electrical
Co.,Ltd
BF6
No.6
Xinhua
Road
Sanjiao
Town
Zhongshan
City
Guangdong
China
CONTENT
Points
for
Attention
«==««======srmesrnsnninneeees
01
Product
Overview
-
Specifications
-
resessss
04
Installation
Filter
«-=«-r-=r-=rosrosrorororraas
04
Function
Instruction
-
06
Maintenance
-----------somenenee
e
08
FAQ
-sererssasssss
s
09
POINTS
FOR
ATTENTION
Before
using,
please
read
this
user
manual
carefully
and
keep
it
for
future
reference.
Warnin
.
To
avoid
electric
shock
and
fire,
do
not
allow
water
,
liquid
or
any
flammable
detergent
to
get
into
or
to
clean
the
product.
2.
Do
not
spray
insecticide,
perfume
or
other
flammable
spray
around
the
products.
3.
Before
connecting
the
power
supply,
please
check
whether
the
voltage
of
the
product
is
consistent
with
the
local
power
supply
voltage.
4.
This
product
can
not
replace
normal
ventilation,
daily
dust
collection
or
oil
pumping
when
cooking.
5.
Ensure
the
product
is
used
in
condition
of
a
stable
and
horizontal
level.
6.
Leave
at
least
30cm
of
space
on
the
back
and
sides
of
the
product,
and
at
least
50cm
of
space
above
the
product
when
using.
7.
Ensure
both
the
filter
and
its
cover
are
properly
installed
before
using
8.
Do
not
insert
finger
or
other
things
into
the
air
outletinlet
to
prevent
physical
damage
or
trouble.
—01—
PRODUCT
OVERVIEW
Components
Control
Panel
Control
Panel
Night
Light
Air
Outlet
Q
Power
Button
Body
N
@
Timer
Button
/
H
8H
\
T
.
I
||||fl||||||
#{®
WindSpeedButton
|
L
2H
|
i
Air
Inlet
/9\
Light
Control
Button
Filter
Indicator
—0o—
—03-
SPECIFICATIONS
Steps
of
Installing
Filter
Model
No.
Fillo
Unplug
the
power
socket
of
the
machine
before
replacing
or
installing
the
filter.
Size
195*195*403mm
step
1
step2
step
3
.
Filter
Net
Weight
2.3kg
OPEN
Packaging
Input
AC120V
60Hz
Power
35W
CADR
90m’/h
Coverage
Area
<11m’
INSTALLATION
FILTER
Notice
e
Please
remove
the
packaging
of
the
filter
before
using
for
the
first
time.
.
e
o
R
1.
Invert
the
machine,
and
rotate
the
base
along
the
direction
marked
"OPEN".
nsure
the
machine
is
unplugged
before
removing
or
installing
the
filter.
'
o
When
the
power
indicator
keeps
flashing
in
red,
the
filter
should
be
replaced
2
Take
outthe
filter
from
the
machine.
©
Please
wipe
the
dust
on
the
filter
regularly,
do
not
wash
or
use
it
repeatedly.
3.
Remove
the
pa?kagmg
of
the‘f\I(er.
o
Please
use
the
filter
specially
designed
for
this
product.
4.
Install
the
filter
into
the
machine.
5.
Then
Install
the
base,
rotate
and
tighten
the
base
along
the
direction
marked
"CLOSE".
—04—
—05—
FUNCTION
INSTRUCTION
When
connect
to
the
power
socket,
the
buzzer
will
ring
for
1
second.
Butto
eratio
O
Power
Button
®
Touch
the
power
button
to
turn
on the
machine,
the
buzzer
will
ring
for
one
time,
the
power
indicator
and
the
low
grade
of
wind
speed
indicator
light
turns
green.
@
Touch
the
button
again,
the
buzzer
will
ring
for
one
time
and
the
machine
will
turn
off
with
all
lights
turn
off.
Notice:
The
machine
will
record
the
working
modes
when
turns
off
without
unplugging
the
power
socket.
@
Timer
Button
@
Inthe
condition
of
working,
press
the
timer
button
to
set
among
the
circulation
of
2H,
4H
and
8H
timer
with
buzzer
rings,
and
the
corresponding
indicator
will
be
on.
@
Press
again,
the
timer
indicator
turns
off
and
the
machine
will
work
continuously
without
timer.
@
In
the
status
of
timing,
the
machine
begins
to
count
down.
When
the
time
is
up,
the
fan
will
stop
working
and
all
lights
will
be
off.
Notice:
The
timer
button
couldn’t
operate
in
the
status
of
shutdown.
:‘
Wind
Speed
Button
@
In
the
condition
of
working,
press
the
wind
speed
button,
the
buzzer
will
ring
for
one
time.
@
Press
again
to
adjust
the
wind
speed
among
the
circulation
of
Low
grade,
Middle
grade
and
High
grade
with
buzzer
rings,
the
corresponding
indicator
will
be
on
Notice:
The
wind
speed
adjustment
couldn’t
operate
in
the
status
of
shutdown.
rQ\
Light
Control
Button
@
In
the
condition
of
working,
touch
the
light
control button,
the
light
degree
can
be
set
between
soft
light
and
standard
light
mode
with
buzzer
rings.
@
Touch
again,
the
LED
light
turns
off.
Notice:
The
light
control
button
couldn’t
operate
in
the
status
of
shutdown.
minder
of
Replacing
Filter
When
the
machine
detects
the
filter
s
saturated,
the
power
indicator
will
keep
flashing
in
red.
Please
press
the
power
button
for
7s
to
reset
after
installing
a
new
fiter.
Note
SITUATION
REASON
o
Is
it
plugged
into
a
power
socket?
Is
there
a
power
outage?
+
Ensure
the
machine
is
unplugged
before
maintenance.
)
)
P
No
working
o
I the
home
leakage
switch
or
fuse
cut
off?
+
Do
not
immerse
the
machine
into
water
or
any
liquid.
«
e the
fler
replacing
indicator
keep
fashing?
+
Do
not
use
abrasive,
corrosive
or
flammable
cleansers
(such
as
bleach
or
alcohol)
to
clean
soor
pert
o
Is
there
any
dust
in
the
surface
of
pre-filter?
any
part
of
the
unit.
oor
performance
*
Don't
use
a
vacuum
cleaner
to
clean
the
filter
or
wash
it
directly.
«
Please
sterilize
the
filter
under
sunlight
regularly.
Cleaning
&
Storage
@
Ensure
the
machine
is
power-off
and
unplugged.
@
Use
a
soft
cloth
with
neutral
cleanser
to
clean
away
any
dust
or
debris
from
the
surface
of
the
unit
and
air
inlet/outlet.
@
After
the
machine
completely
dry
out,
put
on
the
bag and
place
it
in
a
cool
and
well
ventilated
place.
@
If
you
do
not
use
it
for
a
long
time,
in
the
basic
of
previous
steps,
please
turn
on
the
machine
for
a
few
minutes
from
time
to
time
to
ensure
a
good
performance.
Notice:
Please
don't
drop
any
water
into
the
machine
when
clean
the
air
outlet.
®
Is
there
any
obstacle
blocking
the
air
inlet/outlet.
o
Is
there
anything
stuck
on
the fan
in
the
air
outlet?
o
I the
machine
tilted?
o
Please
set
a
lower
grade
of
wind
speed
if
the
noise
is
too
loud
,
or
set
low
grade
of
wind
speed
when
using
in
bedroom
at
night.
Significant noise
©
Itis
the
normal
phenomenon
that
the
machine
emits
the
smell
of
plastic
for
the
first
time.
The
machine
will
emit
nasty
smell
if
the
filter
is
dusty,
so
in
this
Coming
out
hem
situation,
please
clean
or
replace
the
filter.
nasty
smell
o
If
the
burning
smell
emits
from
the
machine,
please
unplug
the
power
socket
and
contact
with
buyer
or
customer
service.
The
reminder
of
replacing
filter
s
sitl
flashing
after
user
have
replaced
a
new
one.
!
o
Please
press
the
power
button
()
for
7s
to
reset
the
machine
and
the
life
counter
of
the
filter
will
tart.
Notice:
If
the
above
FAQ
can
not
solve
your
problems
and
need
maintenance,
please
contact
the
supplier
or
after
sales
service
center.
Please
do
not
disassemble
the
machine
to
maintain
by
yourself.
—09—
Question and Answer IconNeed help?

Do you have a question about the afloia FILLO and is the answer not in the manual?

Summary

Points for Attention

Safety Warnings

Lists essential safety precautions and warnings for users. Avoid electric shock, fire, and improper usage.

Product Overview

Components Identification

Details the different parts of the air purifier, including the control panel, filter, and body.

Specifications

Installation Filter

Filter Installation Steps

Provides a step-by-step visual guide for installing the air purifier filter.

Function Instruction

Button Operations

Details the operation of the power, timer, wind speed, and light control buttons.

Filter Replacement Indicator

Explains the indicator for filter saturation and how to reset it.

Maintenance

Cleaning and Storage Guide

Provides instructions on how to clean and store the air purifier unit and filter.

FAQ

Troubleshooting Common Issues

Addresses common problems like 'No working', 'Poor performance', 'Significant noise', and 'Nasty smell'.

Overview

This document describes the Fillo Air Purifier, a device designed to improve air quality in indoor environments. The manual provides comprehensive instructions for its operation, installation, maintenance, and troubleshooting.

The air purifier's primary function is to clean the air by filtering out dust, pollutants, and other airborne particles. It features a multi-stage filtration system, including a main filter that needs to be regularly maintained and replaced. The device is not intended to replace normal ventilation, daily dust collection, or oil pumping during cooking.

Usage Features:

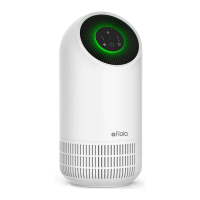
The Fillo Air Purifier is designed for ease of use with a straightforward control panel located on the top of the unit. The control panel includes several buttons and indicators to manage its various functions:

  • Power Button: This button turns the machine on and off. When turned on, the power indicator and the low-grade wind speed indicator light up green, accompanied by a single buzzer ring. Pressing it again turns the machine off, with all lights extinguishing after another single buzzer ring. A convenient feature is that the machine records its working modes when turned off without being unplugged, allowing it to resume previous settings upon restart.
  • Timer Button: This allows users to set an operating duration for the air purifier. While the machine is working, pressing the timer button cycles through 2-hour, 4-hour, and 8-hour timer settings, each accompanied by a buzzer ring and the illumination of the corresponding indicator. Pressing it again will turn off the timer indicator, allowing the machine to work continuously. Once a timer is set, the machine counts down, and when the time expires, the fan stops working, and all lights turn off. It's important to note that the timer button cannot be operated when the machine is in shutdown mode.
  • Wind Speed Button: This button controls the fan speed, offering different levels of air purification intensity. Pressing the wind speed button once will activate it with a buzzer ring. Subsequent presses cycle through Low, Middle, and High-grade wind speeds, each indicated by a buzzer ring and the illumination of the corresponding indicator. Similar to the timer, wind speed adjustment cannot be made when the machine is off.
  • Light Control Button: The air purifier includes a night light feature. Touching the light control button allows users to switch between a soft light mode and a standard light mode, each confirmed by a buzzer ring. Touching it again will turn the LED light off. This function is also inoperable when the machine is in shutdown mode.
  • Indicators: Various indicators on the control panel provide visual feedback on the current settings, such as wind speed (H for High, M for Middle, L for Low) and timer settings (8H, 4H, 2H).

For optimal performance and safety, users should ensure the product is placed on a stable and horizontal surface. It requires at least 30cm of clear space on its back and sides, and 50cm above, to allow for proper air circulation. It is crucial to ensure both the filter and its cover are correctly installed before operating the device. To prevent physical damage or malfunction, no fingers or other objects should be inserted into the air outlet or inlet.

Maintenance Features:

Proper maintenance is essential for the longevity and efficient operation of the Fillo Air Purifier. The manual outlines several key maintenance procedures:

  • Filter Installation and Replacement: Before initial use, the packaging of the filter must be removed. The machine should always be unplugged before removing or installing the filter. The installation process involves inverting the machine, rotating the base counter-clockwise ("OPEN" direction), removing the old filter, unwrapping the new filter, installing it, and then rotating the base clockwise ("CLOSE" direction) to secure it.
  • Filter Replacement Reminder: The air purifier is equipped with a system to detect when the filter is saturated. When this occurs, the power indicator will flash red, signaling that the filter needs to be replaced. After installing a new filter, the user must press the power button for 7 seconds to reset the filter life counter.
  • Regular Cleaning: The dust on the filter should be wiped regularly. It is explicitly stated that the filter should not be washed or reused repeatedly. Users should only use filters specifically designed for this product.
  • General Cleaning & Storage:
    • Before any cleaning, ensure the machine is powered off and unplugged.
    • The exterior surface of the unit and the air inlet/outlet can be cleaned using a soft cloth with a neutral cleanser to remove dust or debris.
    • The machine should never be immersed in water or any other liquid.
    • Abrasive, corrosive, or flammable cleansers (such as bleach or alcohol) should not be used on any part of the unit.
    • A vacuum cleaner should not be used to clean the filter directly.
    • The filter should be sterilized under sunlight regularly.
    • After cleaning, ensure the machine is completely dry before storing it. It should be placed in a bag and kept in a cool, well-ventilated area.
    • If the machine is not used for an extended period, it is recommended to turn it on for a few minutes occasionally, following the previous storage steps, to ensure good performance.
    • A critical warning is provided: do not drop any water into the machine when cleaning the air outlet.

Troubleshooting:

The manual includes a FAQ section to help users diagnose and resolve common issues, such as the machine not working, poor performance, significant noise, or a nasty smell coming from the unit. If problems persist or require maintenance beyond the scope of the FAQ, users are advised to contact the supplier or after-sales service center and refrain from disassembling the machine themselves.

afloia FILLO Specifications

General IconGeneral
ModelFILLO
TypeAir Cleaner
ColorWhite
Filter TypeHEPA
Coverage Area215 sq ft

Related product manuals