!
Practice all workshop safety procedures at all times!
12
Practice all workshop safety procedures at all times!
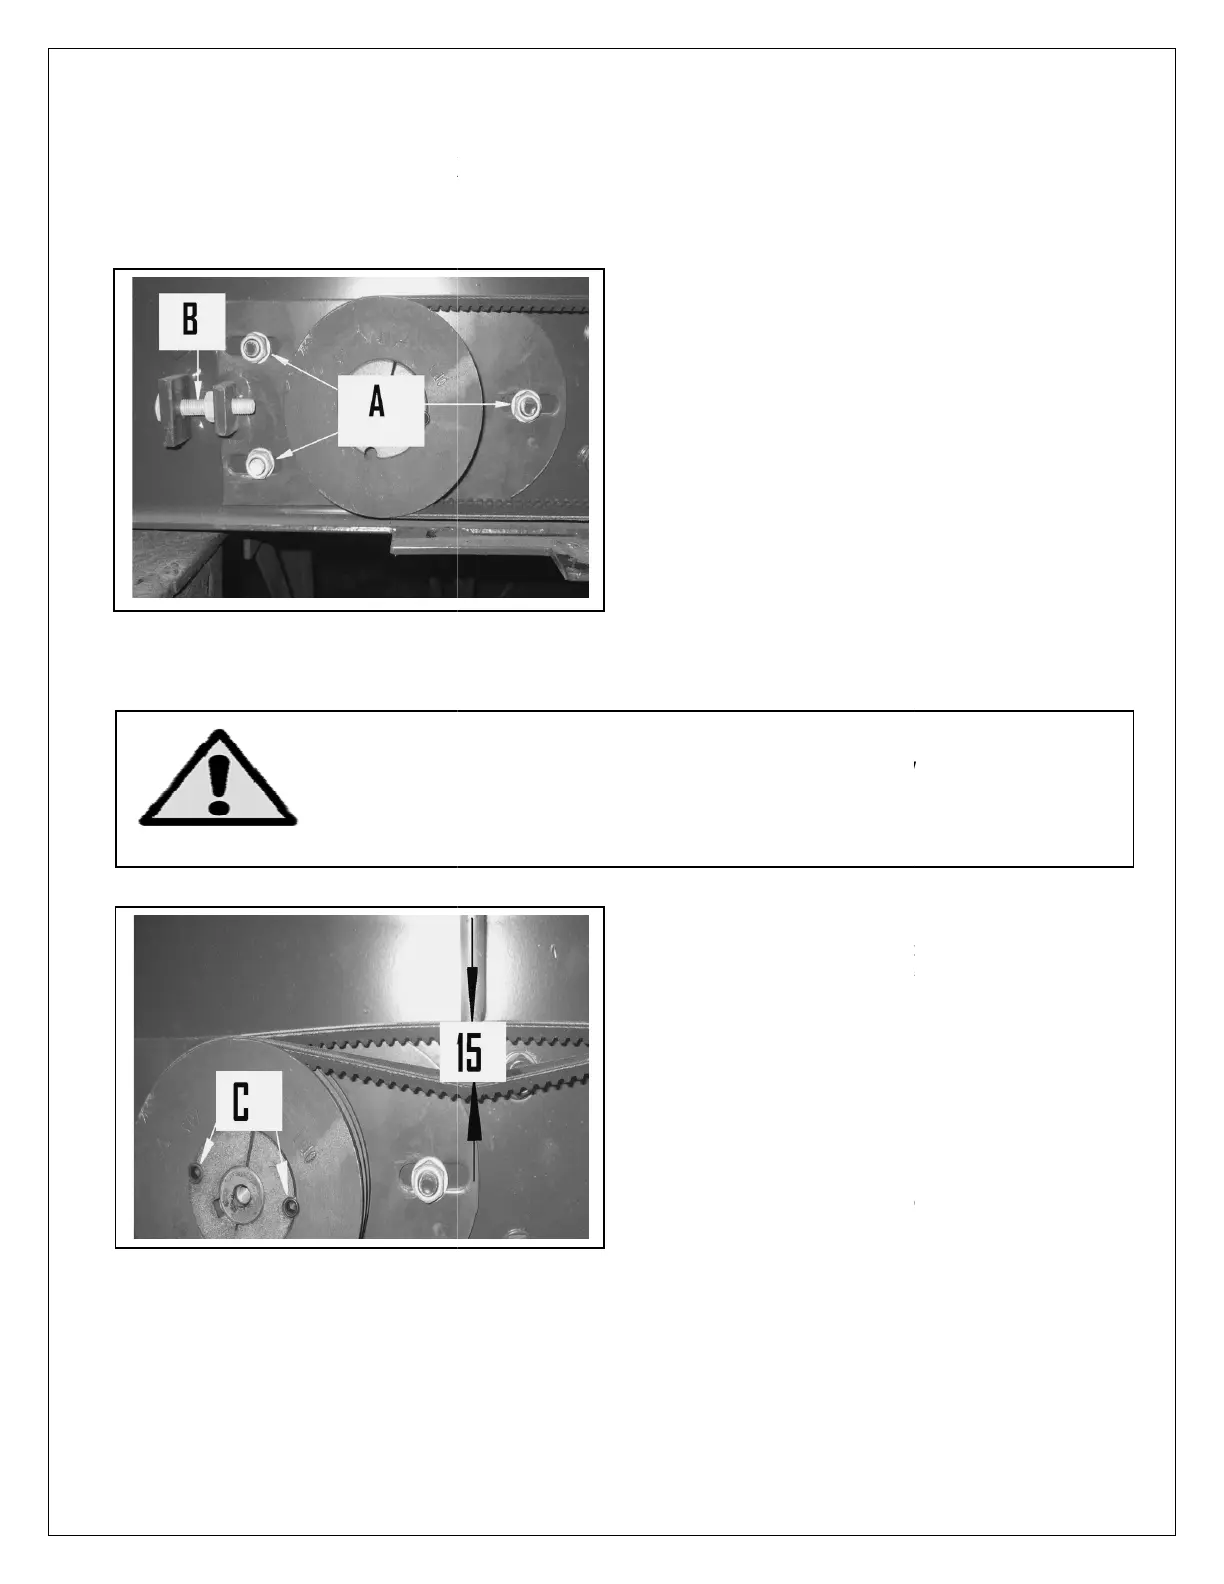
Fig 7.
Fig 8.
7. Tension on all V-
belts must be set at 15mm
will cause undue hydraulic motor wear.
Resulting in loss of power on conveyor
bed.
8.
When the correct tension is achieved, lock
the adjuster bolt (B) Fig 7. Tighten M10
nuts (A) Fig 7.
9.
Check Allan bolts (C) Fig 8 are tight.
10. Re-fit conv
eyor AG 175+200, ensure when
re fitting the hydraulic pipes do not catch
or score on the bearing or any metal edges.
11. Re-
fit bolts removed at stage 1 (Fig 5)
12.
stage 3 (Fig 6)
13.
Run and test all machines.
5. To adjust V-
Nuts (item A) Fig 7.
6. Adjust tension using adjuster screw
(Item B).
-
Practice all workshop safety procedures at all times!
belts must be set at 15mm
Excessive belt tension
will cause undue hydraulic motor wear.
Resulting in loss of power on conveyor
When the correct tension is achieved, lock
the adjuster bolt (B) Fig 7. Tighten M10
Check Allan bolts (C) Fig 8 are tight.
eyor AG 175+200, ensure when
re fitting the hydraulic pipes do not catch
or score on the bearing or any metal edges.
fit bolts removed at stage 1 (Fig 5)
-fit guard removed at
Run and test all machines.
6. Adjust tension using adjuster screw
 Loading...