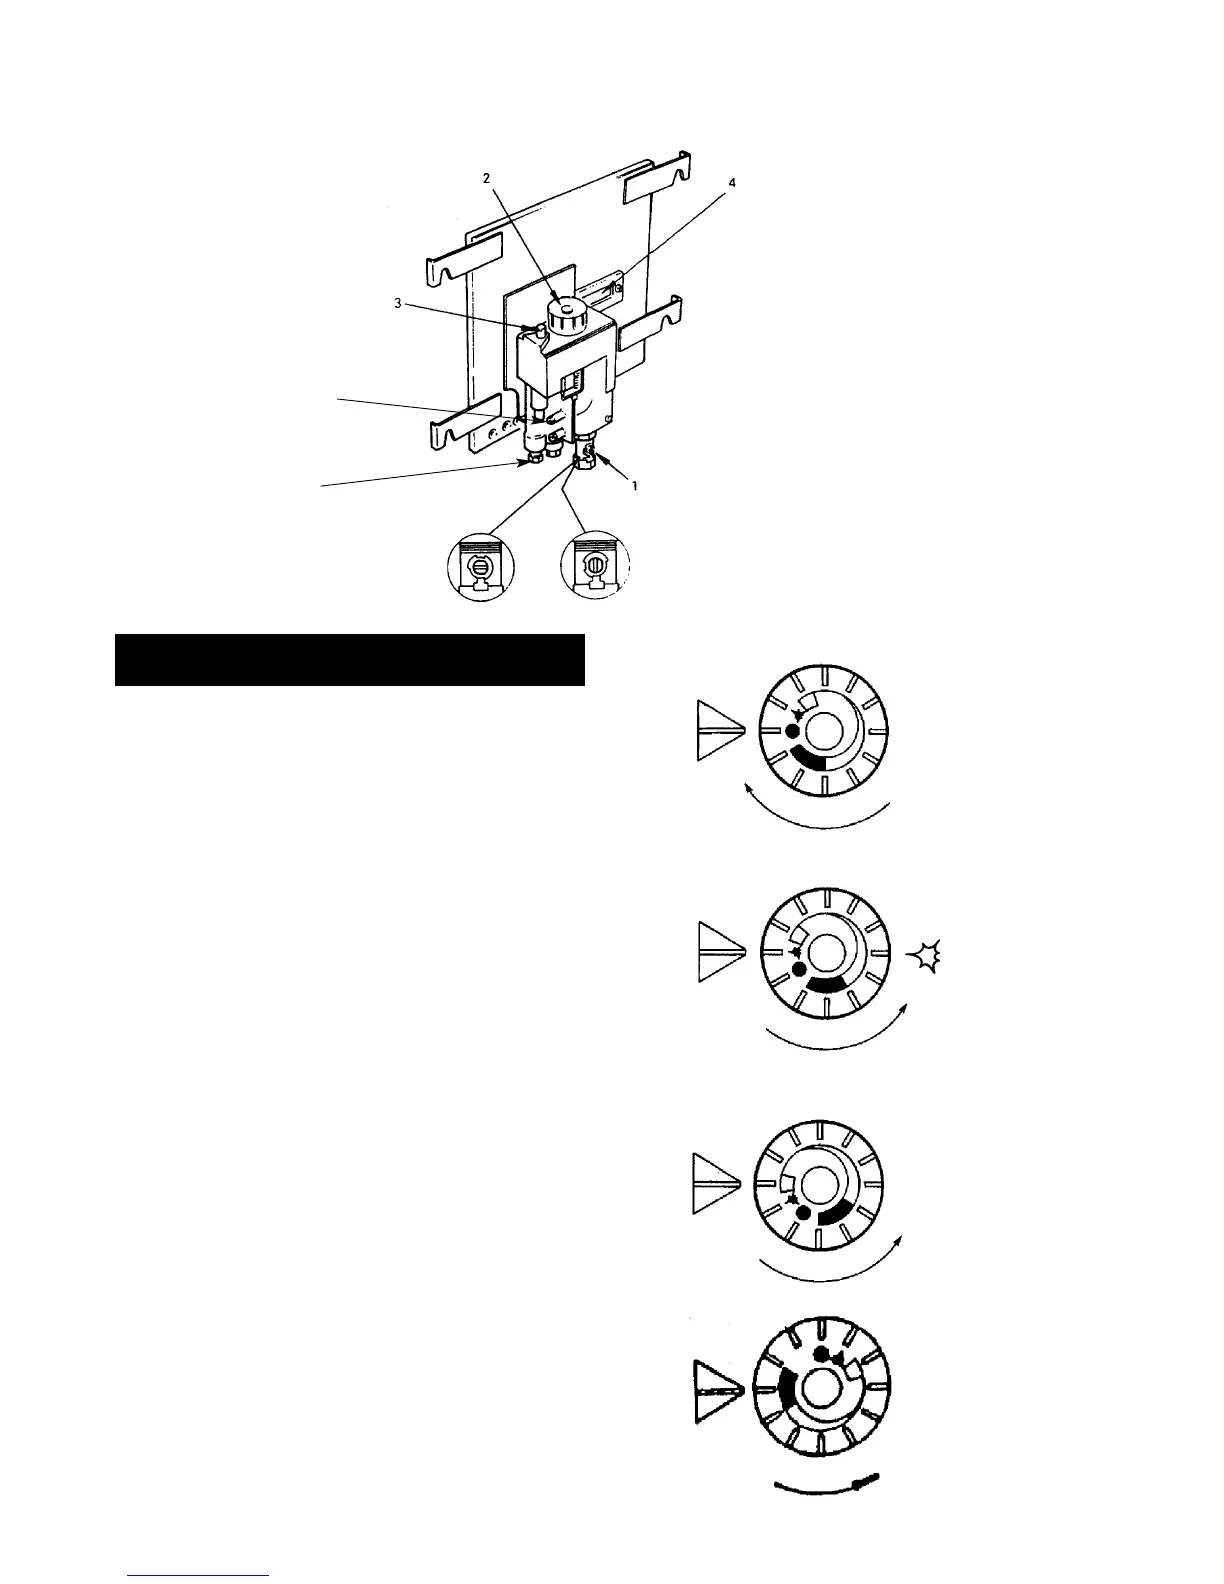
LIGHTING THE BURNER - Fig. 2
CAUTION: NO SMOKING OR NAKED LIGHTS
Open the burner outer door to expose the gas control
combination valve.
CAUTION: BEFORE LIGHTING: ENSURE THAT THE
GAS VALVE CONTROL KNOB 2 IS SET IN THE OFF
POSITION (SEE FIG. A) AND COMBUSTION
DISCHARGE SAFETY DEVICE BUTTON IS
DEPRESSED.
1. Turn off union gas cock 1. Test the gas installation
from the meter cock for soundness and purge.
2. Turn on gas supply to cooker and open gas cock 1.
3. Turn the gas valve control knob 2 anti-clockwise to the
position (see fig. B). Press down and hold the knob in
the position while depressing the piezo ignitor 3
several times until the pilot has lit. This can be
observed through the viewing windows 4.
4. When the pilot has lit continue to hold the gas valve
control knob for approximately 30 seconds. If it goes
out, wait 3 minutes and repeat the procedure for
holding a little longer.
5. With the pilot flame established, release the gas valve
control knob 2 gradually and rotate anti-clockwise to
its low fire position. Where upon the main burner will
automatically light. Leave in the low fire position for at
least 30 minutes.
NOTE: ANY ATTEMPT TO ROTATE THE CONTROL
KNOB BEFORE RELEASE MAY RESULT IN
DAMAGE.
COMMISSIONING
10
FIG. 4
DESN210252 A
OFF
ON
FIG A
OFF
IGNITION
WHITE BLOCK
LOW FIRE
GREEN BAND
NORMAL
FIG B
FIG C
FIG D
6
5
 Loading...