When attaching the springs, do not place your hands, arms, legs or any other body part close to the connector
points (i.e. joints connecting the steel tubes). The connector points can become pinch points as the trampoline
springs tighten up. Wear heavy duty working gloves to protect your hands from injuries during installation by
the springs and protective goggles to avoid injuries to the eyes. Be steady when installing the springs as it can
rebound and fly off if you inadvertently let go when not hooked properly. Make sure no children are playing
nearby when installing the trampoline.
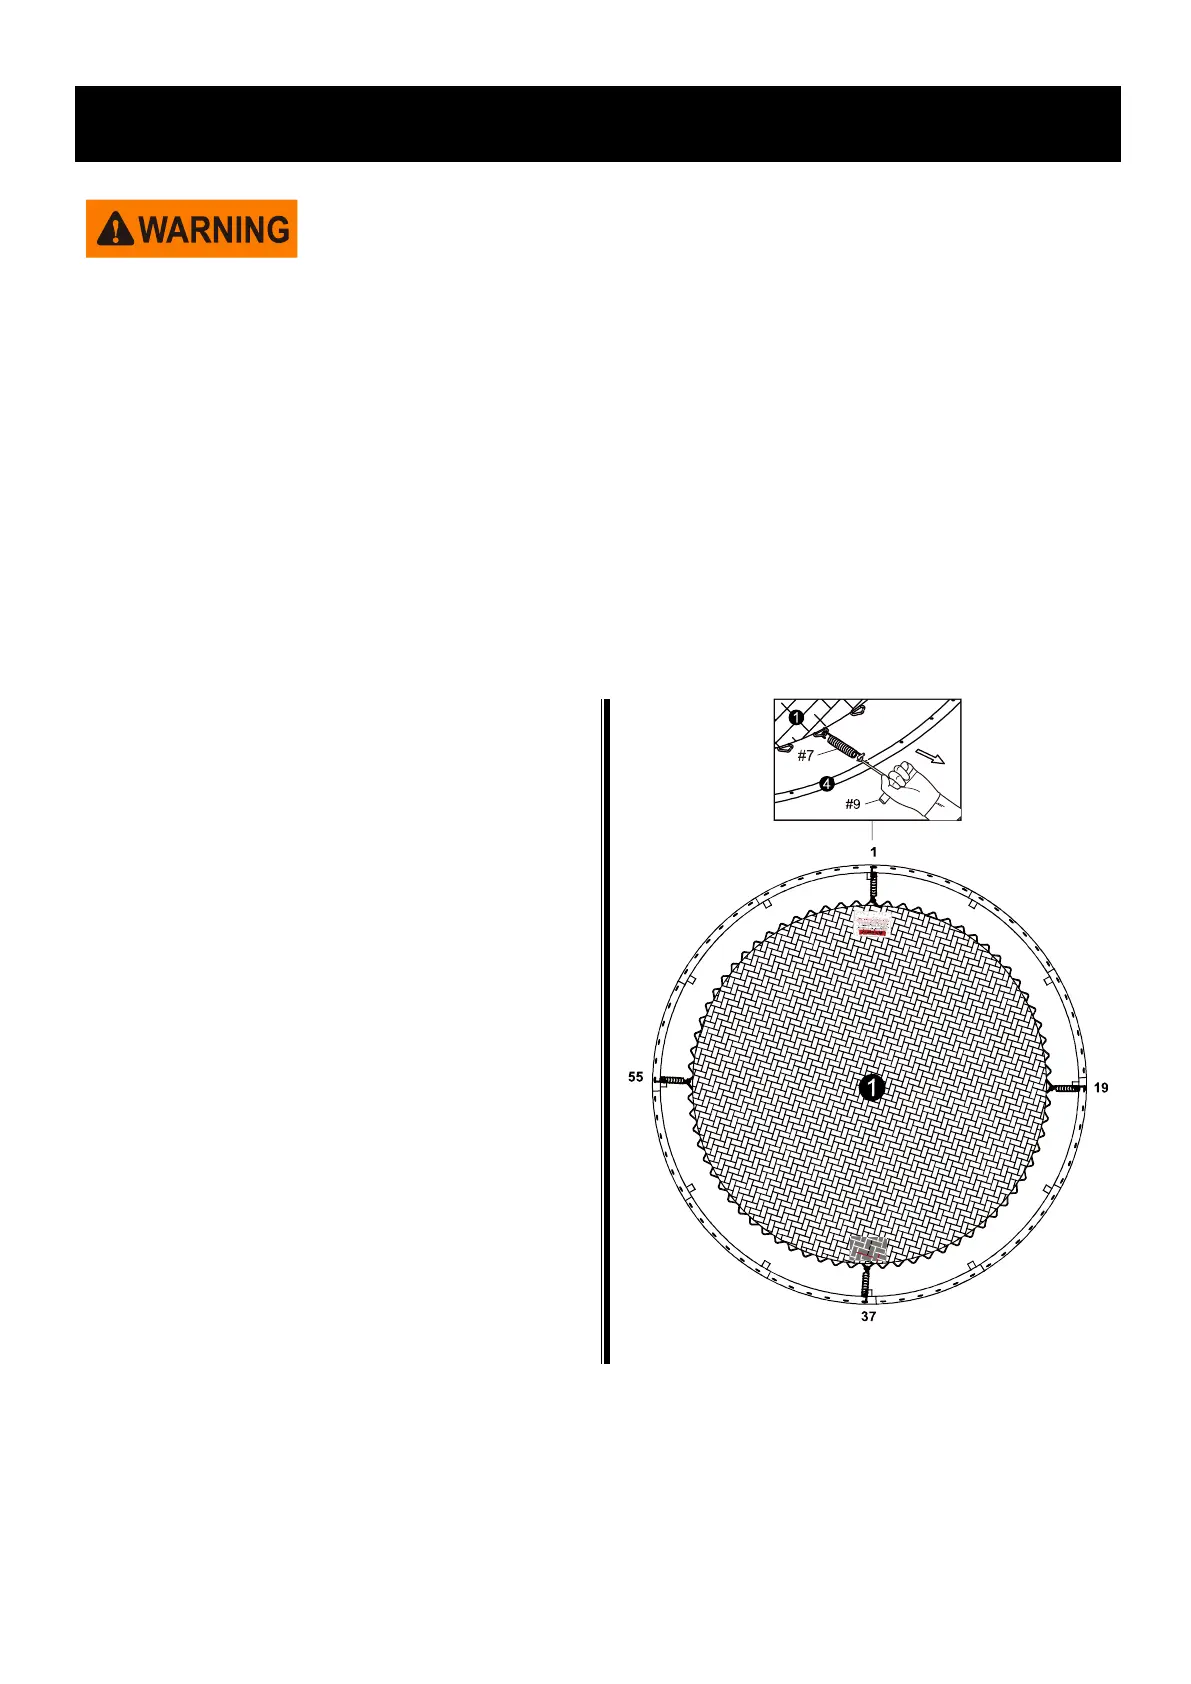
NOTE: Start Point 1 above a leg socket and in front of the mat warning label for ease of spring counting. The
warning label should be positioned where the netting entrance is intended so it will be visible as the user
enters the trampoline.
Step 1 – Spring Assembly ( Springs not included)
To install the springs, hook one end of the Spring
(#7) into the triangle-ring on the Mat (#1), then
pull the other end with the Spring Loading Tool
(#9) underhand and latch it into the
corresponding hole on the frame. Tap on the
spring with the handle of the Spring Loading Tool
to make sure it is securely latched.
There are a total of 72 springs, For even
distribution of spring tension and ease of
assembly, the springs must always be installed
on opposite sides of the mat in an alternating
manner, i.e. 1, then 37, followed by 19 and 55 as
shown below.
Hint: The number of triangle-rings sewn onto the
Mat is equal to the number of holes on the frame.
If you notice that you have miscounted a hole or
triangle-ring, remove and reinstall the springs as
necessary while maintaining an even distribution
of tension as explained above.