and the resistor voltage.!
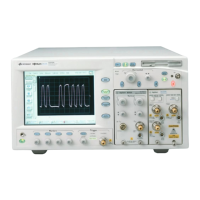
6. Turn on the cursors by pressing the Cursors key. Push the cursor’s knob (push like it was a
button) and then turn the knob to select X1 in pop-up menu. Push the cursor knob again to
select X1. Turn the cursor knob to move cursor X1 across the graph. The time and voltage
values of the point where the cursor intersects the trace are displayed in the “cursor box”.
Move the cursor to one of the peaks in the Channel 1 trace. Use the same process to select
and move cursor X2 to an adjacent peak in the Channel 1 trace. Note the time difference
between the two cursors – it should be one period of the sinusoid. Use the same process to
choose and move cursor Y1 to the minimum (trough) of the Channel 1 sinusoid, and then
move cursor Y2 to the minimum of the Channel 2 sinusoid. Again, the difference is just the
difference in voltage between the input and the output of the voltage divider.!
7. Save a screen image of the graph with the two traces and the cursors. Insert a flash drive
into the USB port of the oscilloscope. Press the Save/Recall key. The Save/Recall Menu
will appear in the softkey area. Press the Save softkey. The menu changes – press the
Format softkey, and the Entry knob to choose the format –#24-bit .bmp (bitmap) or 24-
bit .png (portable network graphics) are are probably good choices. Then use the softkey in
the second position to navigate to the desired location on the flash drive for storing your
file. Under the Settings softkey, you can choose the option Invert Grat to change the
background color of the graticule from black to white – this might save you a bit of ink
when printing out screen images. Finally, press the Press to Save softkey to save the
image. You should receive a message confirming that the file was stored.!
!
8. Now, play around a bit. Change the type of waveform, the frequency, and the amplitude on
the function generator and observe the changes in the oscilloscope traces. Change the time-
and voltage-scale settings on the oscilloscope. Poke around a bit and try out some of the
different functions of the oscilloscope.!
!
 Loading...
