8
Real-time I/Q baseband
generator, Option UN8
Option UN8 simulates mobile or base
station transmissions of common digi-
tal communication standards. The
real-time I/Q baseband generator
supports DECT, GSM, NADC, PDC,
PHS, TETRA, and CDMA communi-
cation standards. Data for these
standards can be generated internal-
ly or supplied externally. After set-
ting the frequency and amplitude
of your signal, TDMA standards
are available with the touch of one
button. Alternatively, you can mix
and match modulation types, symbol
rates and filters to create custom
platforms for developing new or
proprietary communication standards.
Description
Option UN8 is one of two internal
baseband generator cards for the
ESG family. This real-time I/Q
baseband generator builds digitally
modulated signals by mixing and
matching modulation types, symbol
rates and filters. It is provided on
a user-installable card that can be
added to the B version of any existing
ESG or any new instrument.
Different personalities may be
purchased separately to provide
specific modulation formats.
Option UN8 is a standard option
with 1 Megabyte of RAM to store
custom data. To increase the RAM
to 8 Megabytes, Option UN8 can be
ordered in conjunction with Option
UN9 (Option UN8 consists of two
cards). Option UN9 replaces one of
these cards to provide 8 Megabytes
of RAM.
Key features
Intuitive menu
Easy selection of predefined
standards.
Common communication standards
(NADC, GSM, PDC, PHS, DECT,
TETRA) are introduced at the first
menu level. The second level provides
flexible access for basic configuring
of data, timeslots, and framing.
Mix and match modulation types,
symbol rates and filters
Create custom platforms for
developing new or proprietary
communication standards.
The real-time I/Q baseband generator
(Option UN8) enables simple genera-
tion of complex signals. It is easy to
mix and match a modulation type
from one standard with a filter type
from another. For example, generate
a CDPD signal by selecting an NADC
format and substitute a 0.5 GMSK
modulation instead of the standard
p/4 DQPSK modulation or generate
PWT, a DECT variant, by substituting
π/4 DQPSK modulation in the DECT
standard. Implement and recall
non-standard solutions easily.
Unlimited modulation types using FSK,
I/Q and differential table editors
Define modulation formats specific
to application needs or impair the
standard modulation formats for
stress testing.
Select modulations from a menu of
PSK, MSK, QAM or FSK modulation
types.
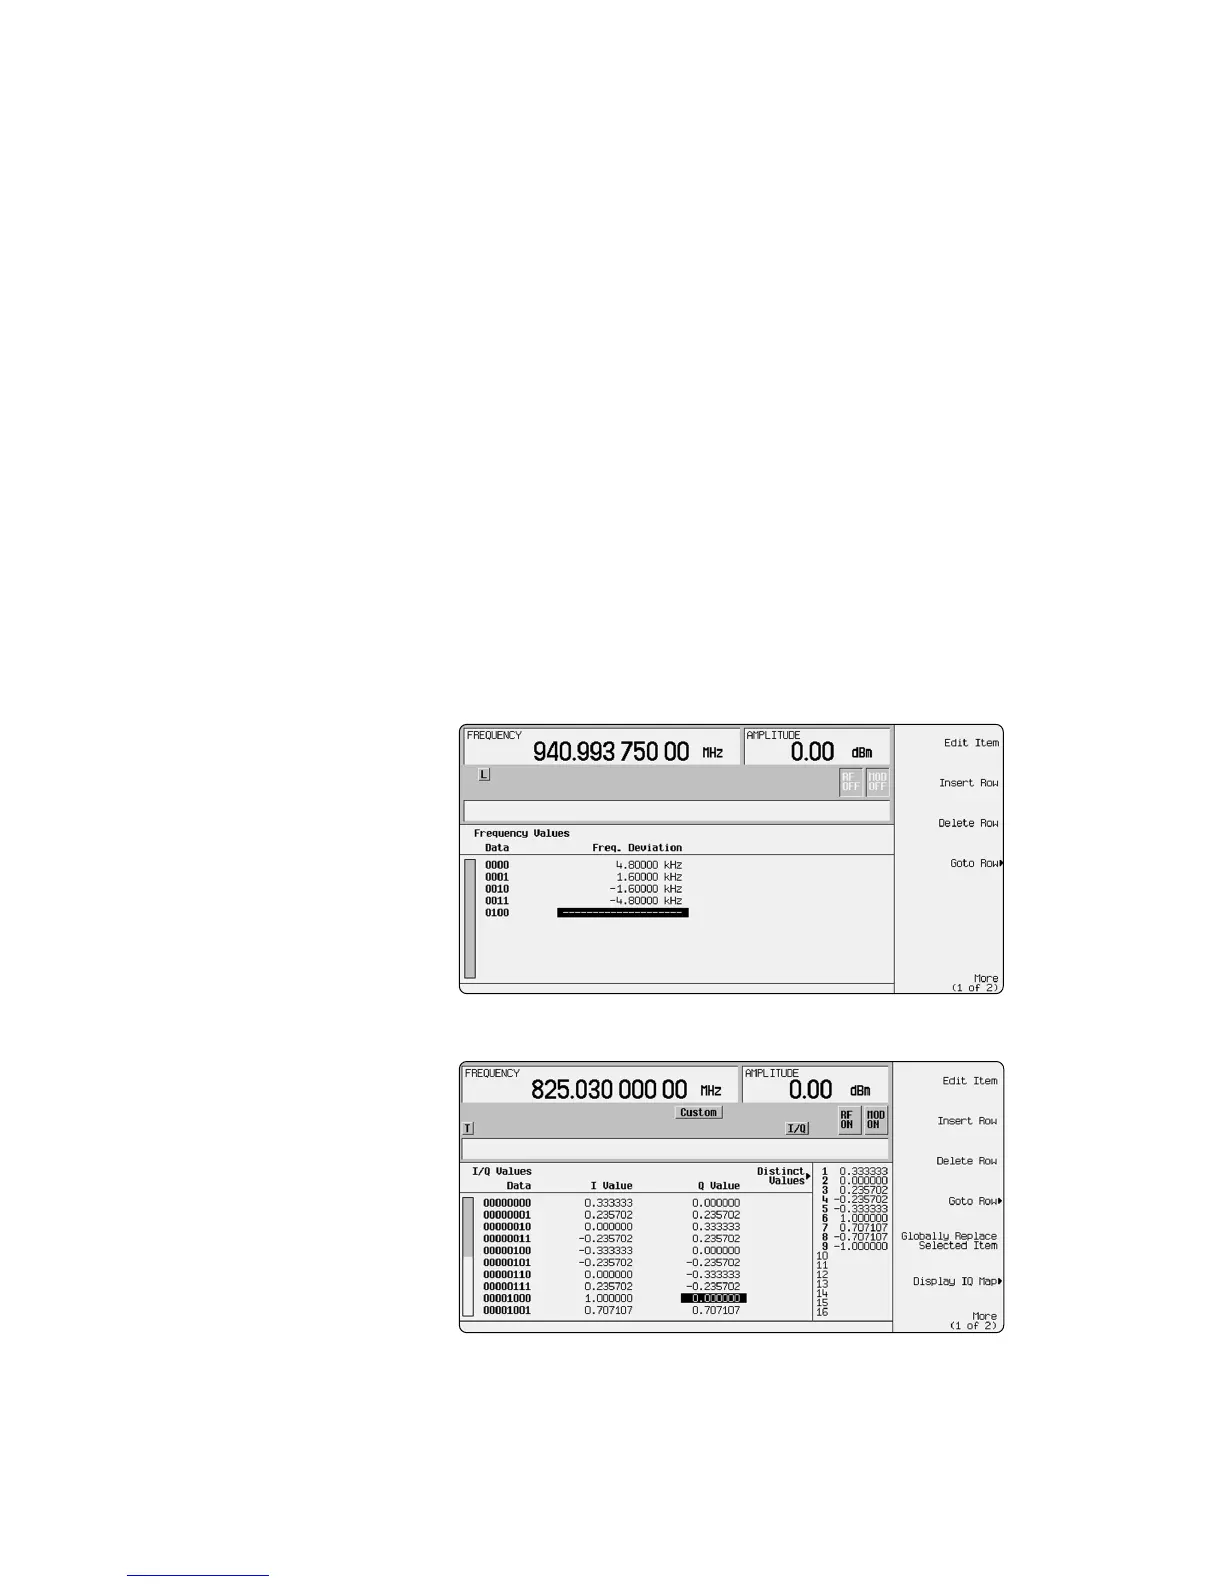
Define the constellation of your choice
with up to 16 values of I and Q. Add
impairments such as origin offset,
EVM, phase error, and quadrature
error to the I/Q definition to test
design robustness. Before generating
the modulated signal, display the I/Q
state map for a quick visual check.
You can build asymmetric FSK formats such as FLEX with the FSK table editor.
Customize modulations or perform margin testing with the I/Q table editor.