18
3GPP W-CDMA multi-
channel, multicarrier
personality, Option 100
Description
Option 100 is a firmware personality
built on the internal dual arbitrary
waveform generator (Option UND).
Users can generate both uplink
and downlink signals that conform
with 3GPP standards. These W-CDMA
signals are suitable for component,
subsystem, mobile, and base station
tests.
Key features
Conforms with 3GPP. In addition,
this new feature set coexists with
the earlier ARIB (1.0-1.2) feature set,
so users have access to either set.
Supports the 3.84 Mcps chip rate.
In addition, it is possible to vary this
rate by +/-10%, in order to simulate
clock drift between systems.
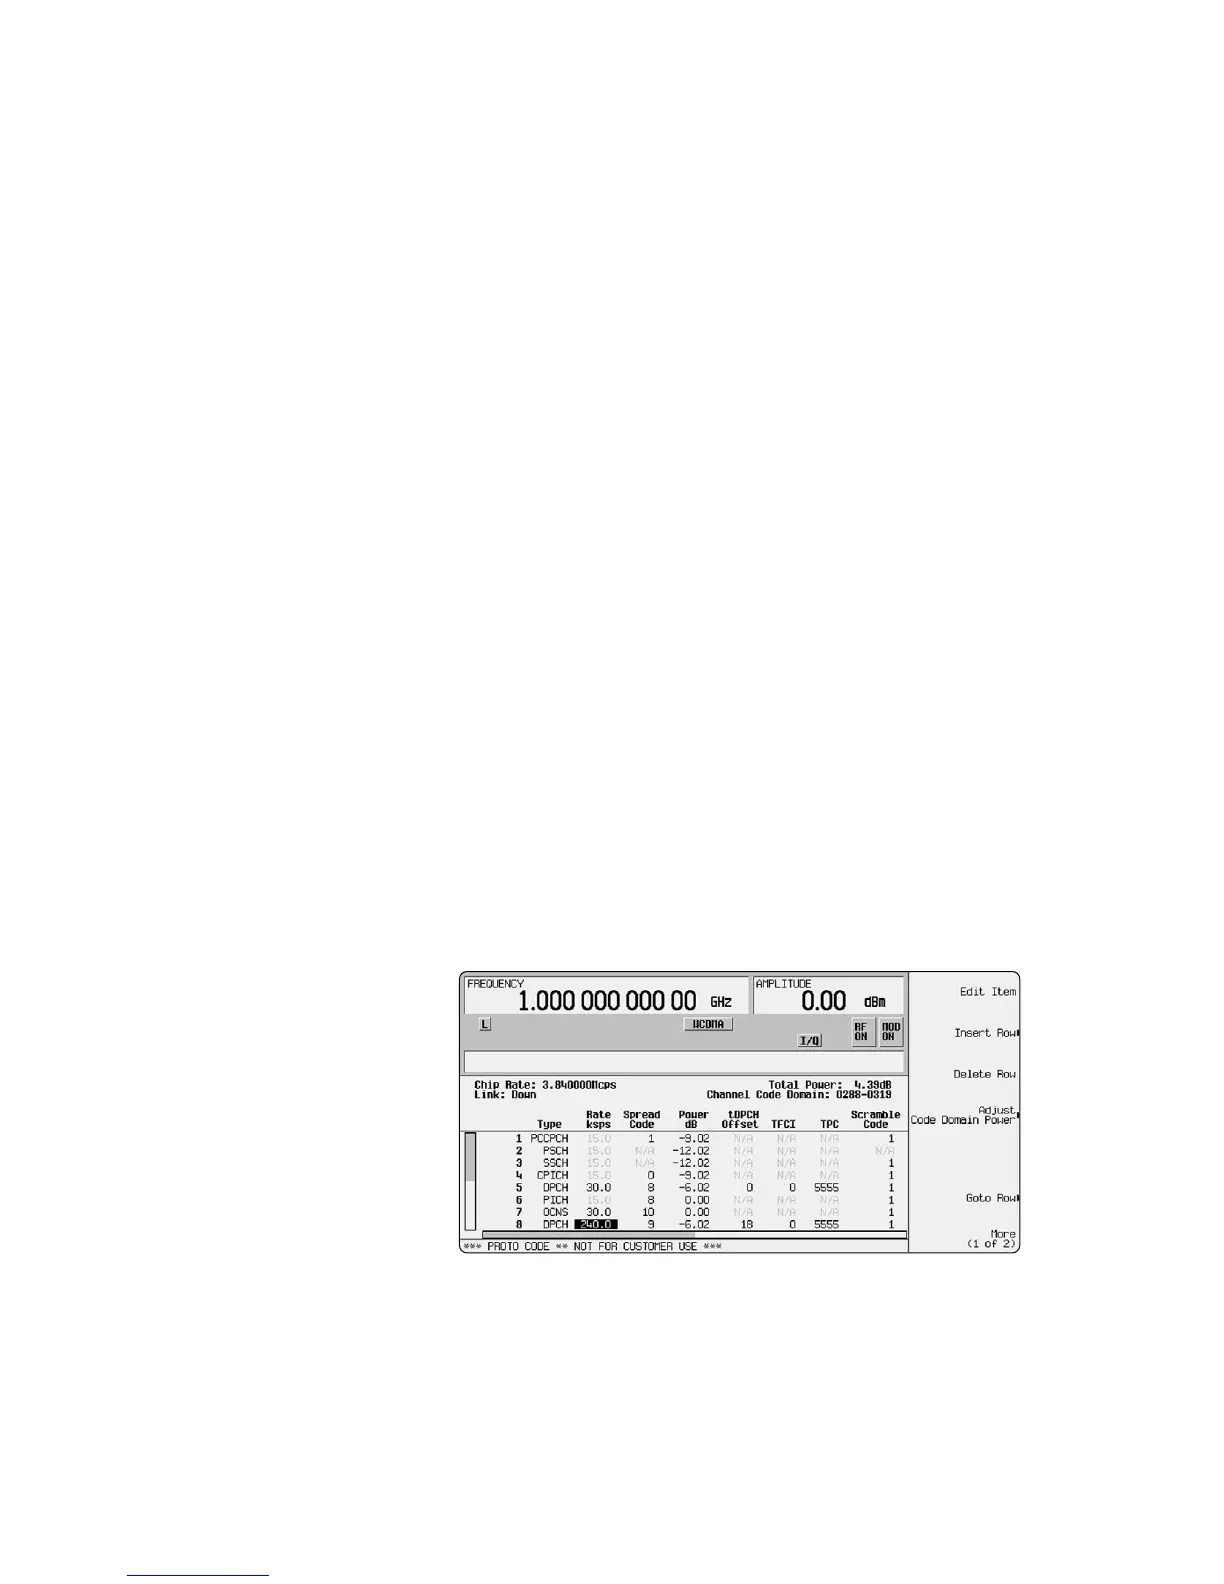
Offers new channel types and
configurations. Downlink physical
channels include PCCPCH, PSCH,
SSCH, DPCH, CPICH, PICH, and
OCNS. These channels are simulated
with the slot structures defined by
the 3GPP standard. Refer to the
Technical Specifications, 5965-3096E
for a complete description. In addition
to user control of individual channel
configurations, test models 1, 2, 3,
and 4 defined by the 3GPP standard,
can be set up at the press of a but-
ton. This option also offers multicar-
rier capability on the downlink, and
up to six Dedicated Physical Data
Channels (DPDCH) plus a Dedicated
Physical Control Channel (DPCCH)
on the uplink.
Provides individual channel rates
based on a 7.5 ksps base for the down-
link, and a 15 ksps for an uplink.
The number of bits per timeslot is
changed to reflect new data rates
and channel configurations.
Option 100 offers the ability to modify
predefined setups, or to define and
store custom user states, using the
built-in table editor. Choose spread
code, scramble code, power, symbol
rate, τDPCH offset, data pattern,
TFCI, FBI, TPC pattern, number of
pilot symbols and pilot power offsets.
This firmware personality upgrade
supports user-defined I/Q baseband
clipping either before or after the
baseband FIR filter. Clipping may
be applied individually to I and Q
or to the composite I/Q vector.
Hardware and firmware
requirements
Existing owners of Option 100
may download the new firmware
free of charge from:
www.agilent.com/find/esg; the
current license key will still function
correctly. Existing owners of an ESG
digital signal generator without
Option 100 can download the new
revision of firmware free from the
web, then activate the option by
purchasing a separate license key
through normal sales channels.
The serial number of the unit as
well as the Host ID number must be
supplied. Option UND hardware is
also required before installing option
100. New customers can order this
firmware personality installed in a
new ESG.
Use the flexible table editor to fully configure a W-CDMA signal waveform.