58 Chapter 2
Installation and Setup
Calibrating System Components
Step 7. Press Restart
NOTE Pressing Restart optimizes the measuring receiver configuration, and is very
important when changes to the measuring receiver settings or the UUT are made.
Pressing Restart causes the measuring receiver to determine if the PSA settings are
correct for the incoming signal, and if they are not, slight changes are made.
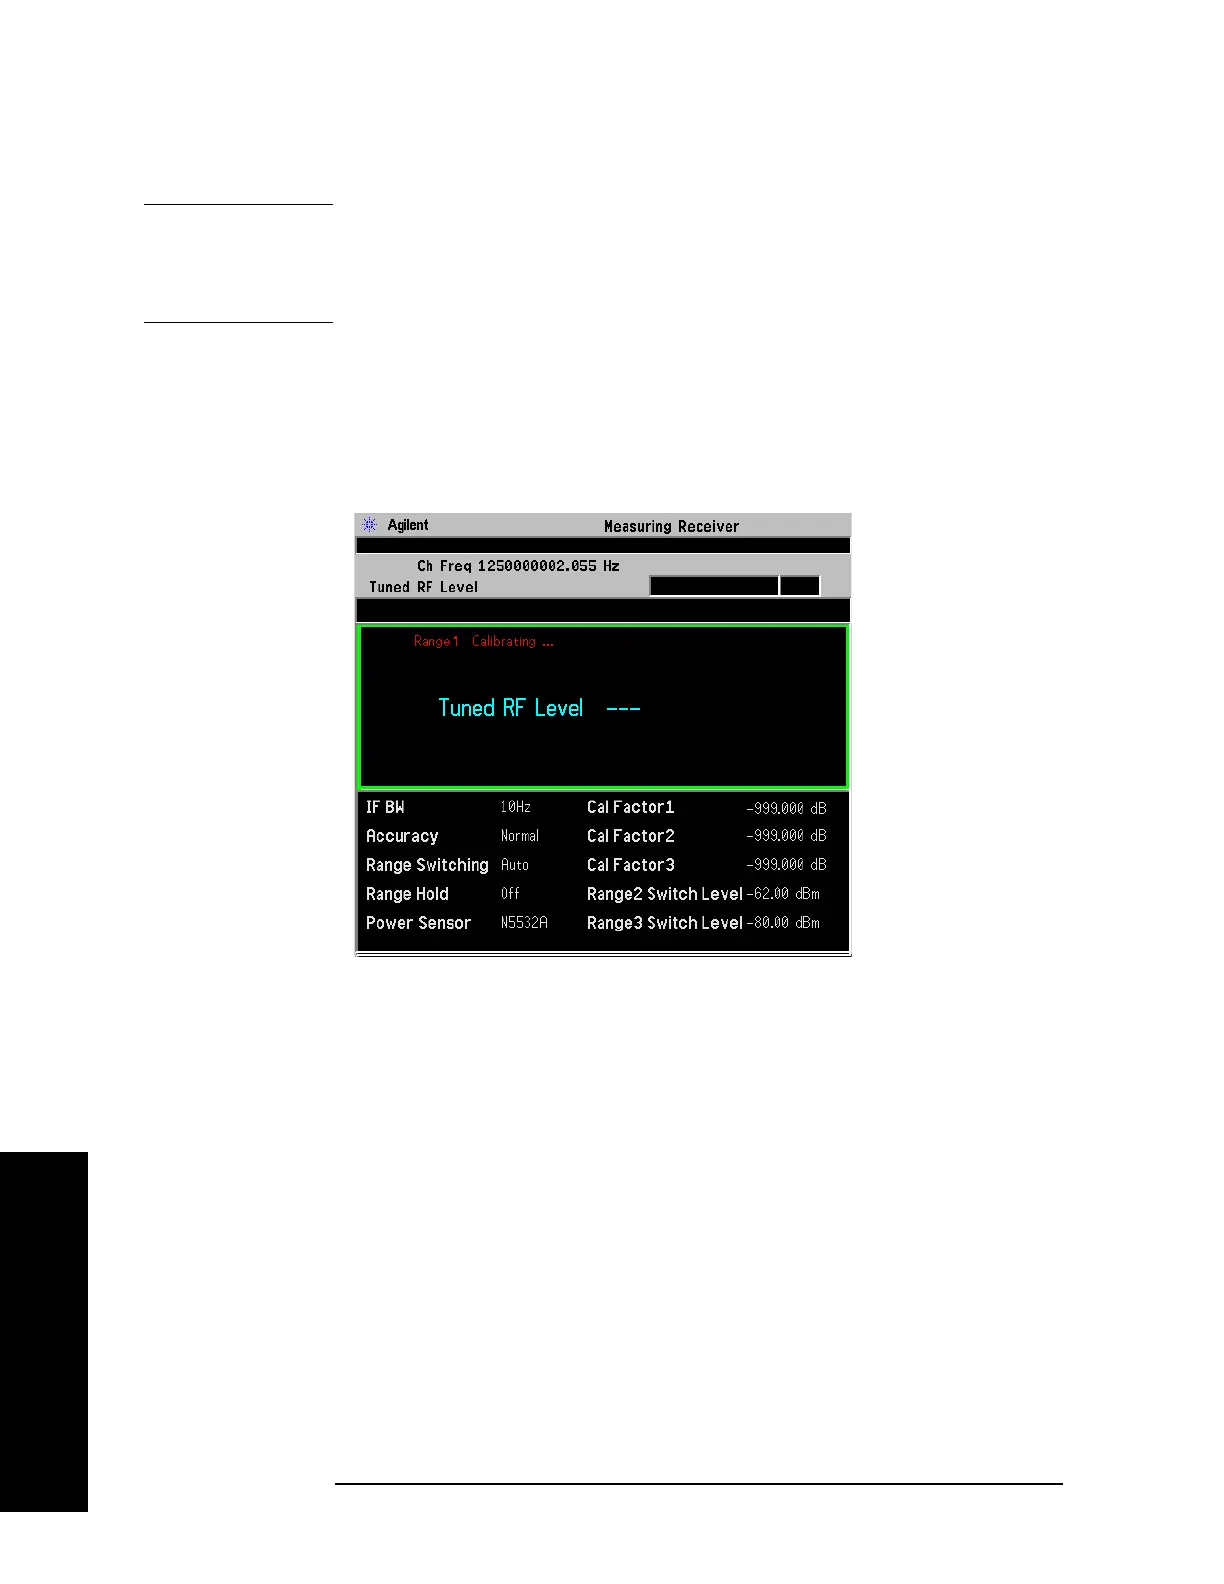
Observe the red Range 1 status indicator displayed on the PSA screen and the Cal
Factor 1 value. When using the Power Meter, the cal factor for range 1 is
established during the first measurement. Also notice that the Range 2 and Range 3
Switch levels are displayed. See Figure 2-5.
Figure 2-5 Automatic Range Calibration
Step 8. Decrease the power level of the source in 10 dB increments. When the
“Calibrating Range 1” and then the “Calibrating Range 2” indicator is displayed,
the PSA is automatically performing the range calibration. When the calibration is
complete, the calibrating message disappears and the Cal Factor Range 2 value is
displayed.
If Range Switching is set to Man, the Recal status indicator is displayed when the
range calibration point is reached. Press
Meas Setup, TRFL Calibrate to trigger the
calibration. See Figure 2-6.

 Loading...


