6 7
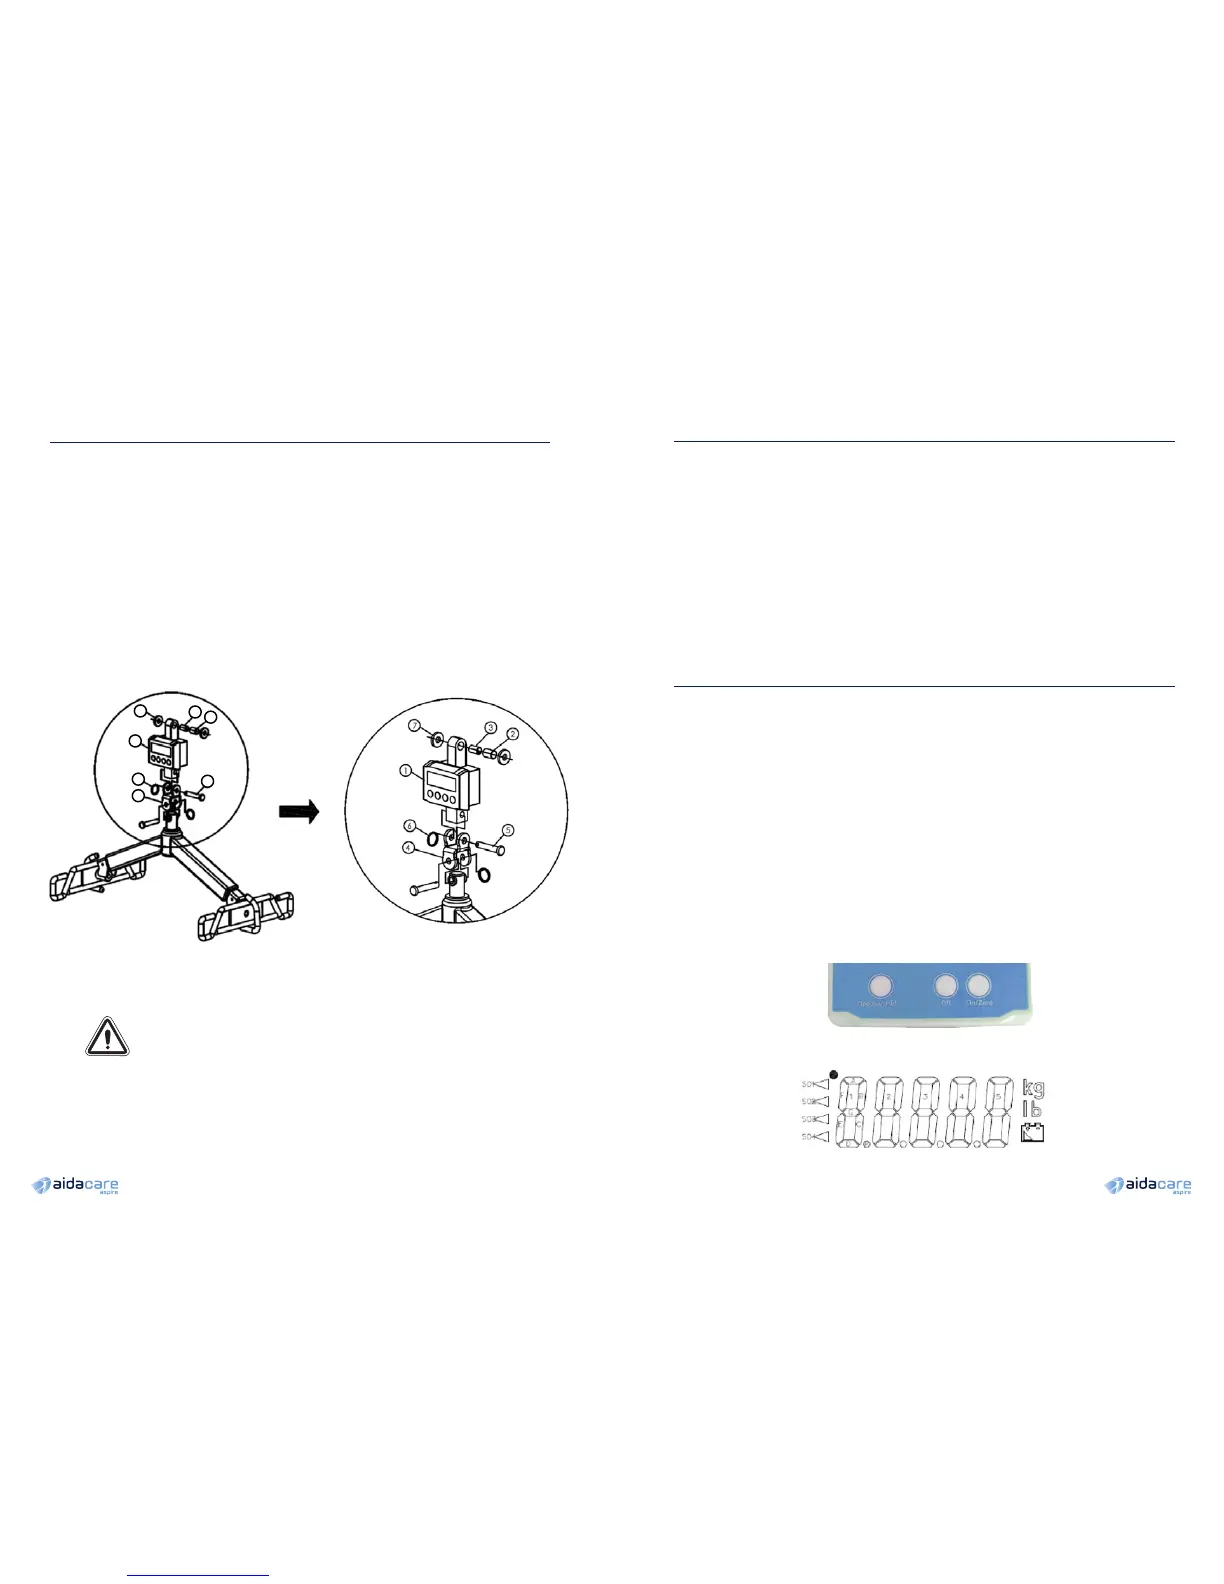
Install the ASPIRE Inline Weigh Scale on the approved Patient Lifter as shown above.
Component numbers shown are listed in 2. Parts Glossary
WARNING: Ensure scale is securely mounted as shown above before proceeding.
4. A S S EM BLY
1. Remove spreader bar from the lifting boom of the patient lifter.
2. Place the metal bushing (2 & 3) in the hole of the upper scale unit
3. Attach washer (7) on either side of the upper scale unit.
4. Attach the upper part of the scale to the boom using the clevis pin and ring clip previously attached to
the spreader bar.
5. Attach the universal bracket (4) to the bottom of the scale using 1 x pin (5) and 1 x key ring (6).
6. Reattach the spreader bar to the bottom of the scale unit using the remaining pin (5) and key ring (6).
5. PRELIMINARY CHECKS
6. WEIGH SCALE OPERATION
After installing the ASPIRE Inline Weigh Scale as per 4. Assembly, these checks should be completed
prior to initially using the weigh scale:
1. Check scale is mounted safely and securely.
2. Check that the battery has sucient charge. If battery symbol appears on screen, battery needs to
be replaced.
3. Check that sling is correctly mounted on the spreader bar as per current manual handling
guidelines.
1. Place sling to be used onto spreader bar without patient/resident/user.
2. Press the scale faceplate ON/ZERO button to zero-out the sling weight (this weight will remain
zeroed out until the O button is pressed).
3. Carefully lift the patient/resident/user in the sling, performing the procedure so that all of the
weight is supported by the lift. Stabilise the movement of the sling after lifting.
4. Weight will display on the scale. Press the Operate/Hold button to hold the weight displayed.
To reset the scale to zero, press the Operate/Hold button again.
5. Lower patient/resident/user safely.
6. If you are weighing another individual using the same sling, perform the lift and their weight will
display. Press Operate/Hold to maintain their weight on the scale display.
7. Press the O button when the weighing procedure is complete.
8. The scale will automatically power o five minutes after measurement has been completed.
KEYBOARD ILLUSTRATION
DISPLAY ILLUSTRATION
INSTRUCTIONS FOR USE
7
1
6
4
5
3
2