EnglishFrançaisEspañolNederlandsItalianoDeutsch
Available from A1 Security Cameras
www.a1securitycameras.com email: sales@a1securitycameras.com
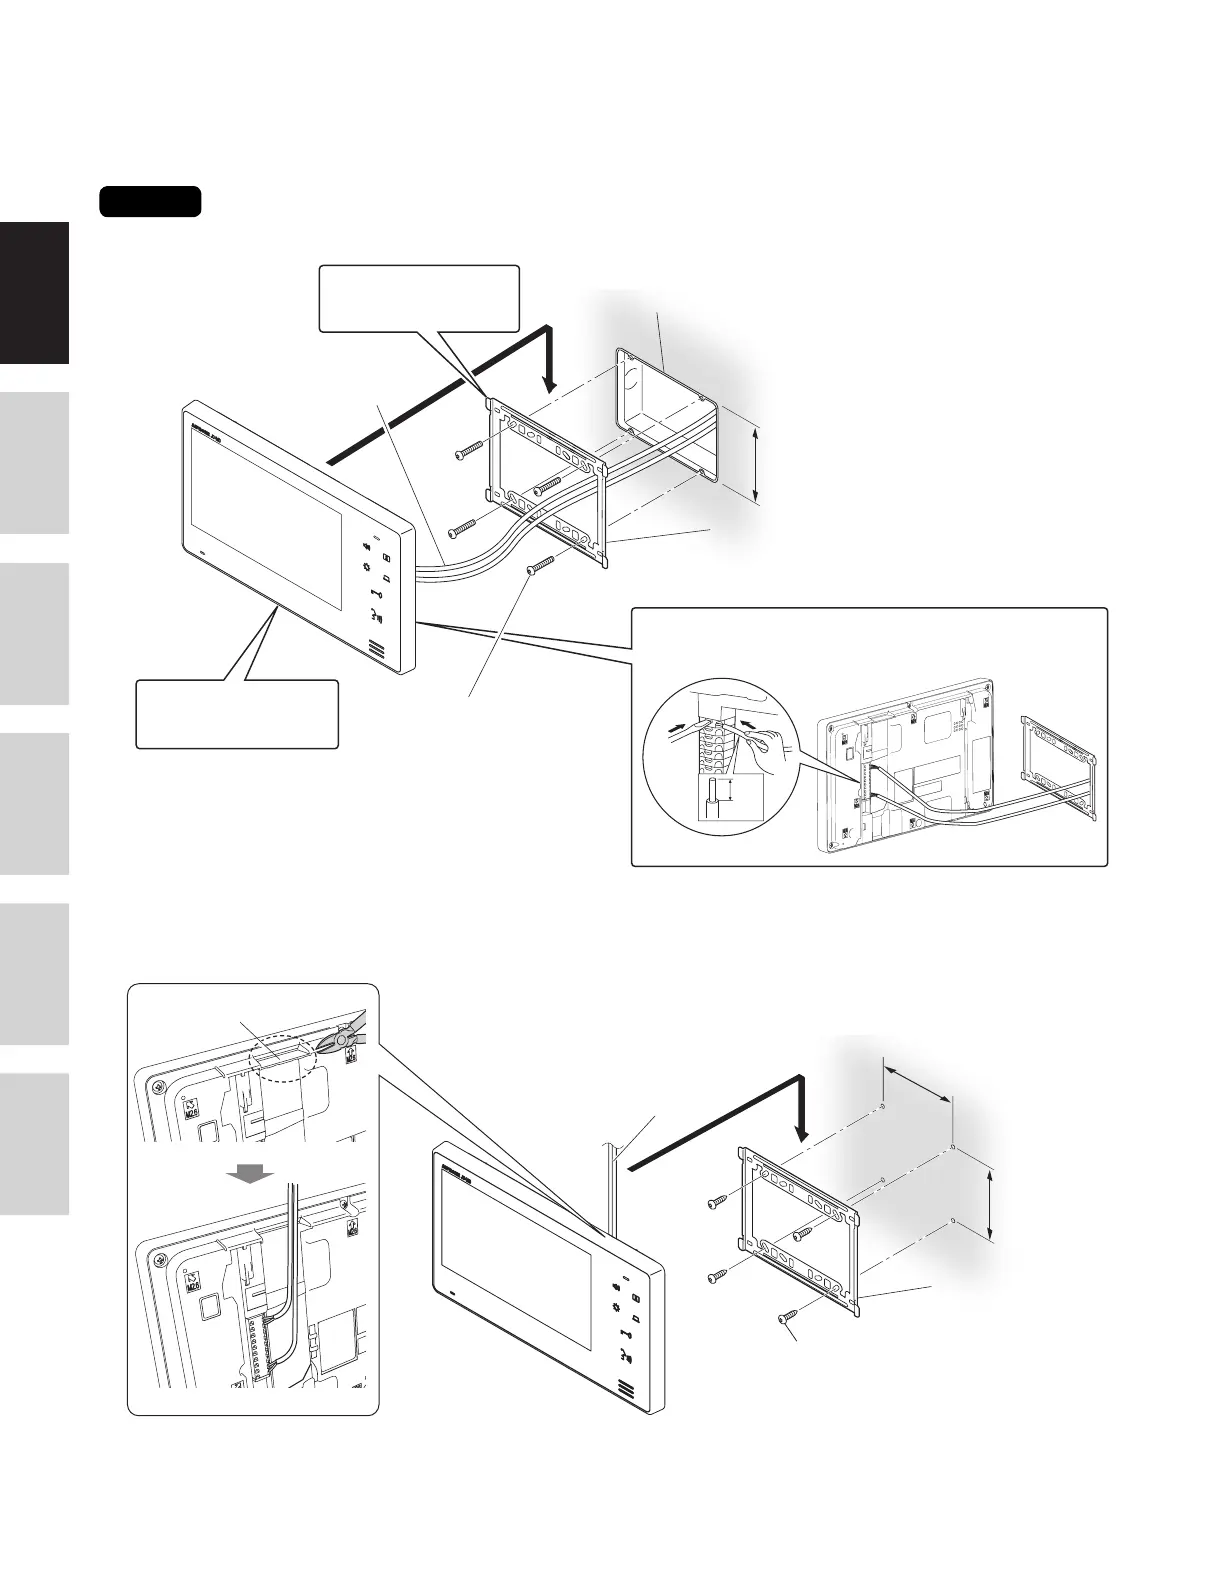
MOUNTING
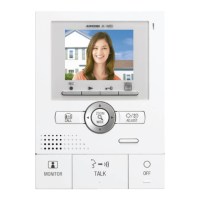
JO-1MD
<Back wiring>
3
Mount the unit on the
mounting bracket.
1
Fasten the mounting
3-gang box
bracket to the wall
Wires
83.5mm (3-5/16")
Mounting bracket
(attached to the unit with shipment)
1. Press release button to insert or remove wire.
2
2. Insert wire into the terminal.
Mounting screw × 4
(Screw shaft: Ø4.1)
(Slotted Head: Ø8.2 or less
Height 3.0mm or less)
(not included)
8mm
(3/8")
<Surface wiring>
When the wiring is not coming through the wall, the wires can be routed to the top or bottom of the unit. Remove cable inlet plate on
the upper part of the unit to allow passage of the wiring into the unit.
Remove cable inlet plate
92mm (3-5/8")
Wires
83.5mm
(3-5/16")
Mounting bracket
(attached to the unit with
shipment)
Wood mounting screw × 4
(Screw shaft: Ø4.1)
(Slotted Head: Ø8.2 or less
Height 3.0mm or less)
(not included)
6