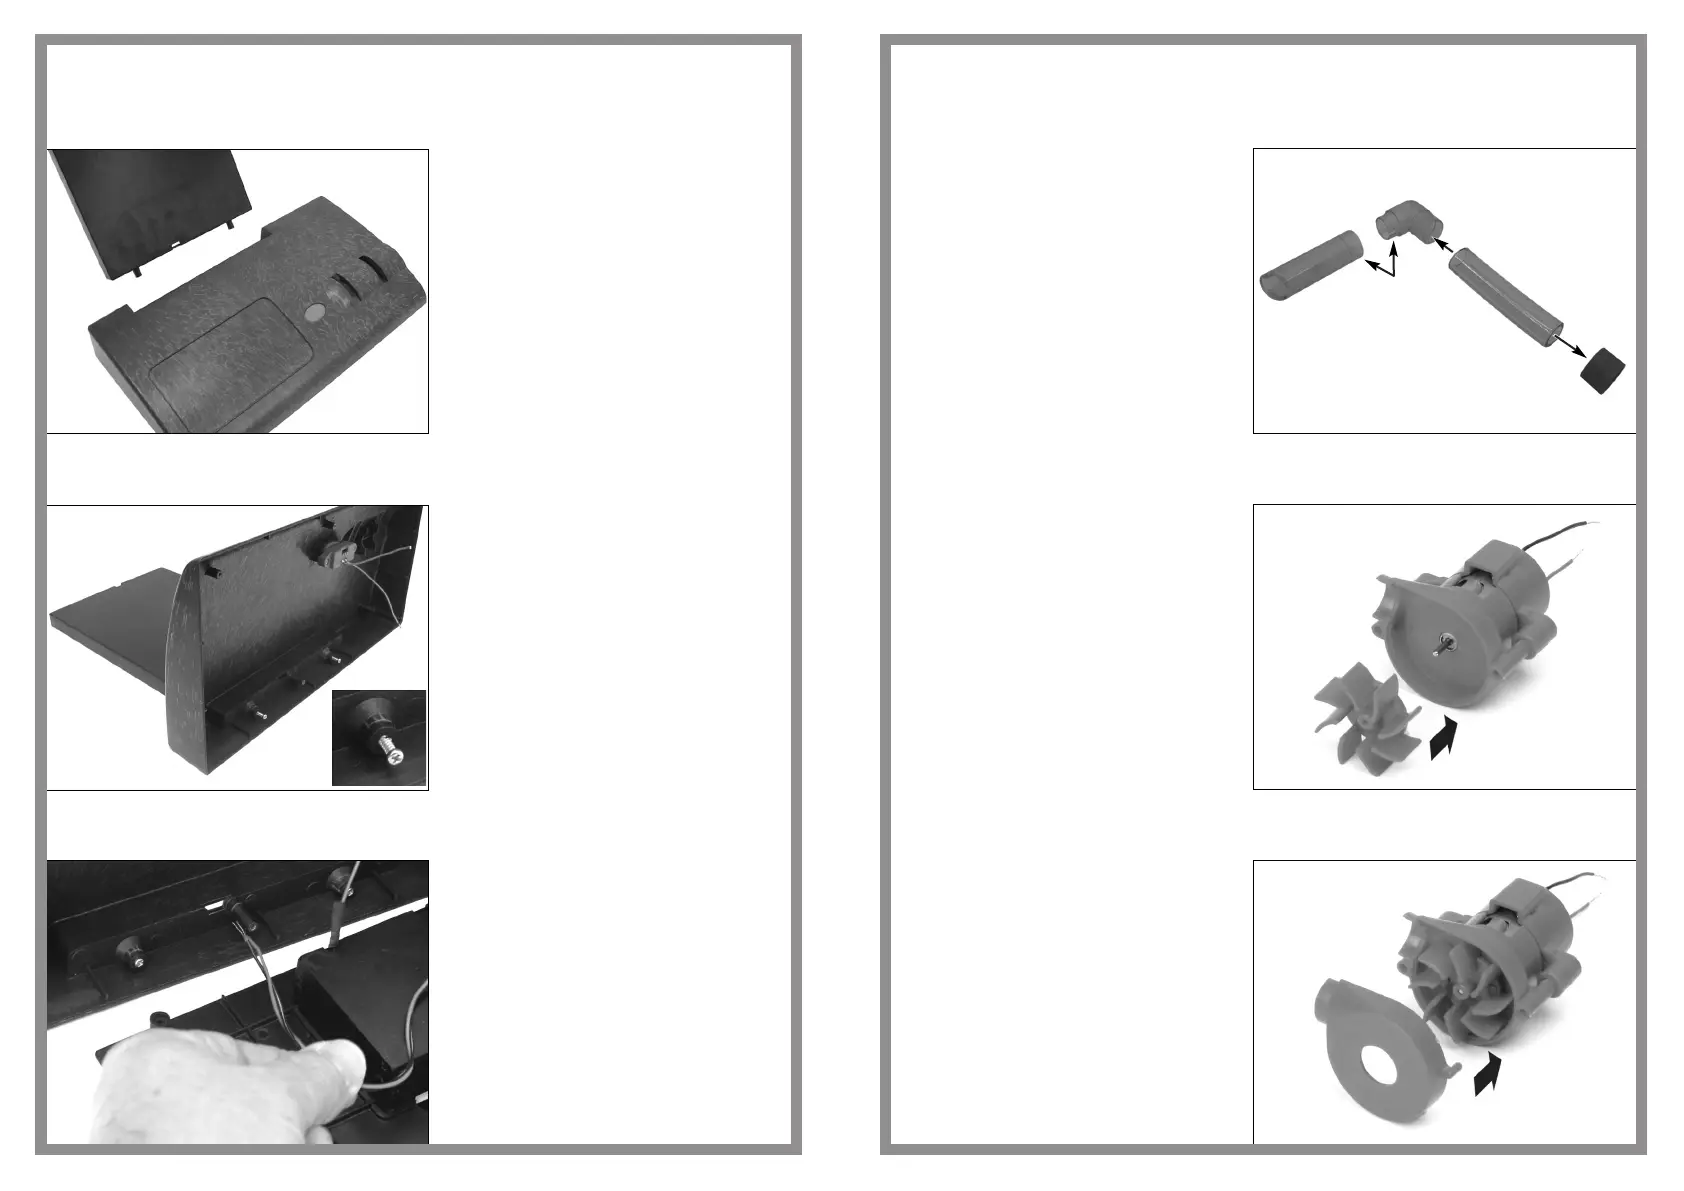
Assembly sequence 37
Assembly sequence 38
Assembly sequence 39
Assemble the fan blower air
directional tubing as indicated
Ensure the vertical down tube with
locating notch (clear solid plastic)
engages with the cut-out in the
right angle elbow piece (clear solid
plastic). This will ensure that the air
passes through the tubing in the
right direction to turn the engine
turbofan blades when the fan
motor is switched on
Locate the fan blade onto the motor
spindle ensuring that it is fully
pushed onto the spindle to prevent
rubbing on the outer casing
Push the outer casing over the
fan blade
This is a very tight fit - ask an adult
to help.
19
Assembly sequence 22
Assembly sequence 23
Assembly sequence 24
Push the location pins to the upright
support, into the top cover location
holes
Note: Ensure the pins to the upright
support are the correct way around
to ensure the electric cables from
the power controller can be fed
through the access holes when
assembling the base unit
Secure the upright support to the
top cover using two screws as
indicated
Offer the assembled base unit to
the top cover and thread the electric
motor connections from the power
control unit into the upright support
unit
jet engine
14
 Loading...