~9~
~8~
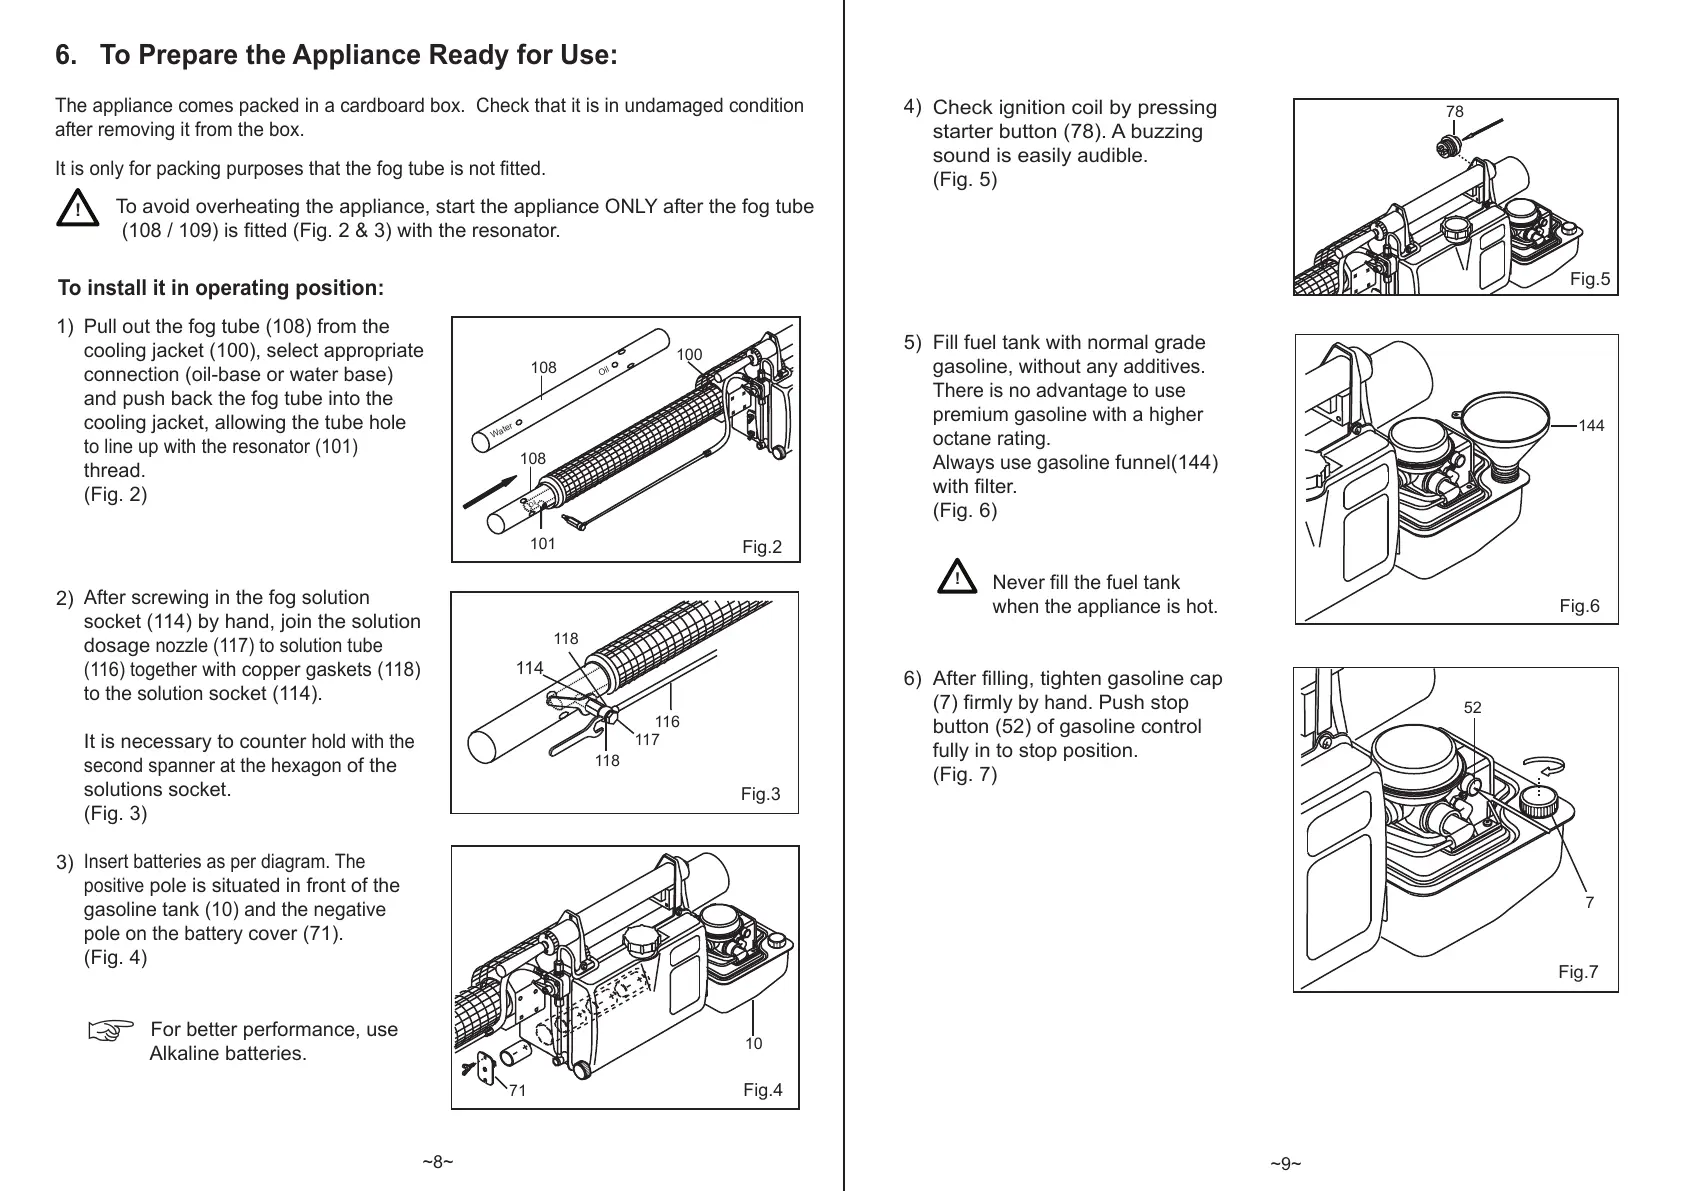
6. To Prepare the Appliance Ready for Use:
The appliance comes packed in a cardboard box. Check that it is in undamaged condition
after removing it from the box.
It is only for packing purposes that the fog tube is not fitted.
To avoid overheating the appliance, start the appliance ONLY after the fog tube
(108 / 109) is fitted (Fig. 2 & 3) with the resonator.
Pull out the fog tube (108) from the
cooling jacket (100), select appropriate
connection (oil-base or water base)
and push back the fog tube into the
cooling jacket, allowing the tube hole
to line up with the resonator (101)
thread.
(Fig. 2)
After screwing in the fog solution
socket
(114) by hand, join the solution
dosage
nozzle (117) to solution tube
(116) together
with copper gaskets (118)
to the solution
socket (114).
It is necessary to counter
hold with the
second spanner at the hexagon
of the
solutions socket.
(Fig. 3)
Insert batteries as per diagram. The
positive
pole is situated in front of the
gasoline tank
(10) and the negative
pole on the battery
cover (71).
(Fig. 4)
For better performance, use
Alkaline batteries.
71
Fig.4
10
Oil
101
108
100
Fig.2
W
ater
108
Oil
116
114
118
117
Fig.3
118
To install it in operating
position:
!
☞
144
Fig.6
Check ignition coil by pressing
starter button (78). A buzzing
sound is easily
audible.
(Fig. 5)
Fill fuel tank with normal grade
gasoline,
without any additives.
There is no advantage to use
premium gasoline with a higher
octane rating.
Always use gasoline
funnel(144)
with filter.
(Fig. 6)
Never fill the fuel tank
when the appliance is hot.
After filling, tighten gasoline cap
(7) firmly
by hand.
Push stop
button (52) of gasoline control
fully in to stop position.
(Fig. 7)
78
Fig.5
Fig.7
52
7
!
1)
2)
3)
4)
5)
6)