Do you have a question about the Aiwa Z-VM270 and is the answer not in the manual?
Covers fire/shock risk, laser safety, and proper handling of the unit and power cord.
Guidelines for placement, heat ventilation, and avoiding moisture or obstructions.
Instructions for connecting power, safe cord use, and when professional service is needed.
Conditions requiring service and a warning against self-servicing the unit.
Connecting and positioning front, surround, and center speakers.
Connecting FM and MW/LW antennas for radio reception.
Voltage check and connecting the AC power cord.
Detailed instructions for connecting the center speaker to the unit.
Connecting video equipment and televisions for playback.
Tips for positioning FM and MW/LW antennas for optimal reception.
Connecting an outdoor antenna for improved FM reception.
Inserting batteries and understanding remote control operational guidelines.
How to turn the unit on/off, use DEMO mode, and manage illumination.
Procedure to set, display, and correct the unit's clock time.
Troubleshooting a flashing clock display due to power interruptions.
Adjusting the main volume and the left/right speaker balance.
Enhancing low-frequency sound with the T-BASS system levels.
Connecting headphones and their impact on surround and Dolby Pro Logic.
Recreating sound environments using DISCO, LIVE, and HALL modes.
Adjusting surround speaker volume and notes on Dolby Pro Logic interaction.
How to turn off DSP surround modes and its effect on microphone use.
Choosing from five preset equalization curves like ROCK, POP, JAZZ, CLASSIC, BGM.
Using preset buttons and remote to select or cancel equalizer modes.
Steps for manually tuning FM, MW, or LW bands and using Auto Search.
Storing and recalling up to 32 preset radio stations for quick access.
Using the MONO setting to reduce noise in FM stereo reception.
Changing the MW tuning interval and its effect on preset stations.
Using the remote control to select preset radio stations directly.
Inserting tapes and basic playback functions for Deck 1 or Deck 2.
Setting playback modes for one side, continuous, or repeat play.
Using the Dolby NR system for cleaner tape playback.
Searching for tracks using the Music Sensor feature during playback.
Turning Dolby NR on or off to match the tape for optimal playback.
Setting up and playing tapes continuously from both decks.
Loading discs and playing all discs or a single selected disc.
Controls for playing, pausing, stopping, and skipping tracks.
Using the remote control to select specific discs and tracks.
Using EDIT/CHECK to view remaining playback time.
How to replace discs without interrupting the current playback.
Playing tracks in random sequence or repeating selected discs.
Creating a custom playback sequence by programming tracks from discs.
How to record from tuner, CD player, or external equipment onto tape.
Starting, pausing, and stopping the recording process.
Creating 4-second blank spaces using the REC/REC MUTE button.
Varying output volume and tone without affecting recording level.
Steps to dub tapes manually from Deck 1 to Deck 2.
Setting Dolby NR for the dubbed tape to match the original.
Making exact copies of both sides of the original tape using SYNC DUB.
Selecting normal speed (N-DUB) or high speed (H-DUB) for dubbing.
Important notes regarding tape tabs, leader segments, and Dolby NR.
Recording CDs to tape managing tape length and track order automatically.
Inserting tape, setting Dolby NR, and starting AI edit recording.
How to add more tracks from other discs to the current AI edit program.
Notes on cassette tape time vs. editing time and display behavior.
Recording CDs to tape checking remaining time for track programming.
Inserting tape and setting Dolby NR for programmed edit recording.
Designating tape length and programming tracks for side A.
Selecting and programming tracks for side B of the tape.
How to check programmed tracks and clear the edit program.
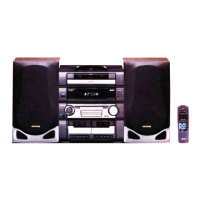
Experience full-scale home theater sound with four-channel audio and steering logic.
Using the noise sequencer to balance speaker sound levels for optimal listening.
Changing the delay time for surround speakers to enhance sound field depth.
Adjusting center or surround speaker levels after initial balance adjustment.
Connecting microphones and setting MIC MIXING control to MIN.
Selecting sound sources, adjusting volume, and mixing microphone sound.
Adding an echo effect to the microphone sound.
Starting playback and engaging the DOLBY PRO LOGIC effect.
Turning off the DOLBY PRO LOGIC mode by repeatedly pressing the button.
Using PHANTOM or 3 CH LOGIC modes when speakers are absent.
Selecting Vocal Fader (VF) or Auto Vocal Fader (A-VF) to soften singer's voice.
Selecting Multiplex (MPX-L) or Auto Multiplex (A-MPX) for channel selection.
Notes on compatibility and effects of Vocal Fader on sound output.
Adjusting time lag for Auto Vocal Fader/Auto Multiplex (SLOW or FAST).
Changing the muted channel for Multiplex function (MPX-L or MPX-R).
Reserving up to 15 tracks for playback after the current track.
Viewing the list of reserved tracks using the EDIT/CHECK button.
How to stop playback or skip a reserved track.
Cancelling all reserved tracks or the Karaoke program.
Adding reservations while a track is playing and reserving another track.
Handling non-existent track numbers and cancelling programmed play.
Setting the unit to turn on automatically at a specified time daily.
Steps to set timer-on time, source, and duration for automatic operation.
Viewing set timer-on time and temporarily cancelling standby mode.
Instructions for timer recording using TUNER and VIDEO/AUX sources.
Setting the unit to turn off automatically at a specified time.
Checking remaining time and cancelling the sleep timer.
Connecting audio sources via VIDEO/AUX IN and PHONO IN jacks.
Connecting to digital audio equipment using the CD DIGITAL OUT (OPTICAL) jack.
Connecting an optional powered subwoofer.
Playing equipment connected to PHONO IN or VIDEO/AUX IN jacks.
Matching sound levels between external sources and other functions.
Instructions for cleaning the cabinet, heads, and tape paths.
Using a demagnetizer to prevent head magnetization after long use.
Guidelines for handling discs and storing tapes to prevent damage.
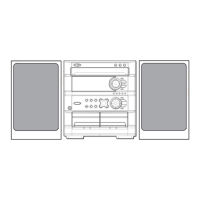
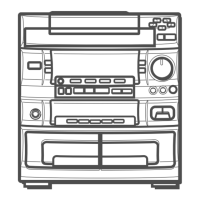
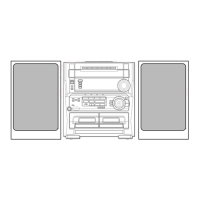
Technical details for the CX-ZVM270 main unit, including tuner, amplifier, and deck.
Technical details for the SX-Z270 speaker system, including impedance and dimensions.
Technical details for the CD player section and Dolby NR/Pro Logic.
Solutions for common issues like no sound, one-speaker sound, or display errors.
Troubleshooting radio reception and tape playback/recording problems.
Troubleshooting CD player issues and resetting the unit.
Procedure to reset the unit in case of unusual conditions or malfunctions.
Alphabetical index of parts with corresponding page numbers for reference.
| Brand | Aiwa |
|---|---|
| Model | Z-VM270 |
| Category | Stereo System |
| Language | English |