Do you have a question about the Aiwa Z-L100 and is the answer not in the manual?
Key warnings about fire, shock, water exposure, and opening the unit.
Advice on unit placement, ventilation, and environmental factors for safe operation.
Information regarding power sources, plug safety, and correct connection.
Conditions requiring professional repair and user warnings against self-servicing.
Connect right and left speakers to the main unit's terminals.
Instructions for turning the main unit on and off.
How to tune stations manually or using the Auto Search feature.
How to save favorite radio stations and tune into them directly.
Steps for playing single or multiple discs.
Creating and managing custom track playback sequences.
How to record from CD, tape, radio, or connected sources.
Automates CD to tape recording based on tape length and AI.
Initial steps for manual CD to tape programmed recording.
How to set the current time on the unit.
Steps for selecting source, time, and duration for timer activation.
Common problems and procedures for resetting the unit.
Problems related to Tuner, Cassette Deck, and CD Player sections.
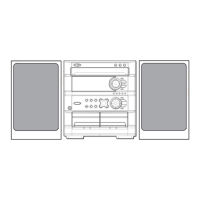
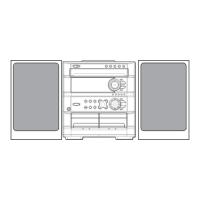
This document provides operating instructions for the Aiwa Z-L100 Compact Disc Stereo System, which includes a compact disc player, stereo cassette receiver, and stereo turntable. The manual is available in English, Spanish, and French.
The unit can be turned on by pressing any of the function buttons (TAPE, TUNER/BAND, VIDEO/AUX/PHONO, CD). Playback of an inserted disc or the previously tuned station will begin directly. The POWER button can also be used. When the unit is turned on, the disc compartment may open and close to reset the unit. To turn the unit off, press POWER. If the power is turned off after the clock is set, nothing is displayed on the display window, but a red indicator above the power button lights up to show that power is supplied.
The unit offers a power economizing mode ("ECO ON" or "ECO AUTO") to reduce power consumption. In this mode, the unit's display illumination blacks out when the power is off, with only the red indicator remaining lit. If the clock is not set, the DEMO mode will begin instead of blacking out. The display illumination brightens for 10 seconds only when a button is pressed or VOLUME is turned. If the display dimmer mode is set to "DIM-OFF," the brightness does not change. When the unit turns on via timer recording, the display dimmer mode is set to the dimmest, and the volume is set to the minimum (0). The unit automatically turns itself off after 10 minutes of inactivity if "ECO AUTO" is selected, unless there is an audio input signal through the VIDEO/AUX/PHONO IN jacks when the function is VIDEO/AUX/PHONO.
To activate this mode, press ECO once, then press II within 4 seconds. Use ◄◄ or ►► to select "ECO ON" or "ECO AUTO," and press II to set.
To change the display brightness, press ECO twice until "DIM MODE" is displayed. Within 4 seconds, press II. Then, within 4 seconds, press ◄◄ or ►► repeatedly to select the desired dimmer mode (DIM-OFF, DIMMER 1, DIMMER 2, DIMMER 3). "DIM-OFF" is the brightest, and "DIMMER 3" is the dimmest. Press II to set the selected mode.
To insert batteries, detach the battery cover and insert two size AA (R6) batteries. The maximum operational distance is approximately 5 meters (16 feet); replace batteries when this distance decreases. The remote control buttons have dual functions: the primary function is indicated on the button, and the secondary function is on the plate above it. To use the primary function, press the button directly. To use the secondary function, press the button while holding SHIFT. The FUNCTION button cycles through the main unit's function buttons (TAPE, TUNER/BAND, VIDEO/AUX/PHONO, CD). If the remote control will not be used for an extended period, remove the batteries to prevent electrolyte leakage. The remote control may not operate correctly if the line of sight to the remote sensor is exposed to intense light or if other remote controls are used nearby.
Volume Control: Turn VOLUME on the main unit or press VOL ∧ or ∨ on the remote control. The volume level is displayed from 0 to MAX (31). The volume automatically sets to 16 when the power is turned off with the volume level at 17 or more.
Super T-BASS System: This system enhances low-frequency sound. Press T-BASS (or T-BASS while pressing SHIFT on the remote control) to cycle through three levels or the off position. Low-frequency sound may be distorted if used with discs or tapes that already emphasize low frequencies.
Graphic Equalizer: The unit provides three equalization curves: ROCK (emphasizes treble and bass), POP (more presence in vocals and midrange), and CLASSIC (enriched sound with heavy bass and fine treble). Press the corresponding button (ROCK, POP, CLASSIC) on the main unit or press GEQ repeatedly while pressing SHIFT on the remote control to select a mode. Pressing the selected button again or cycling to "GEQ OFF" cancels the mode.
Headphones: Connect headphones to the PHONES jack (standard stereo plug ø6.3 mm, 1/4 inch). No sound will be output from the speakers when headphones are plugged in.
Manual Tuning: Press TUNER/BAND to select FM or AM band. If pressed when power is off, the unit turns on directly. On the remote control, press BAND while pressing SHIFT. Use DOWN or UP to select a station. "TUNE" displays for 2 seconds when a station is received. ((I))) displays during FM stereo reception. For quick tuning, hold DOWN or UP until the frequency changes rapidly; release to stop. To stop auto search manually, press DOWN or UP. Auto search may not stop at very weak signals.
FM Stereo Broadcast Noise Reduction: If an FM stereo broadcast contains noise, press MONO TUNER on the remote control while pressing SHIFT to display "MONO." This reduces noise but makes reception monaural. To restore stereo reception, press MONO TUNER again to display "STEREO."
AM Tuning Interval: The default AM tuning interval is 10 kHz/step. To change to 9 kHz/step, press POWER while pressing TUNER/BAND on the unit. Repeat the procedure to reset. Changing the interval clears all preset stations.
Presetting Stations: The unit can store up to 32 preset stations. To store a station, select the band with TUNER/BAND, then use DOWN or UP to select a station. Press IISET to store it. Repeat for other stations. "FULL" displays if you attempt to store more than 32 stations. To tune to a preset station using the remote control, press BAND while pressing SHIFT, then use numbered buttons (0-9, +10). On the main unit, press TUNER/BAND, then repeatedly press PRESET. To clear a preset station, select its number, then press ICLEAR and IISET within 4 seconds. Other stations with higher numbers in the band will decrease by one.
The unit uses Type I (normal) tapes only.
▲/▼ to open the cassette holder.► to start play. Only the side facing out from the unit can be played back.■.II. Press again to resume.◄◄ or ►► in stop mode. Then press ■ to stop.
When both deck 1 and deck 2 are in playback mode, deck 2 is heard.Loading Discs:
▲OPEN/CLOSE to open the disc compartment.▲OPEN/CLOSE.
When loading an 8-cm (3-inch) disc, place it precisely onto the inner circle of the tray. Do not place more than one compact disc per tray or tilt the unit with loaded discs. Remove discs when transporting the unit. Do not use irregular-shaped CDs.Playing Discs:
To play all discs, load them and press ►. Play begins with the disc on tray 1.
To play a single disc, press one of DISC DIRECT PLAY 1-3. The selected disc plays once.
To stop play, press ■. To pause, press II; press again to resume.
To search for a particular point, hold ◄◄ or ►► during playback.
To skip to the beginning of a track, press ◄◄ or ►► repeatedly.
To remove discs, press ▲OPEN/CLOSE.
To start play when power is off, press CD. The power turns on, and the loaded disc(s) begin to play. Pressing ▲OPEN/CLOSE also turns on the power and opens the disc compartment.
Checking Remaining Time: During play, press CD EDIT/CHECK on the remote control while pressing SHIFT. The remaining time until all tracks finish playing is displayed. Repeat to restore the playing time display.
Selecting a Track with Remote Control:
Replacing Discs During Play: While one disc is playing, other discs can be replaced without interrupting play.
▲OPEN/CLOSE to close the compartment.Random/Repeat Play: Use the remote control. Press RANDOM/REPEAT while pressing SHIFT to cycle through functions: RANDOM play (RANDOM lights up), REPEAT play (► lights up), RANDOM/REPEAT play (RANDOM and ► light up), and Cancel (RANDOM and ► disappear). To play all discs, press ►. To play a single disc, press one of DISC DIRECT PLAY 1-3. During random play, it's not possible to skip to previously played tracks with ◄◄.
Programmed Play: Up to 30 tracks can be programmed from any inserted discs.
► to start play.
To check the program, press ◄◄ or ►► in stop mode. To clear the program, press ICLEAR in stop mode. To add tracks, repeat steps 2 and 3 in stop mode. To change programmed tracks, clear the program and repeat all steps. To play programmed tracks repeatedly, press RANDOM/REPEAT repeatedly while pressing SHIFT until ► appears. During programmed play, random play, checking remaining time, or selecting a track is not possible. "FULL" displays if you attempt to program more than 30 tracks.Basic Recording: Use Type I (normal) tapes only. Set the tape to the recording start point. Recording is done on only one side of the tape.
● on deck 1 to start recording. ● and ► are depressed simultaneously. If CD is selected, playback and recording start simultaneously.
To stop recording, press ■ on deck 1. To pause, press II; press again to resume.
Output volume and tone can be varied without affecting recording. Do not press buttons on deck 2 during recording. ● cannot be depressed if the erasure prevention tab is broken off.Recording Part of CD: When ● is pressed, recording starts from the first track. To start in the middle of a track, play the CD first and press IISET for CD at the desired recording start point. Then press ●. The pause mode for CD button is released automatically, and recording starts.
Erasing a Recording: A previous recording is erased when a new recording is made on that part of the tape.
● on deck 1 to start erasure.AI Edit Recording: This function enables CD recording without worrying about tape or track length. The unit automatically calculates total track length and rearranges track order if necessary to avoid cutting tracks short.
◄◄.◄◄ and ►► are also available.● on deck 1 to start recording on the first side. REC flashes for 10 seconds, then CD play and recording of edited tracks start simultaneously. When the tape ends, deck 1 enters recording stop mode.● to start recording on the second side.
To stop recording, press ■ on deck 1. Recording and CD play stop simultaneously.
To clear the edit program, press ICLEAR twice in stop mode or ▲OPEN/CLOSE.
To check programmed track numbers, press CD EDIT/CHECK while pressing SHIFT to select side A or B, and press ◄◄ or ►►.
To add tracks from other discs, if time remains after step 5, press CD EDIT/CHECK while pressing SHIFT to select side A or B. Press DISC DIRECT PLAY 1-3, then numbered buttons to select tracks. Repeat to add more tracks.
Recording is inhibited if the erasure prevention tab is broken off. The AI edit recording function cannot be used with discs containing 31 or more tracks.Programmed Edit Recording: Tracks can be programmed while checking remaining time on each side of the tape.
◄◄.◄◄ and ►► are also available.● on deck 1. REC flashes for 10 seconds, then CD play and recording of edited tracks start simultaneously. When the tape ends, deck 1 enters recording stop mode.● to start recording.
To stop recording, press ■ on deck 1.
To check programmed track numbers, press CD EDIT/CHECK while pressing SHIFT to select side A or B, and press ◄◄ or ►►.
To change the program of each side, press CD EDIT/CHECK while pressing SHIFT to select side A or B, and press ICLEAR to clear the program. Then program tracks again.
To clear the edit program, press ICLEAR twice in stop mode.
Recording is inhibited if the erasure prevention tab is broken off. Up to 30 tracks can be programmed. "FULL" displays if you attempt to program more than 30 tracks.Setting the Clock:
◄◄ or ►► to designate the hour and minute. Holding these buttons down varies time rapidly.II. The clock starts from 00 seconds.
To view the clock when another display is active, press CLOCK while pressing SHIFT. To switch to 24-hour standard, press CLOCK while pressing SHIFT, then II within 4 seconds. Repeat to restore 12-hour standard. If the clock display flashes, it indicates a power failure or cord removal, and the clock needs to be reset.Setting the Sleep Timer: The unit can be turned off automatically at a specified time.
◄◄ or ►► to specify the time until power off (5 to 240 minutes in 5-minute steps).
To check remaining time, press SLEEP once while pressing SHIFT. To cancel, press SLEEP twice while pressing SHIFT; "SLEEPOFF" appears.Setting the Timer: The unit can be turned on at a specified time daily. Ensure the clock is set correctly.
► and "TIMER" appear.◄◄ or ►► to designate the timer-on time, then press II.◄◄ or ►► to select the duration for the timer-activated period (5 to 240 minutes in 5-minute steps).► remains on display (timer standby mode).► on deck 1 or 2 (for listening) or ● on deck 1 (for recording).
The unit turns on and begins play at the timer-on time. If tape length is shorter than recording period, ● on deck 1 releases before timer off. If longer, ● does not release; press ■ to release.
To check timer setting, press TIMER while pressing SHIFT. To change settings, start from step 1. To cancel timer standby mode, press TIMER while pressing SHIFT until ► disappears. To restore, press these buttons again. The unit can be used normally while the timer is set; turn off power by carrying out steps 5 and 6. Timer playback/recording will not begin unless power is off. Connected equipment cannot be turned on/off by this unit's timer. Display is dimmer during timer operation.Basic Operations:
Connecting Optional Equipment: Refer to instructions of connected equipment. Connecting cords are not supplied. Consult your Aiwa dealer.
VIDEO/AUX/PHONO IN Jacks: These jacks input analog sound signals. Use a cable with RCA phono plugs to connect audio equipment (LD players, MD players, VCRs, TVs). Connect red plug to R jack, white plug to L jack. For Aiwa turntables, use one with a built-in equalizer amplifier.
CD DIGITAL OUT (OPTICAL) Jack: This jack outputs CD digital sound signals. Use an optical cable to connect digital audio equipment (DAT deck, MD recorder). Remove the dust cap from the jack, then connect the optical cable plug. Attach the supplied dust cap when not in use.
Listening to External Sources:
General Care: Occasional care and maintenance optimize performance. Cleaning Cabinet: Use a soft, dry cloth. For very dirty surfaces, use a soft cloth lightly moistened with mild detergent solution. Do not use strong solvents. Cleaning Tape Heads: Clean tape heads after every 10 hours of use with a head cleaning cassette. Dirty heads can cause poor sound quality, off-balance sound, inability to erase or record, or lack of high-frequency sound. Demagnetizing Tape Heads: Demagnetize tape heads after every 20 to 30 hours of use with a separately sold demagnetizing cassette. This prevents magnetization from long-term use, which can narrow output range and increase noise. Care of Discs: Wipe discs from center out with a cleaning cloth when dirty. Store discs in their cases after use. Do not leave discs in hot or humid places. Care of Tapes: Store tapes in cases after use. Do not leave tapes near magnets, motors, television sets, or other sources of magnetism, as this can degrade sound quality and cause noise. Do not expose tapes to direct sunlight or leave them in a car parked in direct sunlight.
If the unit malfunctions, check the following:
No Sound: Check AC cord connection, speaker connections, and ensure no short circuits in speaker terminals. Verify correct function button pressed.
Sound from One Speaker: Check if the other speaker is disconnected.
Erroneous Display/Malfunction: Reset the unit by turning power off, then turning it back on while pressing ICLEAR. If power cannot be turned off, disconnect/reconnect AC cord, then perform step 2.
Tuner Section - Static/Noise: Check antenna connection. If signal is weak, connect an outdoor antenna. If noise interference/multipath distortion, change antenna orientation or move unit away from other electrical appliances.
Cassette Deck Section - Tape Not Running: Check if deck is in pause mode.
Off-Balance/Low Sound: Clean playback head.
Recording Not Possible: Check if erasure prevention tab is broken off. Clean recording head.
Erasure Not Possible: Clean erasure head. Check if metal tape is used.
No High Frequency Sound: Clean recording/playback head.
CD Player Section - CD Not Playing: Check disc placement, if disc is dirty, or if lens is affected by condensation (wait one hour).
| Tuner Bands | FM/AM |
|---|---|
| CD Player | Yes |
| Tuner | Yes |
| Remote Control | Yes |
| Cassette Deck | Yes |
| Speakers | 2-way |
| Dimensions | Main Unit: 290 x 220 x 150mm, Speakers: 180 x 280 x 180mm |
| Weight | Main Unit: 4.5kg, Speakers: 2.5kg each |
| Dimensions (Approx.) | Main Unit: 290 x 220 x 150mm, Speakers: 180 x 280 x 180mm |
| Weight (Approx.) | Main Unit: 4.5kg, Speakers: 2.5kg each |