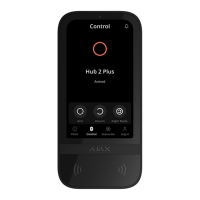
I KeyPad EN
Ajax KeyPad is a wireless touch keypad that controls the Ajax security
system. It is protected against passcode guessing and supports silent alarm
in case of a forced passcode entry. It is connected via the secure Jeweller
protocol, the communication range is up to 1700 meters if there are no
obstacles.
1. Arming mode indicator.
2. Disarmed mode indicator.
3. Partial arming mode indicator.
4. Malfunction indicator.
5. Numeric block of touch buttons.
6. Reset button.
7. Function button.
8. Arming button.
9. Disarm button.
10. Partial arming button.
1. On/Off button.
2. Tamper button.
3. QR code.
FUNCTIONAL ELEMENTS
This short manual contains general information about the KeyPad.
Before using the device, it is advisable to study the full guide on the
website: https://ajax.systems
The KeyPad works only with the Ajax security system. Connection to another
system via Ajax uartBridge or Ajax ocBridge Plus is not available.
To turn on the KeyPad, hold down the On/Off button for 3 seconds. The
device is turned off in the same way.
Connecting and setting up the KeyPad is done through the Ajax Security
System mobile application (the process is guided by the prompts). When
pairing the KeyPad and the hub, they should remain within the same
protected object.
Before using the KeyPad, enter the system arming/disarming code in the
app’s device settings. The default codes are “123456” and “123457”.
You can also activate the alarm by pressing the button, arming the system
without entering the code and protection against passcode guessing.
CONNECTING AND SETTING UP
1
2 3
4
9
10
7
5
8
6
1
3
2
When selecting an installation location for the KeyPad, consider the distance
between the device and the hub, as well as the objects that prevent the radio
signal transmission.
To test the quality of connection with the hub, test the signal strength in the
Ajax Security System app for at least a minute.
The KeyPad touchpad is designed to work with a device fixed to the surface.
We do not guarantee the correct operation of the touch buttons when using
the KeyPad in hands.
The KeyPad is mounted on a vertical surface.
Three blue indicators are lit
blinking shortly.
Two blue indicators blink
frequently.
Good signal
strength
Excellent signal
strength
One blue indicator
blinks.
The red indicator lights
briefl
No signal
Poor signal
strength
SELECTING A LOCATION AND INSTALLING
1. Outside the premises (outdoors).
2. Near the metal objects and mirrors that cause radio signal attenuation
or shading it.
3. Near the powerful main wiring.
4. In the rooms with temperature and humidity exceeding the appropriate
levels.
1. Fix the SmartBracket panel to the surface with supplied screws or other
equally reliable fasteners, using at least two fixation points (one of them
being above the tamper).
2. Put the KeyPad on the mounting panel, and the KeyPad will flash with an
indicator (malfunction), then tighten the mounting screw from the bottom
of the case.
Do not install the KeyPad:
Indication Signal strength
To remove the panel, slide it downward.