on the wire to register with the seating for the sparking plug on the
cylinder head. Take out the wire and make a further mark on it ¼"
ABOVE the previous mark.
Put the wire through the sparking plug hole, then turn the engine
BACKWARDS until the top mark on the wire registers with the seating
for the sparking plug, the piston is now ¼" before top dead centre. A
s"
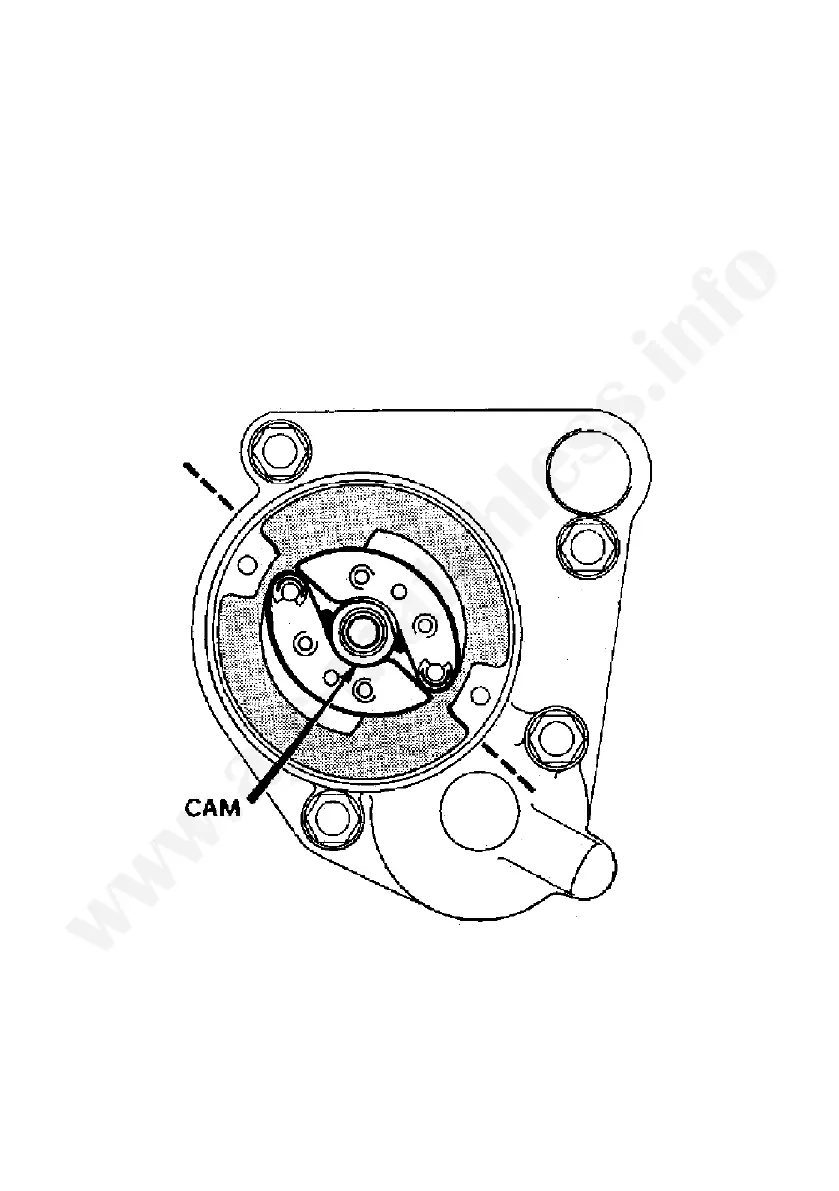
hole is drilled in the contact breaker base plate to enable a small screw-
driver to be inserted, and engaged between the two bob weights for the
automatic ignition control.
(See Fig. 5.)
Turning the screwdriver clockwise will separate the bob weights So the
fully advanced position. If the timing is correct the contact breaker points
should be just about to separate.
The exact point of separation can best be found by inserting a piece of
cigarette paper between the points, which when pulled lightly will be free
when the contact breaker points separate.
FIG 5 Automatic ignition advance mechanism
(approximate ignition setting)
To adjust ignition timing. By slackening the two screws in the slotted
holes on the contact breaker base plate, the plate can be moved either
clockwise or anti-clockwise to adjust the timing as required.
Move the plate clockwise to advance and use the method described for
checking to obtain the correct timing.
30