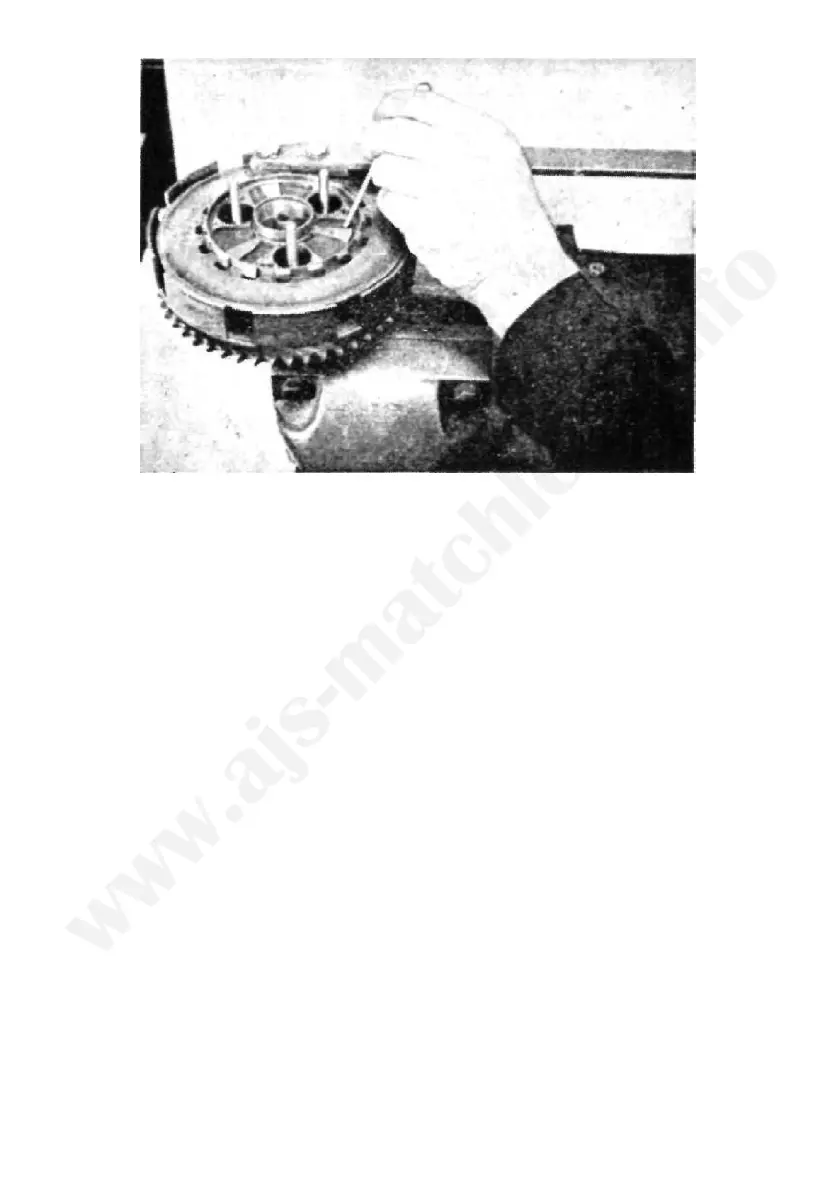
FIG 14 Removing clutch shock absorber rubbers
then the plate 043195, to expose the rollers and cage. Note the closed end
of the roller face faces the plate 043195.
To remove clutch cable. Remove oil filler cap from kickstarter case cover.
Screw right home the clutch cable adjuster, as far as it will go.
Disengage the cable from the operating lever inside the cover. The
cable, after removal from the handlebar lever, can be pulled through the
clips fixing it to the frame.
Clutch spring adjustment. Should clutch slip develop, first make sure the
operating mechanism is in correct adjustment (see clutch adjustment).
The correct position for the clutch spring adjuster nuts is—the spring stud
should just protrude through the recess in the adjuster nut.
Clutch adjustment. Attention to the clutch is usually confined to adjust-
ment of the operating mechanism. To avoid clutch slip or drag, it is
essential to have
x" free movement between the clutch outer casing and
the clutch cable adjuster. Without such movement the operating mechan-
ism will be pre-loaded causing wear on the operating parts, also clutch
slip. Conversely, excessive movement in the clutch cable will prevent
separation of the friction plates and cause the clutch to drag, thus making
the gear selection difficult.
As the clutch inserts tend to settle down, this has the effect of lengthen-
ing the clutch push rod, as the width of the friction inserts are slightly
reduced. To deal with clutch drag, or clutch slip, first unscrew the clutch
cable adjuster lock nut which is located at the handlebar end, run down
the adjuster as far as it will go. Remove the clutch inspection cap, unscrew
one or two turns the adjuster lock nut 040376, shown in Fig. 3.
With a screwdriver, screw in the adjuster until contact with the push
59