EasyManua.ls Logo

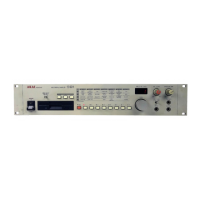
Akai S01

Akai S01
63 pages
To Next Page IconTo Next Page
To Previous Page IconTo Previous Page
Loading...
Standby
to
Sampling
Press
the
REC
key.
The REC
LED
starts
blinking,
four
LEDs
in the
parameter
list
function as
the
recording
level
meter,
and the
PROG.
NO./DATA
display
shows
the
current
trigger
level The
SOI
is
now in
standby
to
sampling.
If
any
key other
than the
REC
key
is
pressed
at this
point,
the sampler
will go
to
Play
mode.
work as
the
REC
LEVEL
meter
current
trigger
level
5.
Adjusting
the
Recording
Level
Adjust the
recording
level
using
the REC
LEVEL
control
by
actually
talking
into
the
microphone.
To
get the
appropriate
recording
level, set
the
level so
that
the top
LED
of
the
recording
level
meter
lightsup
occasionally.
To
record
good
samples,
set
it as
high as
possible
without
distortion
monitoring
the
sound using
headphones.
ST
O
CD
CD
6.
Setting
the
Trigger
Leve!
Set
the appropriate
trigger
level
using the
data
entry
knob
and
display
it
on
the
PROG.
NO./DATA
display.
When
the
input
level is
over the
current
trigger
level,
the
PROG.
NO./DATA
display
will
blink to
indicate
that
the current
level is a
suitable
one.
When
sampling
by
auto-trigger,
the
trigger
level
should be set
within a
range of
0-99.
Remember
the
trigger
level
"100"
is
the
value
for
MANUAL
sampling
(explained
later).
PROS.
HO/DATA
!H
DATA

Related product manuals