produced by: glitchscience.com 2011©
2014©
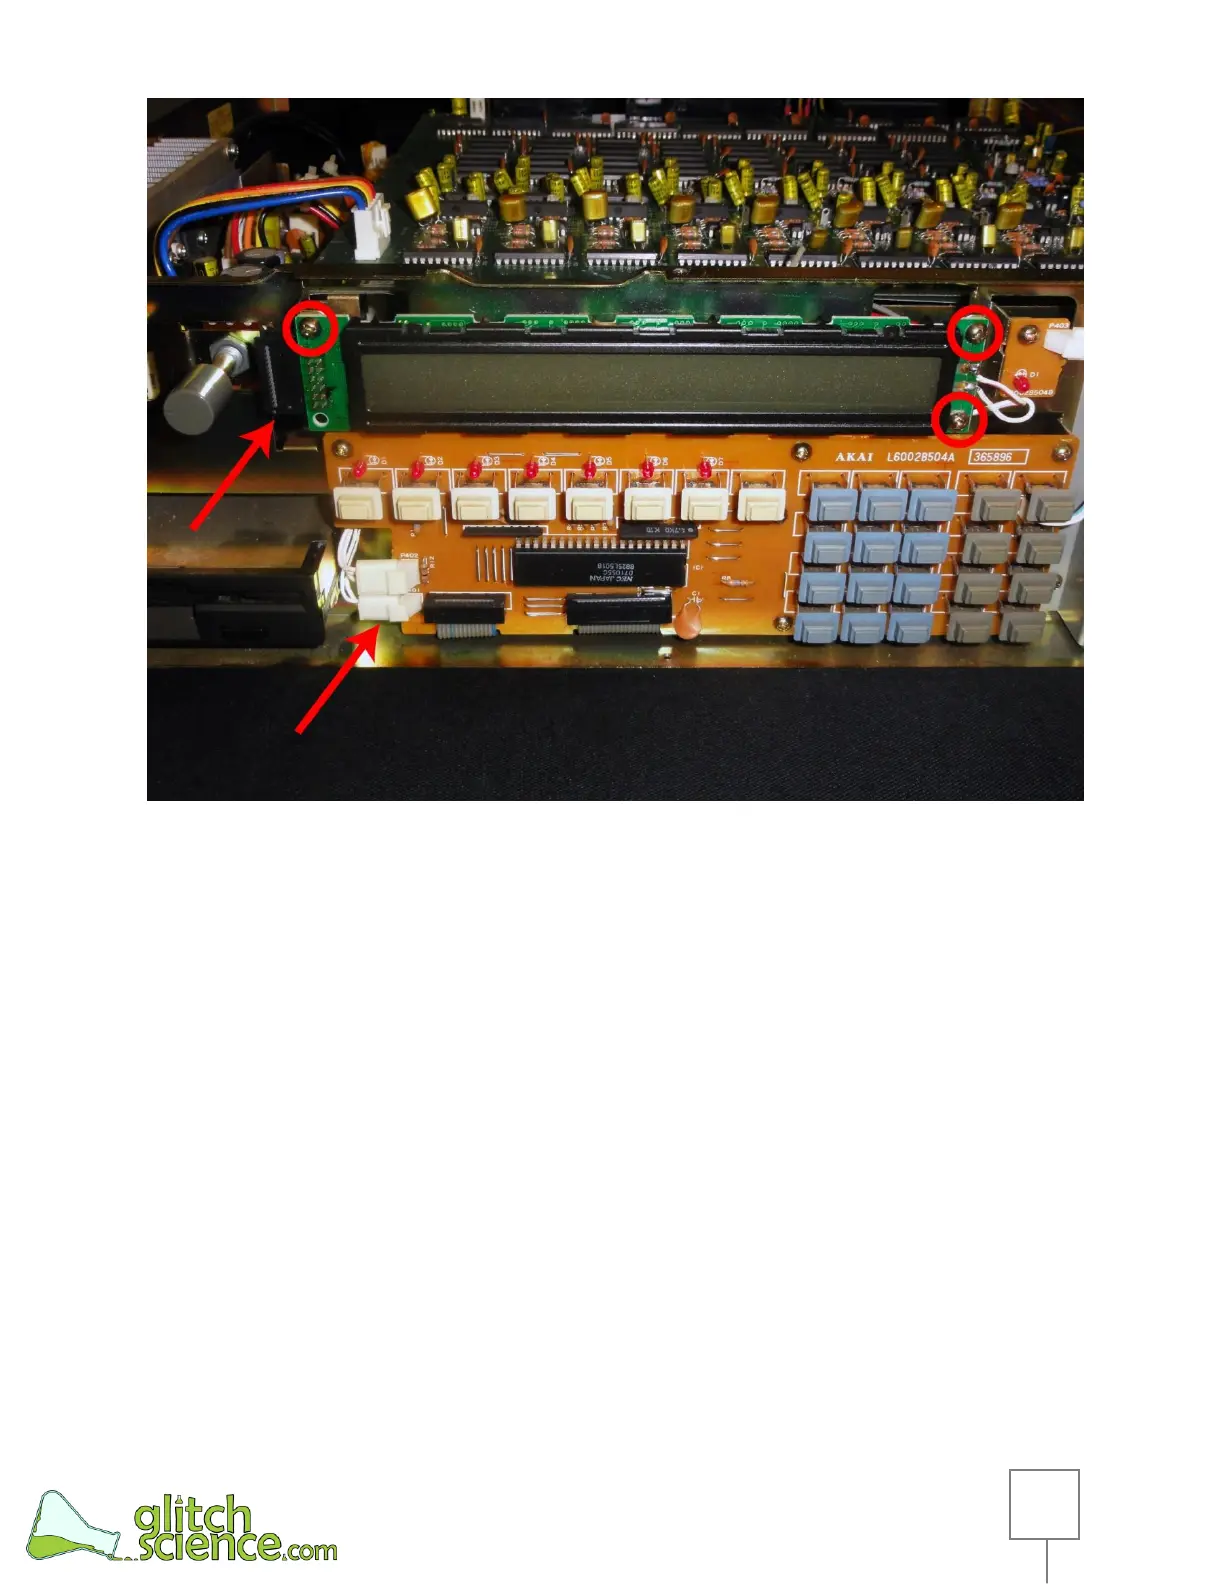
Fig. 7 - Remove the original LCD
Remove the Original LCD:
The original LCD is held in place using 3 screws, remove these screws.
Remove the cable plugged into the side of the LCD.
Remove the bottom 2-pin cable connector from the switch board. It is
shown in the photo above; the bottom arrow points to the connector.
 Loading...