leave the room for an extended period.
23.Switch off the appliance and unplug from the mains socket when not in use, before filling, cleaning or
other maintain.
24.Do not permit the area around the appliance to become damp or wet, Be aware that high humidity levels
may encourage the growth of biological organisms in the environment. If the humidification output volume
cannot be turned down, use the appliance intermittently. Do not allow absorbent materials, such as carpeting,
curtains, drapes, or tablecloths, to become damp.
25.Unplug the appliance during filling and cleaning.
26.Never leave water in the reservoir when the appliance is not in use.
27.Empty and clean the humidifier before storage, clean the humidifier before next use.
28.Micro-organisms that may be present in the water or in the environment where the appliances is used or
stored, can grow in the water reservoir and be blown in the air causing very serious health risks when the
water is not renewed. To prevent nucleation, remove residual water from the equipment and water tank
every time after three days of use.
29.Empty the tank and refill every third day, before refilling, clean it with fresh tap water or cleaning agents if
required by the manufacturer. Remove and scale, deposits, or film that has formed on the sides of the tank or
on interior surfaces. And wipe all surfaces dry.
PREPARATION FOR USE:
Before using the misting fan for the first time:
•Carefully unpack the misting fan and remove all the packing materials.
•Place the misting fan on a flat and stable surface.
•Use a soft cloth to remove any dust on the surface that may happen during packing and transport.
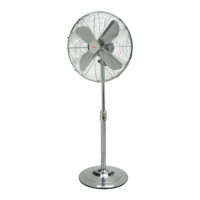
ASSEMBLY INFORMATION:
COMPONENTS:
1.
Guard bracket
2.
Mist attachment
3.
Front fan guard
4.
Blade bracket
5.
Fan blade propeller
6.
Guard bracket
7.
Rear fan guard
8.
Fan head/motor
9.
Mist hose
10.
Fixing screw
11.
Housing
12.
Pedestal base with additional metal weight
13.
4 castors
14.
Floor bracket
15.
Water tank cover
ASSEMBLY:
1.Remove the fan from its packaging and remove any packaging materials from the fan and accessories.
2.Position the metal pipe of the fan head (8) in the round hole on the upper side of the housing (11). Ensure
that the pipe is sitting correctly so that the small screw (10) can be screwed into the small hole in the housing,
in which the metal pipe is fixed.

 Loading...