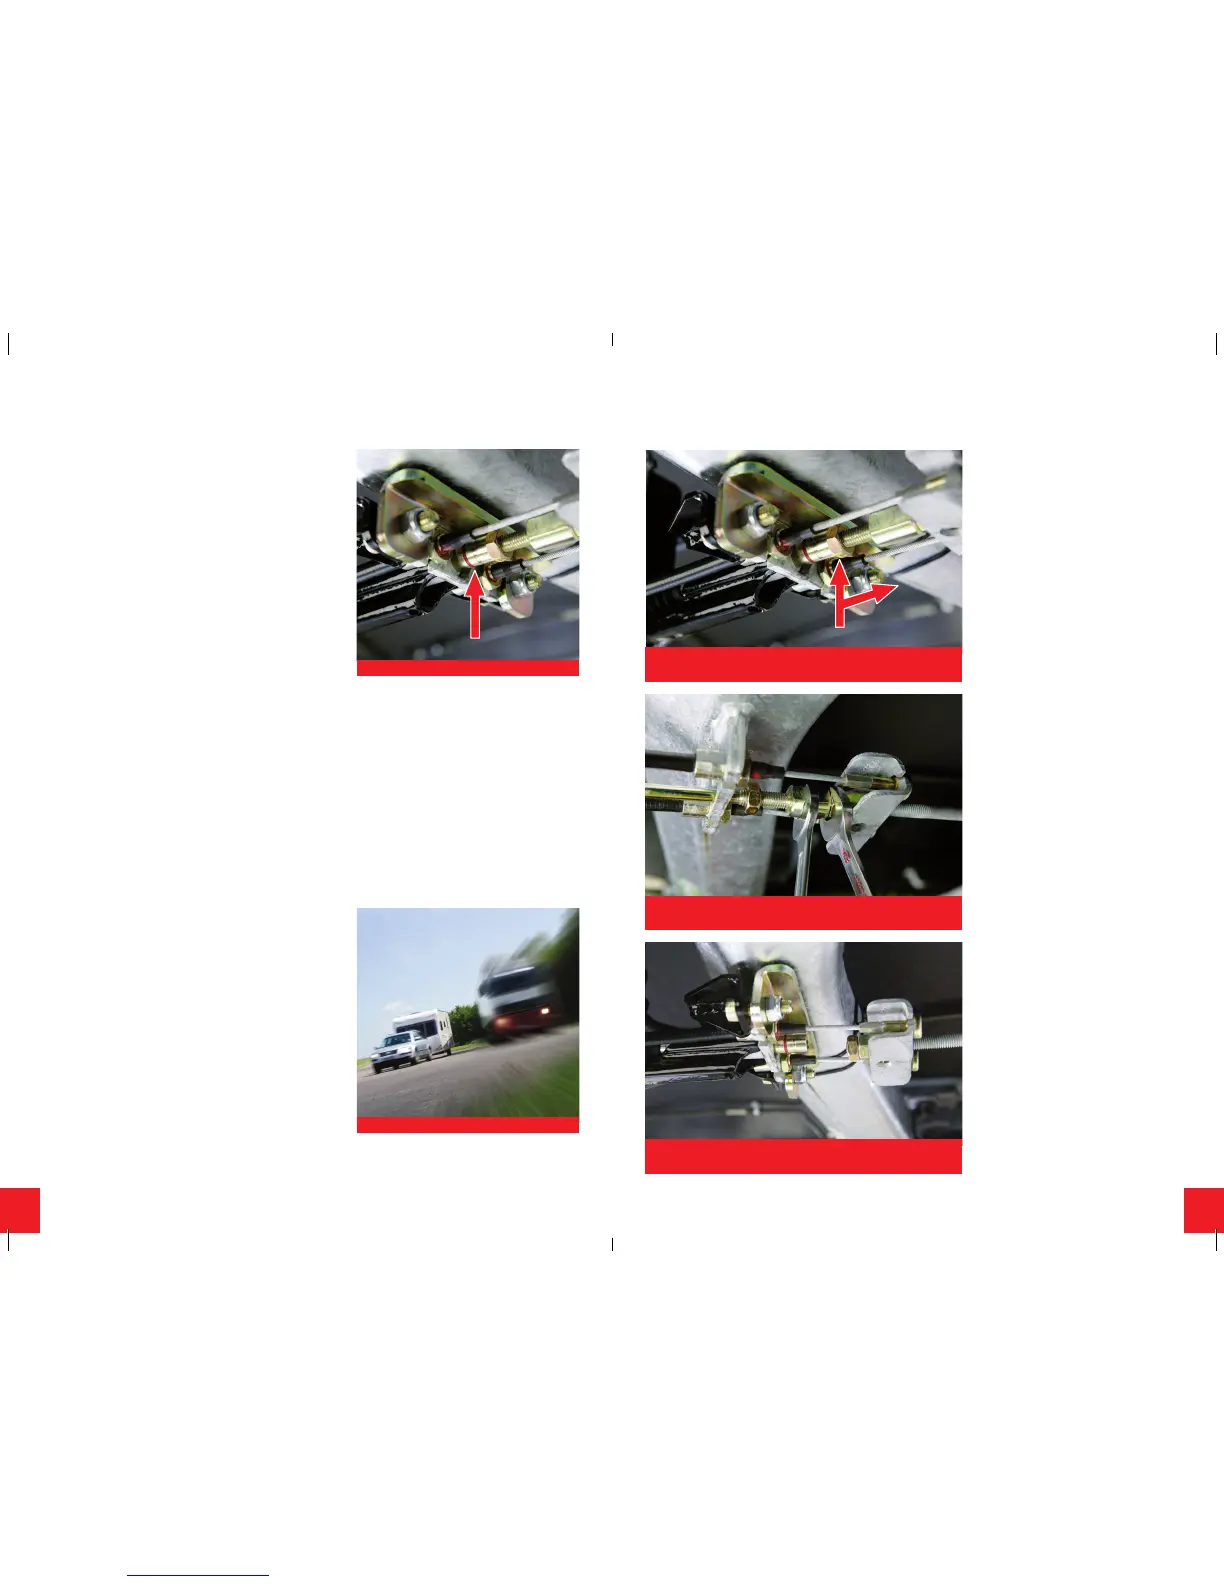
Using a 17mm spanner, slacken locking nut on push rod
away from Bowden cable abutment as directed above.
TROUBLESHOOTING
Should you experience a fault with ATC, the LED light on
the fairing will change colour. Therefore, refer to the table
on page 4 and follow the instructions.
If no illumination of the LED is evident, refer to system
requirements on page 3 and check towbar wiring for
permanent supply.
In the unlikely event that you receive a red ashing LED
light and disconnecting and re-connecting the power does
not alleviate the problem, check the push rod position as
detailed below.
Locate ATC on the axle and check the position of the
push rod.
If no red line is visible, ATC is not active, and can be
driven. However, we recommend that you contact
AL-KO at the earliest convenience.
If the red line is visible on the push rod, as shown on the
left, the caravan should not be moved.
The push rod needs to be removed to deactivate ATC.
Using two 17mm spanners, the removal process is as
shown opposite.
MAINTENANCE AND WARRANTY
ATC is maintenance free and requires no servicing. In
case of any damage to ATC, please contact AL-KO. ATC is
a sealed unit and any evidence of removal of ATC or the
component parts including outer casing and xings will
immediately invalidate any product warranty.
ATC is covered by a 12 month warranty where it is
retrotted to a caravan. If ATC is tted as standard by the
vehicle manufacturer then ATC is covered for the same
duration of the vehicle warranty.
If ATC is subject to a call out under warranty and found to
comply with the relevant specication or standard, then
the cost of any testing or callout charges will be borne by
the customer. We reserve the right to request credit card
details to cover payment in advance.
REMOVAL OF PUSH ROD:
5 6
Re-apply the removed locking nut onto brake rod thread to
secure ball nut as shown above. ATC is now deactivated.
Unscrew push rod from brake rod and slide it from the guide tube.
Remove the locking nut from push rod using two 17mm spanners.