18
PASOS PROGRAMACIÓN
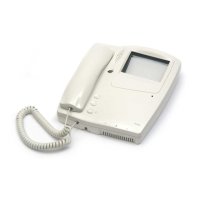
2 Conecte el cordón entre la base del monitor y el auricular. Con el interruptor PROG en la posición ON, escuchará
un tono continuo.
3 Desplace el interruptor PROG a la posición OFF (3.1); el tono desaparacerá. Vuelva a poner el interruptor en la
posición ON (3.2).
4 Pulse el botón de abrepuertas. Se activará el audio y el video entre el monitor y la placa de calle. El monitor
estará preparado para recibir un código.
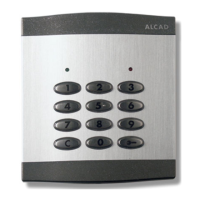
5 Situado en la placa de calle, presione el pulsador de la placa de calle correspondiente a la vivienda. La placa
emitirá un sonido de confirmación. El soporte está programado.
6 Compruebe el funcionamiento del monitor (verificación de llamada, audio y abrepuertas). Si el monitor no funciona
correctamente vuelva al paso 3.
Obs. : Maximum time limit of 1 minute between Steps 3 and 4 and between 4 and 5. The system warns by means
of a series of beeps of the end of the time limit between Steps 4 and 5; repeat Step 4 to have another minute. If the
time limit is exceeded the process must be repeated from Step 3.
2 Connect the cord between the monitor base and the handset. You will hear a continuous tone with the PROG switch
in the ON position.
3 Turn the PROG switch to the OFF position (3.1); the tone stops. Turn the switch back to the ON position (3.2).
4 Press the lock release button. The audio and the video will be activated between the monitor and the entrance panel.
The monitor is ready to receive the code.
5 From the entrance panel, press the push button that corresponds to the house or flat. The panel emits a confirmation
tone. The connection bracket has been programmed.
6 Check the operation of the monitor (call, audio and door opening). If the monitor does not function correctly then
repeat the process from Step 3.
PROGRAMMING STEPS
NB : Temps maximal 1 minute entre les points 3 et 4 et entre 4 et 5. Le système prévient par une série de signaux
sonores la fin du temps maximal entre les points 4 et 5; répétez le point 4 pour obtenir une minute en plus. Si vous
excèdez le temps maximal il faudra de nouveau programmer à partir du point 3.
2 Connecter le câble entre la base du moniteur et le combiné. Avec l'interrupteur PROG en position ON, vous entendrez
une sonnerie continue.
3 Mettez l’interrupteur PROG sur OFF (3.1); la sonnerie disparaîtra. Repositionnez l’interrupteur sur ON (3.2)
4 Appuyer sur le bouton d’ouverture de porte. L'audio et le vidéo seront activées entre la plaque de rue et le
moniteur.
5 Sur la plaque de rue, appuyer sur le bouton poussoir correspondant à la maison. La plaque émettra un signal
sonore de validation. Le support de connexions est programmé.
6 Vérifier le fonctionnement du moniteur (appel, audio et ouvertures des portes). Si le moniteur ne fonctionne pas
correctement retournez au point 3.
ETAPES DE PROGRAMMATION
Nota : Tiempo máximo de 1 minuto entre los pasos 3 y 4 y entre 4 y 5. El sistema avisa mediante pitidos del fin del tiempo
máximo entre 4 y 5; repita el paso 4 para tener otro minuto. Pasado el tiempo máximo deberá iniciar la programación desde el
paso 3.
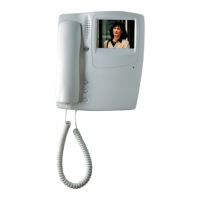
1 Conecte el latiguillo del monitor en el soporte de conexiones.
1 Connect the monitor connector to the connection bracket.
1 Connecter le câble du moniteur sur le support de connexion.
VIDEOPORTERO DIGITAL - DIGITAL VIDEODOOR ENTRY SYSTEMS - VIDÉOPORTIER NUMÉRIQUE