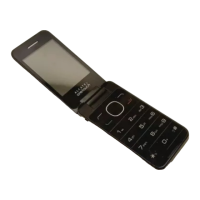
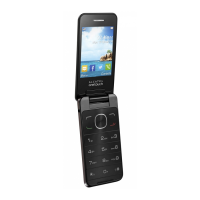
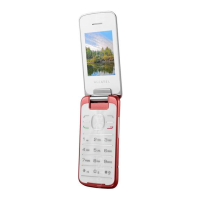
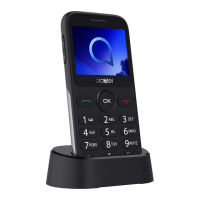
1
10
2
11
3
12
4
13
5
14
6
15
7
16
89
1817
1
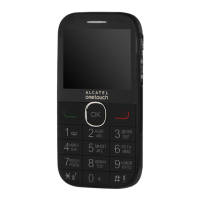
Your mobile .............
1.1 Keys
• Press to confirm an option
• Press to go left/right/up/down
If widget bar is hide:
Profiles
Calendar
Messages
Alarm
• Access main menu
• Pick up/Send a call
• Press: Enter Call log
• Press and hold: Enter Fake call
• Access contacts
• Press: End a call
Return to the Home screen
• Press and hold: Power on/off
• Press and hold: Access your voicemail
From Idle screen
• Press: 0
• Press and hold: “+/P/W”
In Edit mode
• Press: Access symbols table
• Press and hold: 0
From Idle screen
• Press: *
In Edit mode:
• Press: Change input methods
• Press and hold: Access language list
From Idle screen
• Press: #
• Press and hold: Vibration alert
In Edit mode
• Press:
(space)
1.2 Status bar icons
(1)
In 2012G:
Battery charge level.
Level of network reception.
Bluetooth status (Activated).
Bluetooth status (Connected to an audio device).
Missed calls.
Call forwarding activated: your calls are forwarded.
SD card scanning completed.
Roaming.
Flight mode.
GPRS connecting.
GPRS connection status (Activated).
2
Getting started .........
2.1 Set-up
Removing and installing the back cover
Removing and installing the battery
Inserting and removing the SIM card
Place the SIM card with the chip facing downwards and slide it
into its housing. Make sure that it is correctly inserted. To
remove the card, press it and slide it out.
This product meets applicable national
SAR limits of 2.0 W/kg. The specific
maximum SAR values can be found on
page 24 of this user guide.
When carrying the product or using it
while worn on your body, either use an
approved accessory such as a holster or
otherwise maintain a distance of 10 mm
from the body to ensure compliance with
RF exposure requirements. Note that
the product may be transmitting even if
you are not making a phone call.
Your phone only supports mini SIM card. Do not
attempt to insert other SIM types like micro and
nano cards, otherwise this may cause damage to
your phone.
Charging the battery
Connect the battery charger to your phone and mains socket
respectively.
The charging may take about 20 minutes to start if the •
battery is flat.
Be careful not to force the plug into the socket.•
Make sure the battery is correctly inserted before •
connecting the charger.
The mains socket must be near to the phone and easily •
accessible (avoid electric extension cables).
When using your telephone for the first time, charge the •
battery fully (approximately 3 hours). You are advised to
fully charge the battery (
).
To reduce power consumption and energy waste, when •
battery is fully charged, disconnect your charger from the
plug; switch off Bluetooth when not in use; reduce the
backlight time, etc.
The charge is complete when the animation stops.
2.2 Power on your phone
Hold down the
key until the phone powers on.
2.3 Power off your phone
Hold down the
key from the Home screen.
First, make sure the host phone can support the MAP protocol
and that the Remote SIM/MSG setting is ON. Otherwise you
will not be able to access messages in the host phone.
This phone can synchronize new messages with the host phone.
You can view and compose new messages and reply to messages
sent to the host phone via your 2012G/2012D. Sent messages
will be synchronized with the host phone’s sent box.
If the host phone is dual SIM mode, you may use 2012G/2012D
to reply to host phone’s messages via SIM1 but not available for
SIM2.
5
Contacts .............
5.1 Consulting your contacts
To access the contacts from the Home screen, press the
key and select the
icon from the menu.
For dual SIM model, the complete contacts of both SIM1 and
SIM2 are available in this menu
(1)
.
With BT Dialler activated, you can view contacts which are
synchronized between your 2012G/2012D and the host phone
(2)
.
By pressing the
and up/down keys, you can go to the last/
next contact. Select the contact you wish to call and then press
to make the call. You can also send a message to the
contact by selecting Options\Send message.
5.2 Adding a contact
You can add a new contact to phone or SIM card by selecting
"Add contact".
Quick Start Guide
For more information about how to use the phone, please go
to www.alcatelonetouch.com to download complete user
manual (English version only). Moreover, from the website
you can also consult FAQ (English version only).
www.sar-tick.com
(1)
The icons and illustrations in this guide are provided for information
purposes only.
4
Messages ............
4.1 Create message
You can select "Messages\Write msg" from the main menu
or access from the widget bar and select icon to create
text/multimedia message. You can type a message and you can
also modify a predefined message in Templates or customise
your message by adding pictures, sounds, videos, etc (only
available while editing a MMS). While writing a message, select
"Options" to access all the messaging options.
For dual SIM model, you can type a message and select to
send it to a recipient in either the SIM1 or SIM2 directory
(1)
.
One or more recipients can be added from contact list. Press
"Contacts" through key to multi-select recipients from
Contacts.
An SMS will be converted to MMS automatically when images,
videos, audio, slides or attachments are inserted.
An SMS message of more than a certain number of
characters (the number of characters depends on
your language) will be charged as several SMS. An
MMS message containing photos and/or sounds
may also be billed as more than one message.
Specific letters (accent) will increase the size of
the SMS, this may cause multiple SMS to be sent to
your recipient.
4.2 View message
(2)
With BT Dialler activated, you can review messages which are
synchronized between your 2012G/2012D and the host phone.
(1)
2012D only.
(2)
Depends on software version and countries. If your phone has BT
Dialer feature, please activate it firstly (please refer to 15.6.2 BT
Dialler for activation).
3
Making a call ............
Dial the desired number then press the
key to place the
call. If you make a mistake, you can delete the incorrect digits
by pressing the right softkey.
To hang up the call, press the
key.
Making an emergency call
If your phone is covered by the network, dial emergency
number and press the
key to make an emergency call.
This works even without a SIM card and without typing the
PIN code.
3.1 Calling your voicemail
(1)
To access your voicemail, hold down the
key.
3.2 Receiving a call
When you receive an incoming call, press the
key to talk
and then hang up by pressing the
key.
3.3 Available functions during the call
During a call, you can use your directory, your calendar, short
messages, etc. without losing your correspondent.
(1)
Contact your network operator to check service availability.
EDGE connecting.
EDGE attached.
Music activated.
Radio is on.
Headset connected.
Alarm or appointments programmed.
Receiving an MMS.
Sending an MMS.
SMS unread.
MMS unread.
Voicemail message arrived.
(Flickering) Message is full: your phone cannot accept
any new message. You must access the message list and
delete at least one message on your SIM card or on your
phone memory.
Vibrate alert: your phone vibrates, but does not ring or
beep with the exception of the alarm.
Silence mode: your phone does not ring, beep or vibrate
with the exception of the alarm.
6
Call log .................
6. 1 Access
You can access this function by pressing from the idle
screen, or by selecting
from the widget bar or main menu.
6.2 Available options
When you press Options, you can have access to View, Send
message, Save to Contacts, Edit before call, Add to
blacklist, Add to whitelist, Delete, Delete all, etc.
With BT Dialler activated, you can also review all of the host
phone’s missed, outgoing and incoming calls but you will not be
able to delete this information from the host phone by using the
local (2012G/2012D) phone
(1)
.
You can select a contact in the host phone’s call log list and then
select Options to make a call or send a text message to them
using the local phone.
7
Facebook
...........
Facebook is a social utility that connects people with friends and
others who work, study and live around them. It provides a
number of features with which users interact, such as Wall,
Pokes, etc.
To open an account online, please go to: http://m.facebook.com/.
8
FB Messenger .....
Facebook Messenger is an instant messaging service which lets
you communicate with your friends whenever they are
connected to it.
Sending/receiving pictures and group messaging are also supported.
(1)
Depends on software version and countries. If your phone has BT Dialer
feature, please activate it firstly (please refer to 15.6.2 BT Dialler for
activation).
9
Twitter ..............
Twitter is a social networking and microblogging service that has
gained notability and popularity worldwide. This feature enables
phone users to exchange news updates and ideas with a
community in the form of messages or posts. Posts are displayed
on the author's profile page and delivered to the author's
subscribers or followers.
To open an account online, please go to: http://m.twitter.com/.
10
Apps
(1)
................
Apps is an online software store, where you can download and
install applications and games to your phone. All downloaded
files can be found in "Apps Mgr" .
11
Apps Mgr ...........
You may manage your downloaded applications and games.
12
Camera .............
Your mobile phone is fitted with a camera for taking photos and
shooting videos that you can use in different ways:
store them in your “• My files”.
send them in a multimedia message (MMS) to a mobile •
phone.
send them directly by MMS or Bluetooth.•
customise your Home screen.•
select them as incoming call image to a contact in your •
Contacts.
transfer them by data cable or microSD card to your •
computer.
13
Media applications .
13.1 Music ........................................................
Access this feature from the main menu by selecting “Music”.
You will have full flexibility of managing music both on your
mobile and memory card.
With BT Dialler activated, you can control the music player
using the local phone if the host phone is playing music
(1)
.
13.2 Images ......................................................
A library links to the images in “My images” in phone or SD
card to multi-mark, set as
Wallpaper, Power on/off display, and
Incoming call image, or sent by MMS, Bluetooth.
13.3 Videos ......................................................
Contains all video clips (stored in "My videos") in phone or SD
card and enables you to Play, Send, Rename, Copy, Move,
Delete, etc.
13.4 FM radio...................................................
Your phone is equipped with a radio
(2)
with RDS
(3)
functionality.
You can use the application as a traditional radio with saved
channels or with parallel visual information related to the radio
program on the display if you tune to stations that offer Visual
Radio service. You can listen to it while running other
applications.
14
My files ..............
You will have access to all audio and visual files stored in phone
or memory card in My files. You can access a number of items
in Phone or Memory card with this option: My audios, My
images, My videos, Received, etc.
Inserting and removing the memory card:
Place the microSD card with the chip facing downwards and
slide it into its housing. Make sure that it is correctly inserted.
To remove the card, press and slide it out.
15
Tools ........................
15.1 Recorder ..................................................
Accessing Recorder allows you to make voice or sound
recordings.
15.2 Alarm .......................................................
Your mobile phone has a built-in alarm clock with a snooze
feature.
(2)
Depends on software version and countries. If your phone has BT Dialer
feature, please activate it firstly (please refer to 15.6.2 BT Dialler for
activation).
15.3 Calculator ................................................
Enter a number, select the type of operation to be performed,
using the navigation keys, and enter the second number, then
press “=” to display the result.
15.4 Calendar ..................................................
Once you enter this menu from the main menu, there is a
monthly-view calendar for you to keep track of important
meetings, appointments, etc. Days with events entered will be
marked.
15.5 Notes ........................................................
You can create a note in text format by accessing “Notes” from
the main menu.
15.6 Bluetooth™ .............................................
15.6.1 Access
Press
from the Home screen to enter the main menu, then
select "Bluetooth".
15.6.2 BT Dialler
(1)
This phone is embedded with a BT dialler feature which means
that you can connect your 2012G/2012D with a host phone
through a Bluetooth connection. Once successfully linked, you
can receive and make calls from the host phone using this phone.
Other options available are syncing with the host phone’s
contacts, viewing its call log, and viewing/making SMS messages
sent to/from the host phone.
You can pair with the host phone through Bluetooth.
Activate host connection: Turn Bluetooth on, select to view
the list of available Bluetooth devices and then press BT dialler\
On.
English - CJB27T0ALAAA
You need to confirm your password (automatically displayed) in
the host phone once you have chosen to pair it with your
2012G/2012D.
When pairing succeeded, the host name will be visible on your
2012G/2012D.
You only need to pair your 2012G/2012D once. It automatically
reconnects to your host phone once you turn on Bluetooth
both in your 2012G/2012D and host phones.
15.7 Voice alarm .............................................
With this menu, you may create the voice file and set it as the
alarm.
15.8 Fake call ...................................................
This program enables you to call yourself by simulating a caller
number/name, ringtone at a scheduled time. It helps you to
politely escape from social situations at any time you wish. This
call can be rejected by
key.
15.9 Call filter ..................................................
Enable blacklist, all callers in the list will be automatically
blocked. Enable whitelist, only callers in the list can be
connected.
15.10 WAP ........................................................
Access WAP options: Homepage, Bookmarks, Recent
pages, Offline pages, Go to URL, Settings.
16
Profiles ..............
With this menu, you may personalise ringtones for different
events and environments.
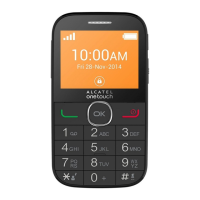
In 2012D:
Level of network reception.
Call forwarding activated: your calls are forwarded.
GPRS connecting.
GPRS connection status (Activated).
EDGE connecting.
EDGE attached.
1.3 Home screen
1.3.1 Widget bar
Widgets are convenient shortcuts for quick access from the
Home screen.
You can customize widget bar by "Settings/Phone settings/
Widget bar".
1.3.2 Change wallpaper
You can select a folder to choose one image as favourite
wallpaper by selecting "Options/Set as/Wallpaper".
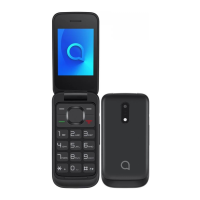
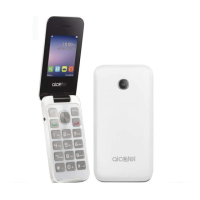
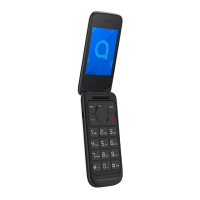
2012G
2012D
17
Settings ............
From the main menu, select the menu icon and select the
function of your choice in order to customise your telephone:
Phone settings, Call settings, Network, Connectivity,
Security, Regulatory & Safety, Rights manager, Restore
default
(1)
Dual SIM settings
(2)
.
18
Services ............
Contact your network operator to check service availability.
19
Making the most
of your mobile .......
PC suite
You can download software upgrade for free from the
website. The PC suite includes:
Backup/restore•
You can backup the important data in your mobile and restore
them when needed.
GPRS modem•
Use your mobile phone to connect PC to the internet.
Multimedia Personalization•
Customize your mobile with images, animations and melodies.
PROTECT YOUR HEARING
To prevent possible hearing damage, do not listen at high
volume levels for long periods. Exercise caution when
holding your device near your ear while the loudspeaker is in use.
(1)
Depending on your network operator.
(1)
Depends on software version and countries. If your phone has BT Dialer
feature, please activate it firstly (please refer to 15.6.2 BT Dialler for
activation).
(3)
Depending on your network operator and market.
(2)
The quality of the radio depends on the coverage of the radio station in
that particular area.
(1)
Make the phone’s settings recover to its default value. End-user data
will not be erased. Enter its default password 1234 to confirm to
restore and reboot.
Camera
Volume key
Micro-USB
connector
Left softkey
Send key
Voicemail key
End key
Right softkey
* key
# key
Headset
connector
(1)
2012D only.
(1)
Depends on software version and countries.
(2)
2012D only.