Alcatel-Lucent 300 Series Access Point | Installation Guide 4
The 300 Series access points ship with two ceiling rail
adapters for 9/16” and 15/16” ceiling rails. Additional ceiling
rail adapters for other rail styles and wall mount adapters are
available as accessory kits.
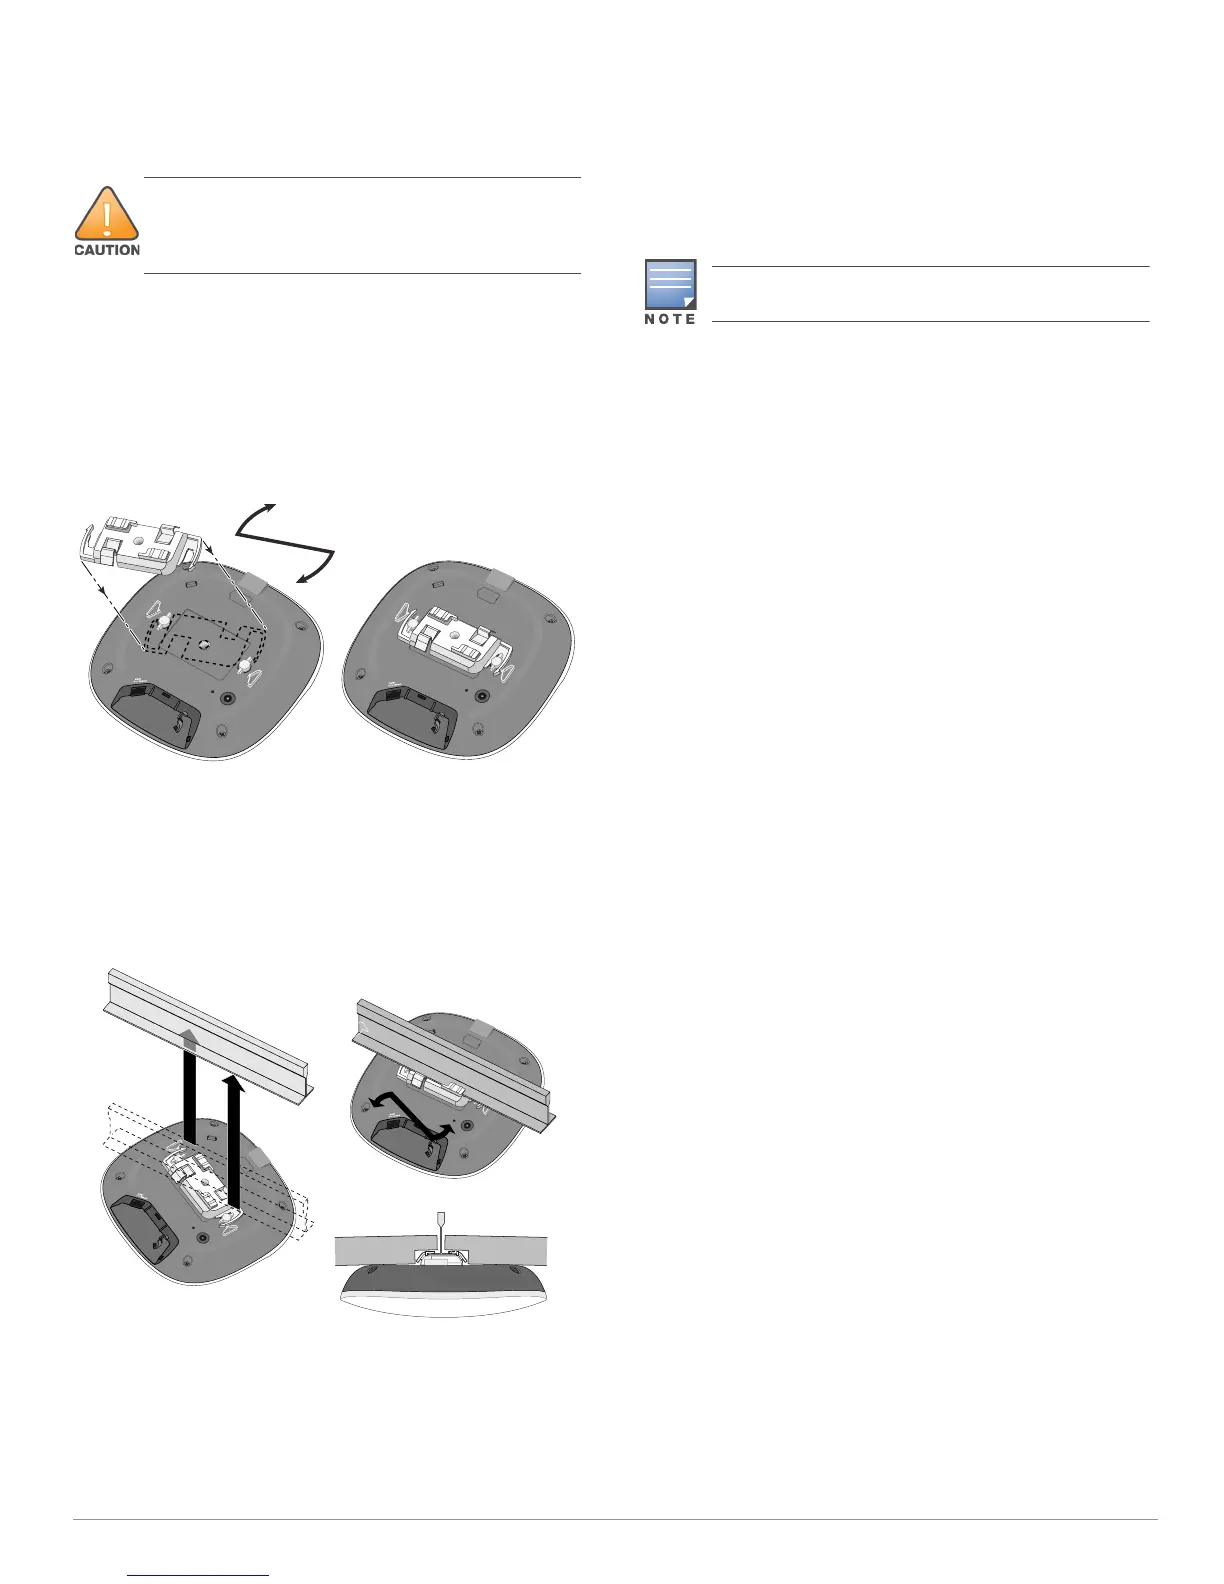
1. Pull the necessary cables through a prepared hole in the
ceiling tile near where the access point will be placed.
2. Place the adapter against the back of the access point
with the adapter at an angle of approximately 30 degrees
to the tabs (see Figure 4).
3. Twist the adapter clockwise until it snaps into place in the
tabs (see Figure 4).
Figure 4 Attaching the Ceiling Rail Adapter
4. Hold the access point next to the ceiling tile rail with the
ceiling tile rail mounting slots at approximately a 30-
degree angle to the ceiling tile rail (see Figure 5). Make
sure that any cable slack is above the ceiling tile.
5. Pushing toward the ceiling tile, rotate the access point
clockwise until the device clicks into place on the ceiling
tile rail.
Figure 5 Mounting the Access Point
Connecting Required Cables
Install cables in accordance with all applicable local and
national regulations and practices.
Verifying Post-Installation Connectivity
The integrated LEDs on the access point can be used to verify
that the access point is receiving power and initializing
successfully (see Table 1). Refer to the AOS-W Quick Start
Guide/Alcatel-Lucent Instant Quick Start Guide for further
details on verifying post-installation network connectivity.
Configuring the 300 Series Access Points
Access Point Provisioning/Reprovisioning
Provisioning parameters are unique to each access point.
These local access point parameters are initially configured
on the switch which are then pushed out to the access point
and stored on the access point itself. Alcatel-Lucent
recommends that provisioning settings be configured via the
AOS-W Web UI only. Refer to the AOS-W User Guide for
complete details.
Access Point Configuration
Configuration parameters are network or switch specific and
are configured and stored on the switch. Network
configuration settings are pushed out to the access point but
remain stored on the switch.
Configuration settings can be configured via the AOS-W Web
UI or AOS-W CLI. Refer to the AOS-W User Guide for complete
details.
The installer is responsible for securing the access point
onto the ceiling tile rail in accordance with the steps below.
Failure to properly install this product may result in
physical injury and/or damage to property.
The instructions for this section are applicable to the
OAW-AP304 and OAW-AP305 only.