Do you have a question about the ALIBI ALI-QVR3100H Series and is the answer not in the manual?
Details on-screen keyboards for data input, including alphanumeric and numeric options.
Explains USB mouse usage for navigation and interaction within the recorder interface.
Guides through initial recorder configuration using an automated setup wizard.
Details how to access the main menu interface by right-clicking on the live view screen.
Covers camera management, including adding IP cameras and configuring analog cameras.
Covers basic image adjustments for analog cameras like OSD and image settings.
Provides instructions for manually checking video quality diagnostics on selected cameras.
Covers configuration of internal and network HDDs for storage, including group modes and cloud.
Details how to configure system-related alarms like HDD errors or network disconnections.
Detects when a face appears in the field of view and allows specific actions upon detection.
Detects objects crossing a virtual line and allows configuration of direction and duration.
Detects objects entering a defined virtual area and triggers actions based on intrusion events.
Detects objects entering a predefined virtual region and allows response actions.
Detects objects exiting a predefined virtual region and allows response actions.
Detects unattended objects left in a predefined area, triggering response actions.
Detects when an object is removed from a predefined area, triggering response actions.
Detects abnormal sound levels (increase/decrease) in the surveillance area.
Detects image blur caused by lens defocus, triggering response actions.
Detects changes in the surveillance environment caused by external factors.
Detects infrared heat signatures from people or animals, triggering an alarm.
Features for quickly analyzing data generated from VCA analysis of video images.
Configures display resolution for VGA and HDMI monitors, with default at 720p.
Describes how to access the pop-up menu by right-clicking on the desktop.
Explains support for multiple monitors and output options for Main and Aux displays.
Details mouse operations for navigation and interaction within the Live View screen.
Explains the meaning of icons appearing in the Live View for record and alarm status.
Describes the toolbar at the top/bottom of the frame for quick access to features like recording and zoom.
Covers general configuration for recording settings, including parameters, schedules, and modes.
Overview of playback features, including instant, by channel, time, event, tag, logs, smart, sub-periods, external files, and frame-by-frame.
Covers exporting recorded files via video search, event search, and during playback.
Explains matching QVR RS-485 interface to PTZ camera communication settings.
Provides access to PTZ camera features, requiring pre-configuration.
Covers setting up camera positions (presets), patrol paths, and movement patterns.
Enables horizontal scanning within a predefined range for PTZ cameras.
Details the process of creating new user accounts with specific permissions for system access.
Explains how to remove existing user accounts from the system.
Describes how to modify existing user account settings.
Configures general network settings, preferring static IP over DHCP for stable access.
Sets up Dynamic DNS for accessing the QVR from outside the local network.
Configures the Network Time Protocol server for accurate system date and time synchronization.
Enables multicast functionality for connecting more than 64 cameras.
Configures RTSP port numbers for controlling streaming media servers.
Sets up email notifications for alarm events or system changes.
Enables Universal Plug and Play for seamless device discovery and network connection.
Details the process of initializing HDDs before they can be used for data storage.
Covers adding NAS or IP SAN devices for expanded storage capacity.
Allocates HDD space using Partition or Group modes for camera recording.
Covers HDD monitoring through S.M.A.R.T. and Bad Sector Detection.
Displays status reports for the QVR, cameras, network, and HDDs.
Provides information on system logs, including alarm, exception, and operation events.
Allows exporting and importing the QVR's configuration file for backup or restoration.
Guides on upgrading the QVR firmware via cloud, USB, or FTP server.
Restores the QVR configuration to original settings via Restore Defaults, Factory Defaults, or Restore to Inactive.
Checks network traffic and tests network delay and packet loss.
Guides on accessing the QVR from another computer on the LAN, including plugin installation.
Describes the remote Live View window, including screen layout and camera selection.
Allows reviewing recorded video remotely, with options for downloading to a local computer.
Enables viewing and modifying QVR configuration remotely.
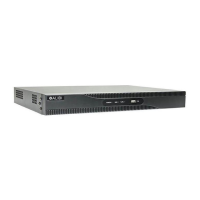
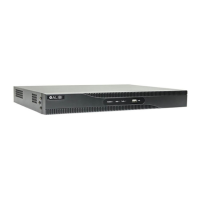
| Type | DVR |
|---|---|
| Video Channels | 16 |
| Video Output | HDMI, VGA, BNC |
| Audio Output | RCA x 1 |
| Operating System | Embedded Linux |
| Mobile App Support | Yes |
| Power Supply | DC 12V |
| Model | ALI-QVR3100H |
| Video Input | BNC |
| Recording Resolution | 1080p |
| Hard Drive Support | SATA |
| Maximum HDD Capacity | 10TB |
| Audio Input | RCA |
| Compression | H.264 |
| Network Interface | RJ45 |
| Operating Temperature | -10°C to 55°C |




 Loading...