Unpack the unit and identify all parts using the parts diagram in this manual.
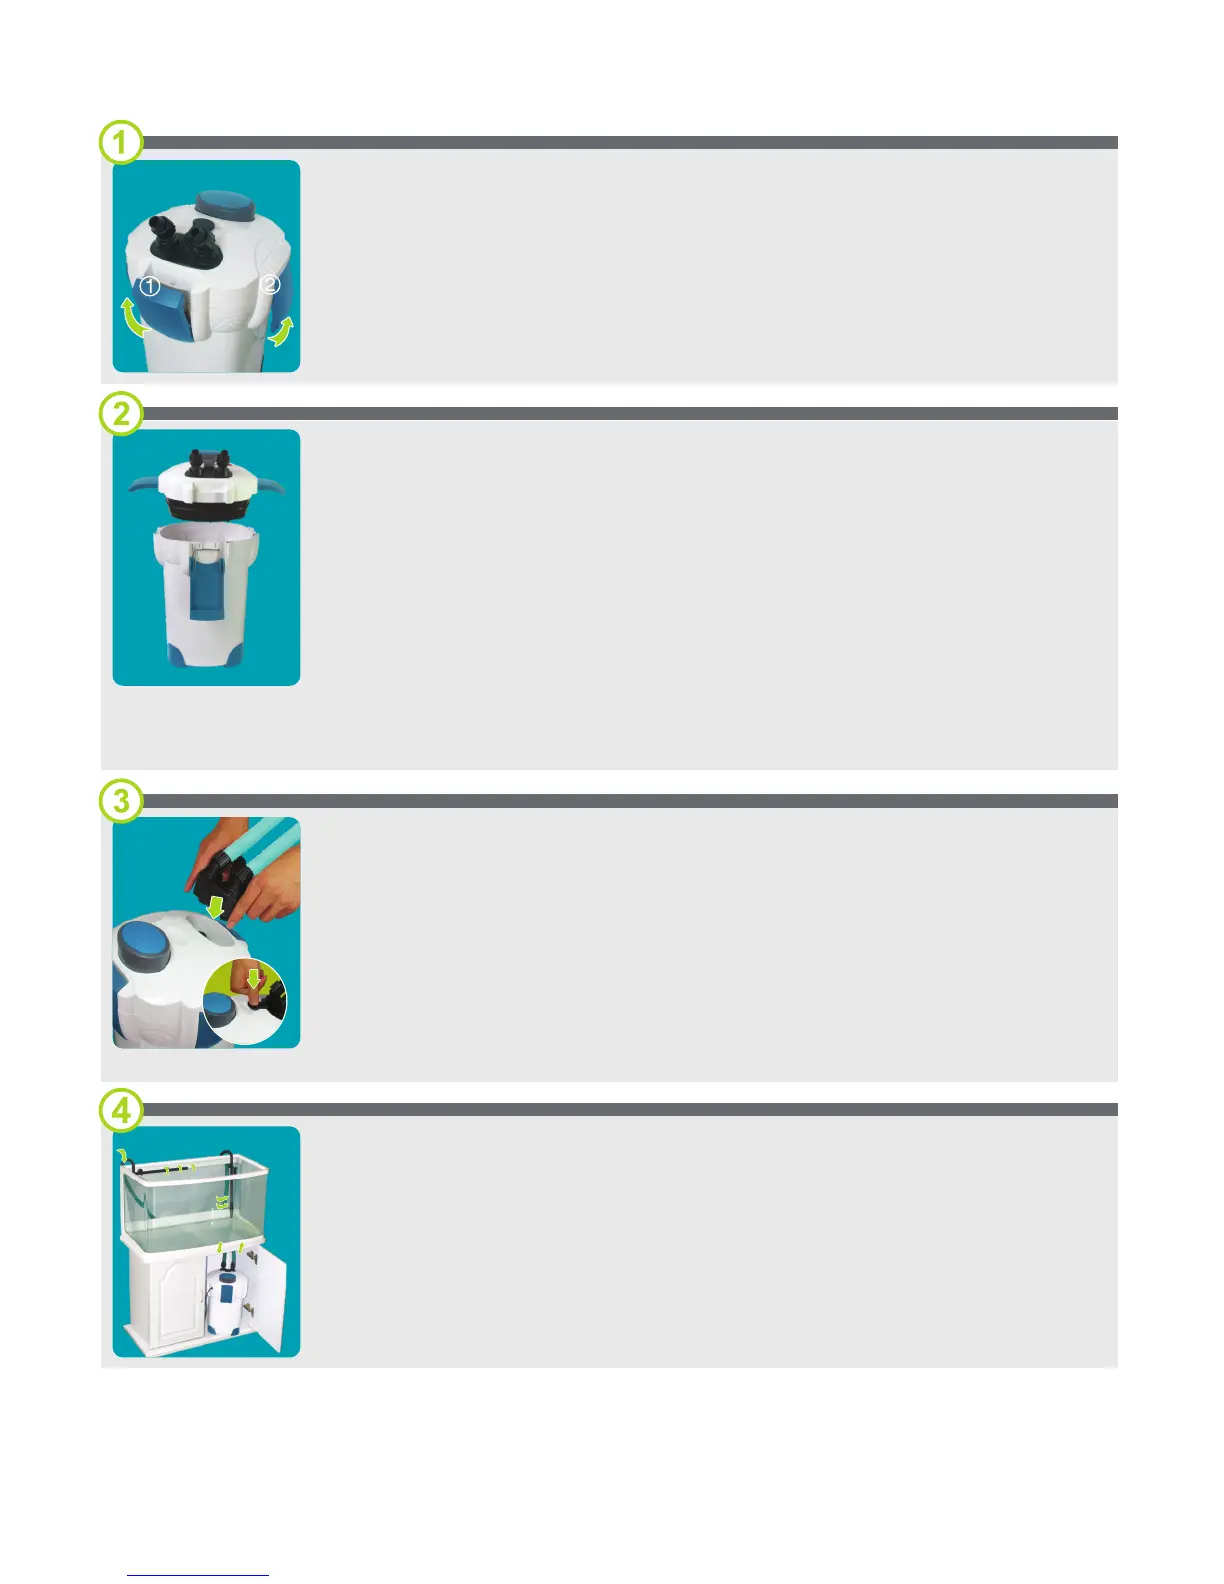
To open the unit, unfasten the 2 buckles that are situated at the
front and back of the filter then lift the 2 levers that are attached
to the left and right sides of the motor head. On doing this the
motor head will lift away from the unit.
Take out the filter media secure plate and pull out the filter media
baskets using the handles provided. Using the baskets, rinse your
filter media under the tap until it runs clear. Once you have done
this you should place the rinsed baskets and filter media back
inside the filter with the filter media secure plate at the top.
Before replacing 3 the motor head on the filter, fill your filter /4
full with water from your aquarium. Place the motor head back on
top of the unit, shut both of the motor head levers down and
fasten the buckles to the side of the filter.
To attach the provided hoses to the filter, remove the hose
adapter by lifting the hose adapter securing buckle and pulling
the adapter out of the motor head. Install your hoses onto the
Inlet and Outlet connections on the hose adapter and secure
them into place using the plastic screw nuts. Push the hose
adapter back into the motor head and re-fasten it using the
securing buckle.
Fit your hose to your aquarium so as the inlet hose is fitted to the
overflow pipe and the outlet hose is fitted to the spray bar as per
the image opposite. Please ensure your aquarium water level is
high enough to cover all inlet and outlet pipework connection
points, as otherwise you can let air into the filter system which
will stop it from priming properly.