Rockwell Automation Publication 193-IN080A-EN-P - September 2018 11
E300 Electronic Overload Relay
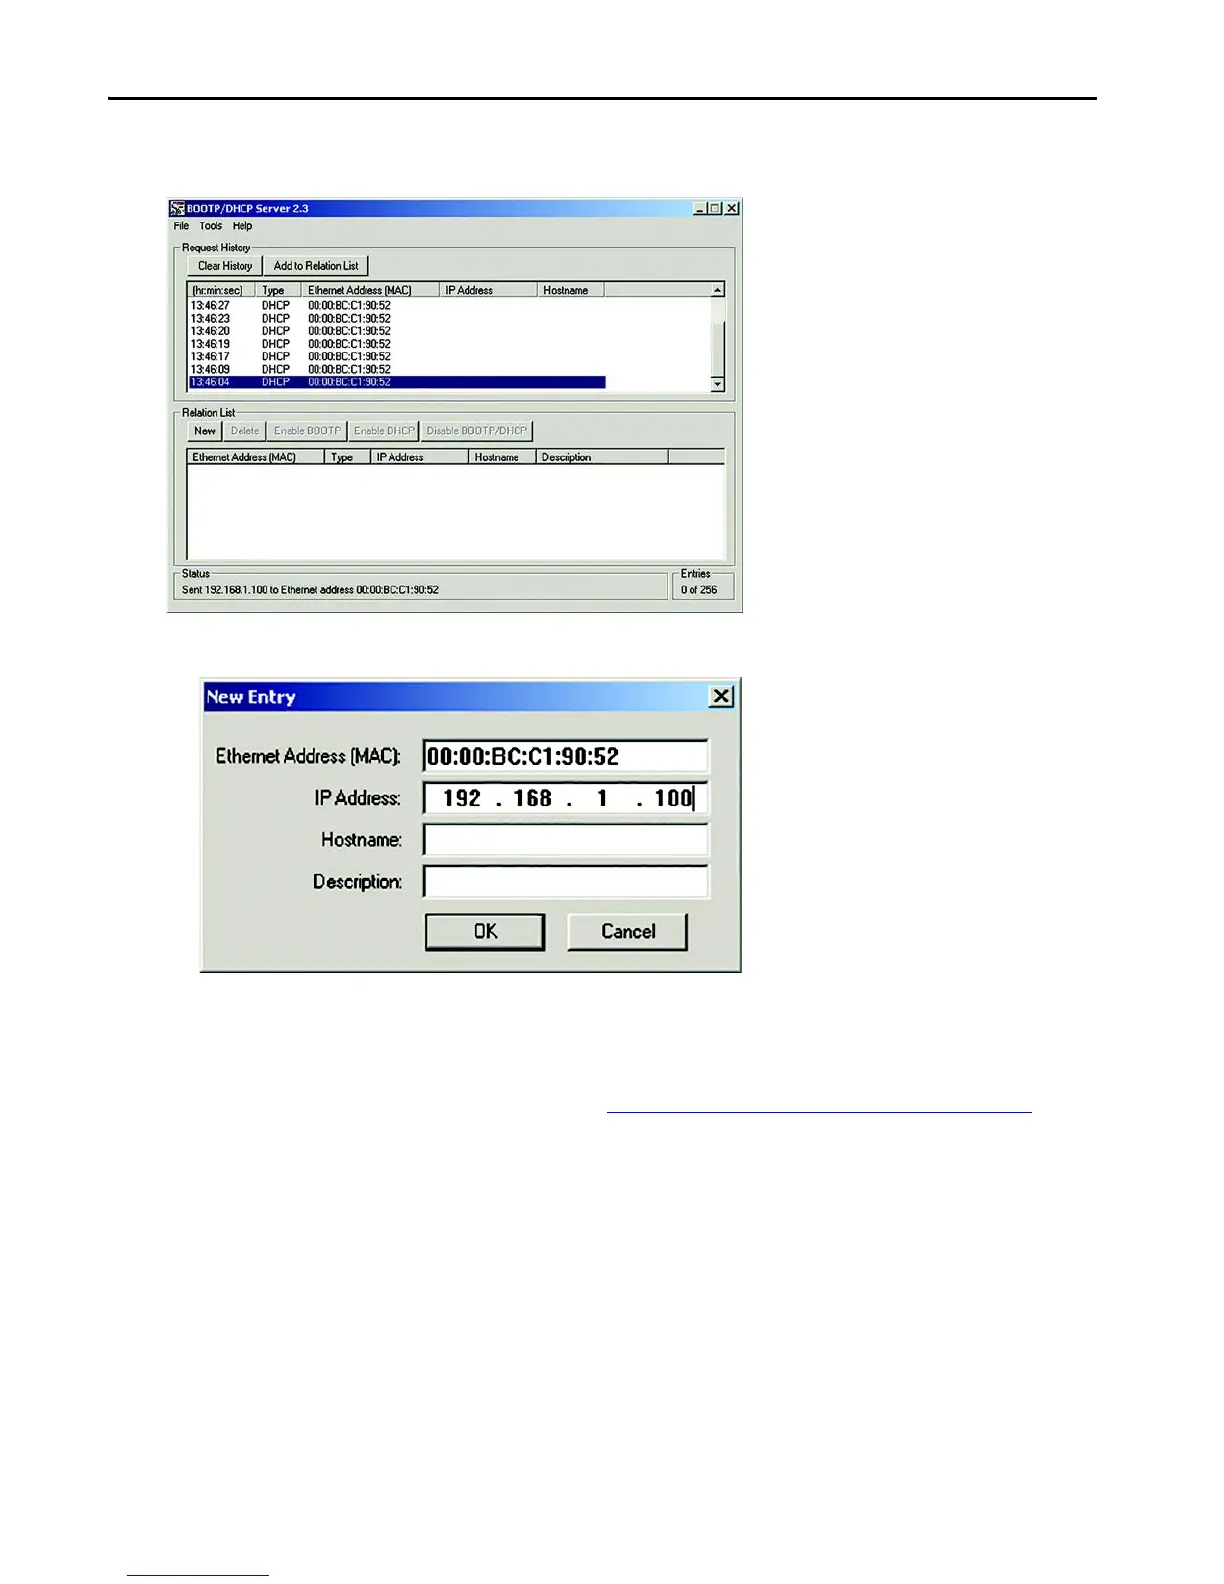
3. Double-click the MAC address of the E300 module that you want to configure. It may take a few seconds for your E300 relay to appear in
the Request History.
4. The New Entry window appears with the Ethernet Address (MAC). Type the IP address. Select OK.
5. Cycle power to the E300 relay.
6. Once your E300 is powered up, verify that the proper IP address has been assigned, select the module in the Relation List panel, and click
Disable BOOTP/DHCP.
After completing either one of the above methods, your E300 Electronic Overload Relay is configured and connected to your network. The next
step to communicating with the E300 is to download its EDS file. See See Downloading the Electronic Data Sheet (EDS) File
on page 13.
DeviceNet Communication
E300 relays are shipped with a default hardware node address (MAC ID) setting of 9-9 (node address 63) and the data rate set to Autobaud. Each
device on a DeviceNet network must have a unique node address, which can be set to a value from 0 to 63. Most DeviceNet systems use address 0 for
the master device (Scanner). Leave node address 63 vacant for introduction of new slave devices. You can change the node address and data rate for
E300 relays by using software or by setting the hardware switches that are on the front of each unit. While both methods yield the same result, it is a
good practice to choose one method and use it consistently throughout the system.

 Loading...