14 Rockwell Automation Publication 193-IN080A-EN-P - September 2018
E300 Electronic Overload Relay
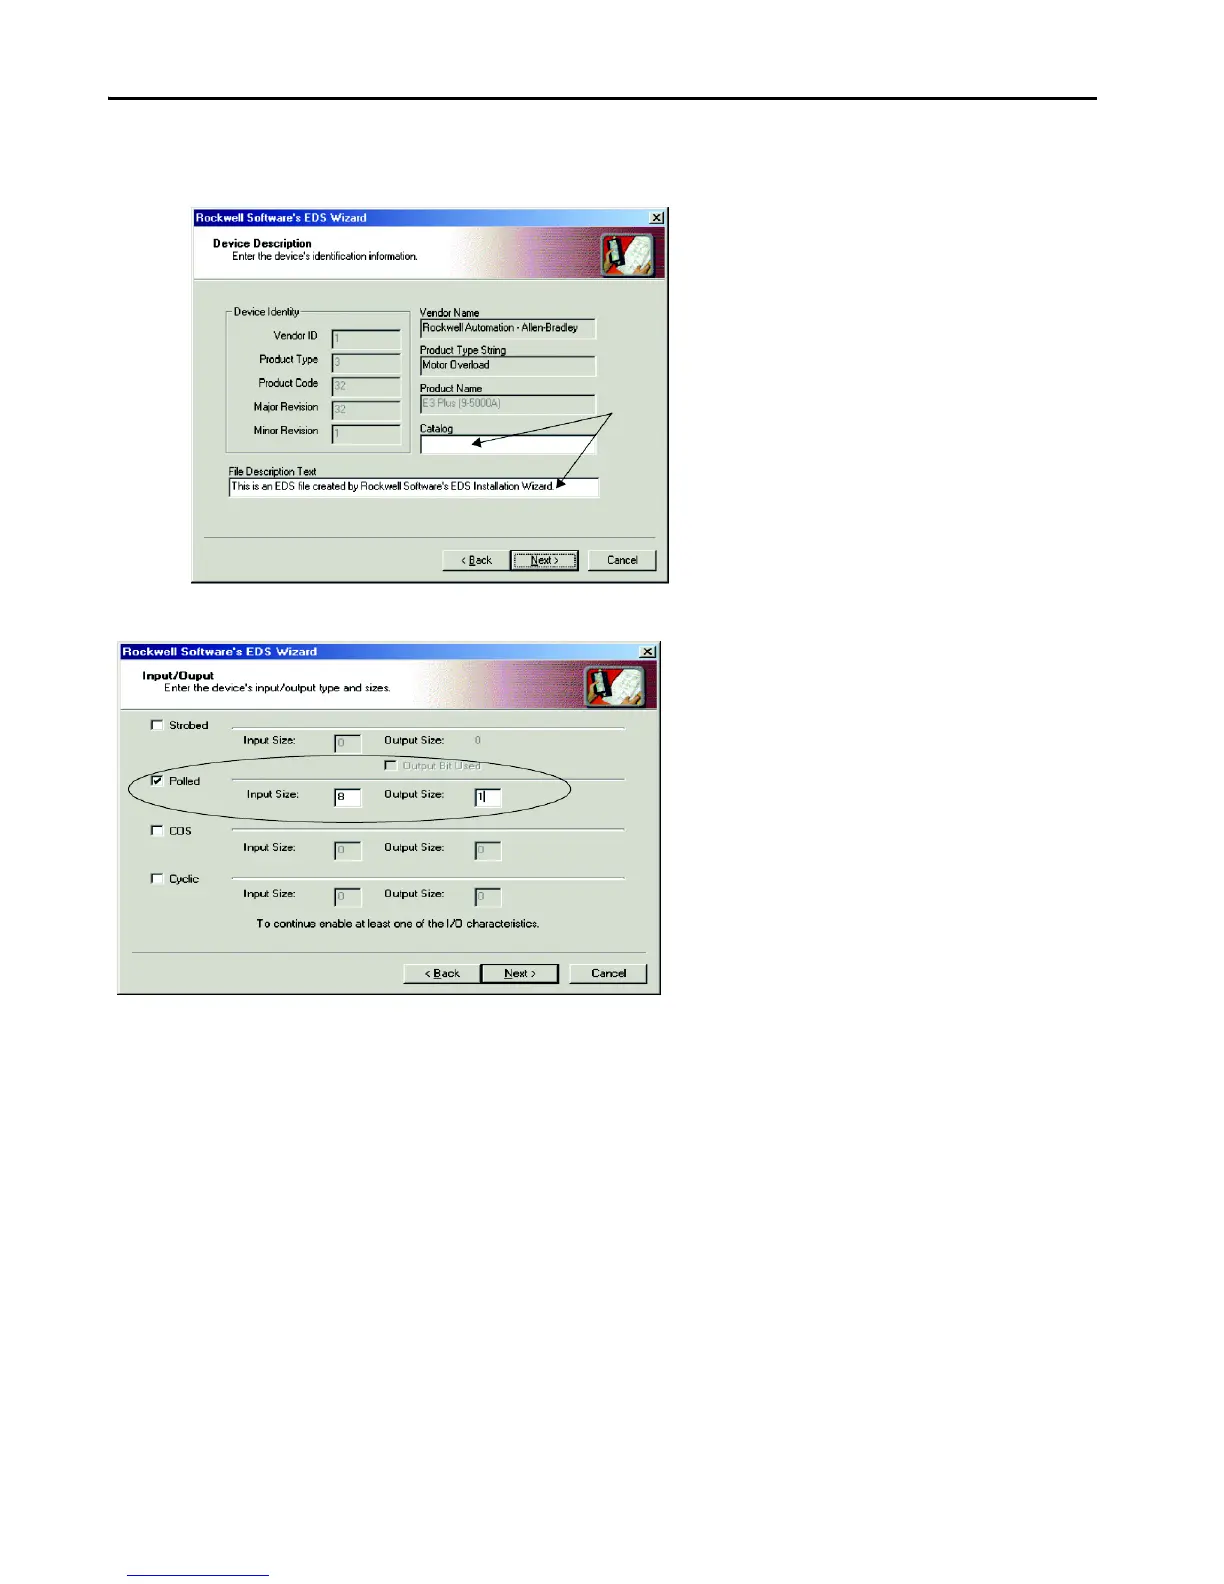
10. Select Next. The EDS Wizard screen appears.
11. (Optional) Type a value in the Catalog and File Description Text fields, then select Next.
12. On the input/output screen in the EDS Wizard, select the Polled checkbox, then enter a value of 8 for Input and 1 for Output.
13. Select Next. RSNetWorx uploads the EDS file from the E300 relay.
14. Select Next to display the icon options for the node.
15. Select the E300 relay icon, then click Change Icon.
16. Select OK after selecting the desired icon.
17. Select Next.
18. Select Next when you are prompted to register this device.
19. Select Finish.
After a short time, the RSNetWorx software updates the online screen by replacing the Unrecognized Device with the name and icon given by the
EDS file that you have registered.
 Loading...