ITA ENG FRA ESP DEU POR
6-1622192 rev. 14 21/09/2012 7/9
8. Additional variations.
8.1 Water hammer timing change.
If the water hammer or the electronic locking activation are not matched with gate characteristics, these may be modified inserting the learned instruc-
tion that follow. These instructions are carried out with a 4 button transmitter, in which all the keys have been learnt by the central unit.
To enter the learning function, the gate must be closed.
If the operation timing of water hammer does not meet gate requirements you are automating, there is
the possibility to change it through the following procedure.
The activation sequence for present learning menu is the following:
1. Close the gate by means of a step-by-step order.
2. Once the gate has stopped moving and the flashing light is off, press the UP key (the blinking light
signals reception of key by a brief flashing), then release the same.
3. Press the DOWN key (the blinking light signals reception of key by a brief flashing), then release
the same.
4. Press the UP key (the blinking light signals reception of key by a brief flashing), then release the
same.
The entering into learning menu for the water hammer timing, is confirmed by the blinking light with a 1 flash and 1 pause sequence.
By pressing theUP key, you define an increase in water hammer timing by approximately 0.1 seconds each time is pressed, where as by pressing
the DOWN key, you determine a decrease in water hammer timing by approximately 0,1 seconds each time is pushed until the default value.
To exit from learning modality, is sufficient to convey a Step-by-Step command.
The table below gives the possible variations.
UP
DOWN
If the time lag set for second wing opening not meet the requirements of the gate you are automating (as for example in the event of asymmetrical
wings), it is possible to change it through the reported procedure.
The activation sequence for present learning menu is the following:
1. Close the gate by means of a step-by-step order.
2. Once the gate has stopped moving and the flashing light is off, press the UP key (the blinking light signals reception of key by a brief flashing),
then release the same.
3. Press the DOWN key (the blinking light signals reception of key by a brief flashing), then release the same.
4. Press the DOWN key (the blinking light signals reception of key by a brief flashing), then release the same.
5. Press the UP key ((the blinking light signals reception of key by a brief flashing), then release the same.
The entering into learning menu for the electric lock activation timing with consequently wing opening time delay, is confirmed by the blinking light with
1 flash and 1 pause sequence.
By pressing the UP key, you define an increase in the electric lock activation timing (and consequent second wing opening time delay in 2 motor ver-
sions) by approximately 0.1 seconds each time is pressed, whereas by pressing the DOWN key, you determine a decrease in the electric lock activa-
tion timing by approximately 0.1 seconds each time is pushed.
To exit from learning modality, is sufficient to convey a Step-by-Step command.
8.2 Variation of electric lock timing and consequent second wing opening time delay.
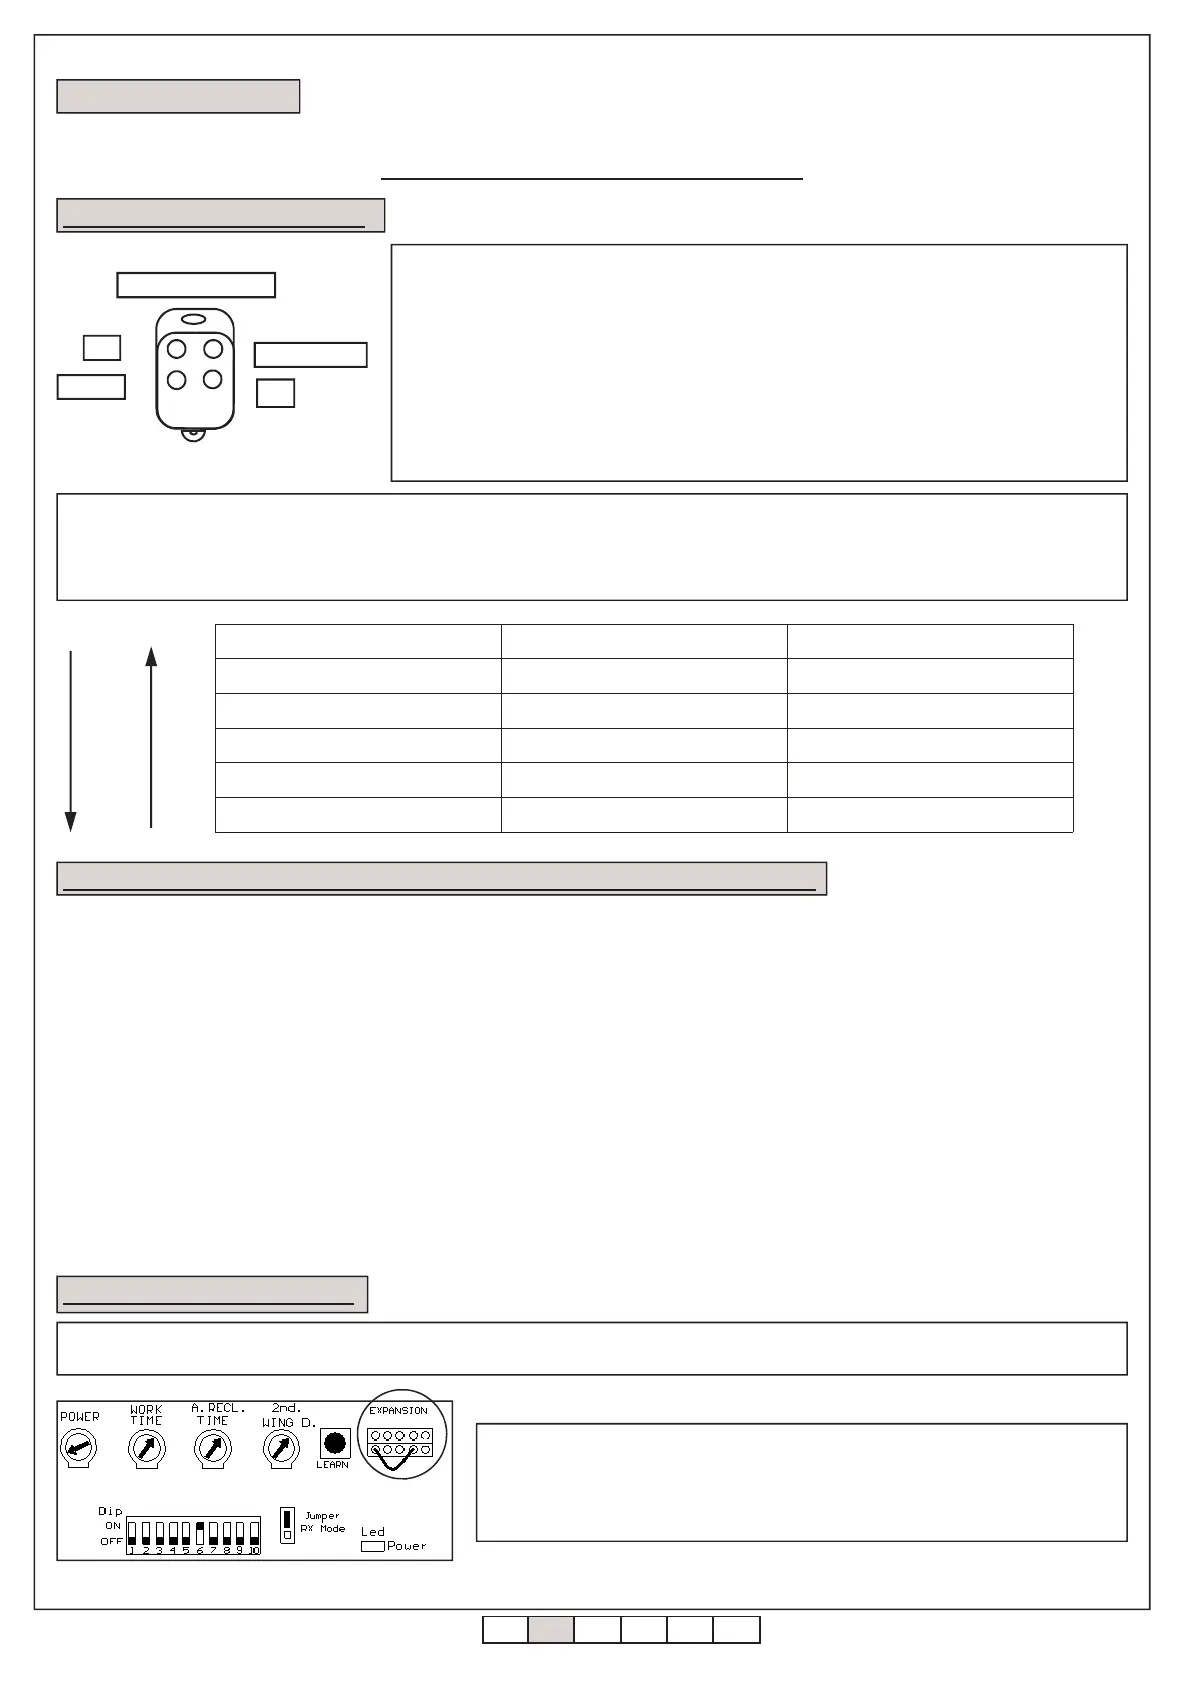
In some situations is advisable to eliminate slow-down phase of the gate; first of all, you have to take off power to control unit and consequently cut
off the short circuit bridge near the LEARN key, as noted in this figure:
Then, powered once again the switchboard. After this operation, the central unit do not
execute slow-downs (neither in opening nor in closing phase): therefore, the phase that
first occured with a reduced velocity will be realised at the same one of standard work.
Verify movement gate as it might be necessary re-calibrated. For enable again the slow-
downs, is necessary to set up the short circuit bridge.
8.3 Disactivation of slow-downs.
Learning (n° UP/DOWN) Water hammer in opening Water hammer in closing
Default Minimum Null
1 Minimum Minimum
2 Minimum+ 0,1 sec. Minimum + 0,1 sec.
4 Minimum + 0,3 sec. Minimum + 0,3 sec.
... ... ...
a
c
b
d
PP
DOWN
PEDESTRIAN
UP
TRANSMITTER
 Loading...