This document describes the Solterra Professional heat pump, a device designed for efficient heating and hot water supply. The Solterra Professional is available in two main series: H-devices, which operate up to a maximum flow temperature of 65°C, and M-devices, which operate up to a maximum flow temperature of 55°C.
Function Description
The Solterra Professional heat pump is designed to extract heat from a low-temperature source (brine or water) and transfer it to a higher-temperature heating circuit for space heating and domestic hot water. This process involves a refrigerant circuit where the refrigerant evaporates at low pressure and temperature, absorbs heat from the source, is then compressed to a higher pressure and temperature, and finally condenses, releasing heat to the heating circuit. The condensed liquid then expands to complete the cycle. This energy-saving method significantly reduces the need for environmental protection by lowering emissions and energy consumption.
The heat pump is equipped with a comprehensive control system that manages the entire heating process, including the compressor, circulating pumps, and various sensors. It can be integrated into existing heating installations and is suitable for both new constructions and renovations. The device is designed for continuous operation and features components for safe and reliable performance.
Important Technical Specifications
The Solterra Professional heat pumps come in various models, each with specific technical data. Here's a summary of key specifications across the range:
General:
- Conformity: CE
- Installation: Indoor (for M-devices) or Outdoor (for H-devices)
- Protection: IP24
Power Data:
- Heating power/COP (Coefficient of Performance): Varies significantly by model and operating conditions (e.g., B0/W35, B-5/W35). For instance, an SWP 230H at B0/W35 has a heating power of 22.8 kW and a COP of 4.0, while an SWP 820 (M-device) at B0/W35 has a heating power of 82.0 kW and a COP of 4.2.
- Power consumption: Also varies by model and conditions. For example, an SWP 230H consumes 5.7 kW at B0/W35, and an SWP 820 consumes 19.5 kW at B0/W35.
- Nominal voltage / protection heat pump: 400 / 500V (for larger models) or 400 / 40C (for smaller models).
- Maximum machine current within application limits: Varies by model, e.g., 12.1 A for SWP 230H, 29.7 A for SWP 820.
- Maximum theoretical compressor current (Imax) Klixon shift point: Varies, e.g., 17 A for SWP 230H, 32 A for SWP 820.
- Starting current direct (locked rotor) with smooth starter (installed): Varies, e.g., 99/50 for SWP 230H, 198/90 for SWP 820.
Sound:
- Sound pressure level averaged at 1m distance to the machine (free field): Typically around 55-60 dB(A).
Application Limits:
- Temperature limits heating circuit water: 20 to 65 °C (H-devices), 20 to 55 °C (M-devices).
- Temperature limits brine: -5 to 25 °C.
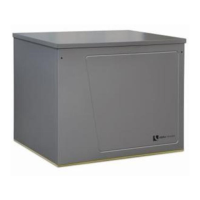
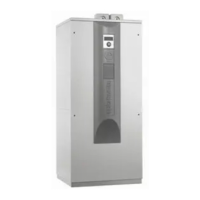
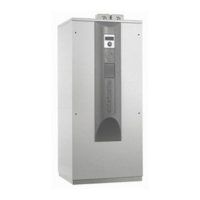
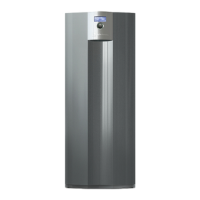
Device Dimensions:
- Dimensions, width x depth x height (without connections): 920 x 800 x 1690 mm.
- Weight including transport packing: Varies by model, e.g., 400 kg for SWP 230H, 570 kg for SWP 820.
- Refrigerating agent type / charge: Varies by model, e.g., R134a / 6 kg for SWP 230H, R407c / 12 kg for SWP 820.
Heating Circuit Water:
- Minimum / nominal / maximum water flow rate: Varies by model, e.g., 2000 / 2200 / 4500 l/h for SWP 230H, 6500 / 7300 / 15000 l/h for SWP 820.
- Pressure drop heat pump at nominal water flow rate: Typically low, e.g., 0.02 bar.
- Temperature spread B0/W35: K value varies, e.g., 8.1 K.
Heat Source (Brine):
- Minimum / nominal / maximum brine flow rate: Varies by model, e.g., 6300 / 8500 / 17000 l/h for SWP 330H, 17000 / 20800 / 25000 l/h for SWP 820.
- Pressure drop heat pump at nominal brine flow rate: Typically low, e.g., 0.02 bar.
- Minimum brine / antifreeze concentration up to: 25 / -13 %.
- Recommended brine circulation pump Grundfos type: Varies by model, e.g., CHI 8-10 (3x400V,50Hz) for SWP 330H, UPS 50-180F (3x400V,50Hz) for SWP 820.
Connections:
- Heating circuit water: 2 x 2" Außengewinde.
- Brine: 2 x 2" Außengewinde (external thread).
- Dirt filter with 2 x 2" internal thread for brine circle, to be installed before heat pump.
- Power cable: mm²/m (cable cross-section and length).
- Control line: mm²/m.
Heating Output Curves:
The manual provides detailed heating output curves (kW) and power consumption (kW) and COP (Coefficient of Performance) graphs for various models (SWP 230H, 330H, 410H, 500H, 390, 540, 670, 820) across different brine temperatures (-10°C to 30°C) and flow temperatures (35°C, 50°C, 65°C). These graphs illustrate the performance with one or two compressors running.
Pressure Drop Curves:
Pressure drop curves for both heating circuit water and brine are provided for different models (SWP 230H to SWP 500H, and SWP 390 to SWP 820). These curves help in selecting appropriate circulating pumps and ensuring efficient system operation.
Usage Features
Installation:
- Location: The heat pump must be installed on a sustainable and horizontal underground, preferably on a sound-absorbing concrete foundation. The installation room must be frost-protected and dry.
- Clearances: A minimum distance of 1600 mm on the operating side must be maintained for maintenance access.
- Connections: All pipe connections are 2" external threads (conical pipe threads). Structure-borne sound transmissions to the heating system and heat source side must be avoided using compensators. The connection point on the heat pump must be secured against torsion with a spanner to avoid damage to the copper pipe on the condenser side.
- Electrical Installation: Must be carried out by competent persons in accordance with all safety and IEE regulations. The cables must be led through the cable entry points on the device rear. The terminal strips are situated in the central control room.
Operation:
- Controller: The device is equipped with a controller (e.g., Luxtronik) that manages and monitors the heat pump's operation.
- Heating Circuit Water Supply: The heating system must be flushed before connecting the heat pump to prevent contamination. The minimum heating circuit water flow rate depends on the heating output of the heat pump.
- Buffer Storage: A buffer storage is needed to ensure minimum run-time of the heat pump and to limit the number of heat pump timings.
- Circulating Pump: The heating circuit water and sanitary water circulating pumps must be graded. The use of variable speed pumps is not permitted.
- Sanitary Water Heating: Domestic water heating with the heating pumps takes place with a second heating circuit run in parallel to the heating circuit.
Safety Regulations:
- The manual emphasizes the importance of reading the entire instruction manual before installation and operation.
- Only qualified personnel should perform installation, maintenance, and repair work.
- Electrical circuits must be switched off before opening the device.
- The use of a heat pump plant must be notified to your local energy supply company.
- The heat pump must not be inclined by more than 45° during transportation.
- After purging the evaporator with a chemical purging agent, the neutralization of remainders as well as intense water rinsing is absolutely necessary.
- Never treat the device surface with scouring, acidic or corrosive agents.
Maintenance Features
Start-up:
- The heat pump must be started by the heat pump controller, and the start-up is to be carried out by a competent person.
- A checklist for start-up includes verifying installation and assembly, electrical supply, isolation valves, and venting of heating circuits and brine circuits.
Maintenance:
- The device should be cleaned with a damp cloth and a mild cleansing agent.
- Never use scouring, acidic, or corrosive agents.
Trouble Shooting:
- The diagnostic program within the heat pump controller will establish errors.
- Further details regarding diagnosis and troubleshooting can be found in the heat pump controller instruction manual.
Assembly Controller:
- The operating element is stored on the intermediate plate in the device during transport. The appropriate cable is stored top right and is already clipped on the circuit board.
- For securing the screen, no tools are required. It can be attached at the front plate without a single screw.
- The screen can be removed by pulling the cable outside through the nozzle and close the front plate. The lock-nozzles must be released in reverse, i.e., top-down. The lower lock-nozzles are very tight and must be released by pressing firmly against the centre of the screen to prevent them from breaking.