EasyManua.ls Logo

Alpha WSER UNIVERSAL MOTOR - User Manual

Alpha WSER UNIVERSAL MOTOR
3 pages
Print Icon
To Next Page IconTo Next Page
Loading...
WSER UNIVERSAL MOTOR GUIDE p1
Protection Index: IP44
Up to 15 remotes (or channels) may be assigned to each motor
Thermal protection will engage after 4 minutes of continuous running
Power: 240V/50Hz
M.ETHOD A
MB.ETHOD
Only works for the first remote
assigned to the motor
You can now use the remote
to control the motor.
You can now use the remote
to control the motor.
Press the UP and DOWN buttons
simultaneously, then release.
Press the UP and DOWN buttons
simultaneously, then release.
Turn power on, the motor
will vibrate.
Press the STOP button once,
the motor will vibrate.
Press the STOP button once,
the motor will vibrate.
1
1
1
1
1
1
1
1
Press the red button on the
motor for 1 second.
METHOD C. (Use Method C, if Method A or B do not work) C 3an only be used if you cut and restore power to the motor 3 times. You must allow
seconds before restoring power each time and you must allow the motor to vibrate properly each time. After the third cycle, you may assign the remote.
Can be used at any time.
AC Power
antenna
neutral wire ( )blue
ground wire ( )green
live wire (b )rown
AC Power
240V
up
stop
down
1
1
1
1
6
1
1
1
1
(motor moves a few millimeters at a time unless button held down for 3 secs)
Pr ss the STOP button once.e
Press the P button once,U
the tor will vibrate.mo
The tor is now in “step bymo
step” ode.m
Pr ss the UP and DOWN buttonse
simultaneously, then release.
Pr sstheSTOPbutton6e
times.
Press the UP and DOWN buttons
simultaneously, then release.
Press the DOWN button
once, the motor will vibrate.
The UP and DOWN directions of
the motor have been reversed.
Hold the red button on the motor down for 3 seconds, The motor will vibrate.
The UP and Down directions of the
motor have been reversed.
Method A
Method B
1. TECHNICAL SPECIFICATIONS
2. WIRE CONNECTIONS
3. ASSIGNING A REMOTE TO A MOTOR (you have 10 seconds to complete the task)
4. CHANGING THE MOTOR’S DIRECTION
5. TURN ON “STEP BY STEP” MODE
ALPHA SUPPORT PHONE (02) 4355 4775
Question and Answer IconNeed help?

Do you have a question about the Alpha WSER UNIVERSAL MOTOR and is the answer not in the manual?

Summary

Technical Specifications

Wire Connections

Assigning a Remote to a Motor

Method A

Procedure for assigning the first remote to a motor using AC power connection.

Method B

Procedure for assigning remotes at any time via button presses.

Method C

Advanced method for remote assignment involving power cycling.

Changing the Motors Direction

Method A

Steps to reverse motor direction using the red button on the motor.

Method B

Steps to reverse motor direction using button sequences on the remote.

Turn On Step By Step Mode

Turn Off Step By Step Mode

Setting Limits

Setting the Top Limit

Procedure to set the upper limit position for the motor, moving the blind to the desired position.

Setting the Bottom Limit

Procedure to set the lower limit position for the motor, moving the blind to the desired position.

Deleting Limits

Deleting the Top Limit

Procedure to remove the previously set top limit position.

Deleting the Bottom Limit

Procedure to remove the previously set bottom limit position.

Assigning an Extra Remote

Deleting a Remote or Channel

Method A: Delete Individual Remote

Procedure to delete the specific remote or channel currently in use.

Method B: Delete All Remotes

Procedure to delete all remotes currently assigned to the motor.

Setting and Changing Third Limit

Setting the Third Limit

Procedure to set a midway limit position between top and bottom limits.

Changing the Third Limit

Procedure to modify an existing midway limit position.

Important Notes and Tips

Overview

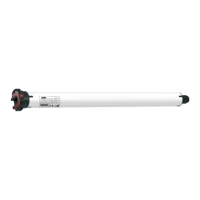
This document provides a comprehensive guide for the Alpha WSER Universal Motor, detailing its technical specifications, usage, and maintenance.

Function Description

The Alpha WSER Universal Motor is designed for various applications, likely involving automated movement such as blinds or awnings. It can be controlled remotely and offers features like setting movement limits, adjusting direction, and operating in a "step-by-step" mode for precise control. The motor also includes a protective measure for awnings when integrated with specific Alpha sensors.

Important Technical Specifications

  • Power: 240V/50Hz
  • Protection Index: IP44
  • Remote Control: Up to 15 remotes (or channels) can be assigned to each motor.
  • Thermal Protection: Engages after 4 minutes of continuous running.
  • Ambient Operating Temperature: -10°C to +55°C.
  • Wiring: Includes neutral (blue), ground (green), and live (brown) wires for AC Power 240V, along with an antenna.

Usage Features

Assigning a Remote to a Motor

  • Method A (First Remote Only): Turn power on. When the motor vibrates, press the UP and DOWN buttons simultaneously, then release. Press the STOP button once. The motor will vibrate, and the remote can then control it.
  • Method B (Any Time): Press the red button on the motor for 1 second. Press the UP and DOWN buttons simultaneously, then release. Press the STOP button once. The motor will vibrate, and the remote can then control it.
  • Method C (Troubleshooting): If Methods A or B fail, cut and restore power to the motor 3 times, allowing 3 seconds between each power restoration and ensuring the motor vibrates properly each time. After the third cycle, the remote can be assigned.

Changing the Motor's Direction

  • Method A: Hold the red button on the motor down for 3 seconds until it vibrates. The UP and DOWN directions will be reversed.
  • Method B: Press the UP and DOWN buttons simultaneously, then release. Press the STOP button 6 times. Press the DOWN button once. The motor will vibrate, and the UP and DOWN directions will be reversed.

"Step by Step" Mode

  • Turn On: Press the UP and DOWN buttons simultaneously, then release. Press the STOP button once. Press the UP button once. The motor will vibrate, and it will be in "step by step" mode.
  • Turn Off: Press the UP and DOWN buttons simultaneously, then release. Press the STOP button once. Press the DOWN button once. The motor will vibrate, and it will return to normal operation.

Setting Limits

  • Top Limit: Move the blind to the desired top position. Press the UP and DOWN buttons simultaneously, then release. Press the STOP button twice. Press the UP button once. The motor will vibrate, and the top limit will be set.
  • Bottom Limit: Move the blind to the desired bottom position. Press the UP and DOWN buttons simultaneously, then release. Press the STOP button twice. Press the DOWN button once. The motor will vibrate, and the bottom limit will be set.
  • Third Limit (Midway Position): Move the blind to the desired midway position. Press the STOP button 4 times. The motor will vibrate. Hold down the STOP button for 2 seconds to send the motor to the third limit position.
  • Changing Third Limit: Move the blind to the new desired midway position. Press the STOP button 4 times. The motor will vibrate. Hold down the STOP button for 2 seconds to send the motor to the new third limit position.

Deleting Limits

  • Deleting Top Limit: Press the UP and DOWN buttons simultaneously, then release. Press the STOP button 4 times. Press the UP button once. The motor will vibrate, and the top limit will be deleted.
  • Deleting Bottom Limit: Press the UP and DOWN buttons simultaneously, then release. Press the STOP button 4 times. Press the DOWN button once. The motor will vibrate, and the bottom limit will be deleted.
  • Note: The third limit is automatically deleted if either the top or bottom limits are deleted.

Assigning an Extra Remote (or Channel)

Using an original remote: Press the UP and DOWN buttons on the original remote simultaneously, then release. Press the STOP button 8 times on the original remote. The motor will vibrate. On the new remote, press the UP and DOWN buttons simultaneously, then release. Press the STOP button once. The motor will vibrate, and the new remote can now control it.

Deleting a Remote (or Channel)

  • Method A (Individual Remote/Channel): Press the UP and DOWN buttons on the remote simultaneously, then release. Press the STOP button 7 times. Press the UP button once. The motor will vibrate, and that specific remote/channel will be deleted.
  • Method B (All Remotes): Press the UP and DOWN buttons on any remote simultaneously, then release. Press the STOP button 6 times. Press the UP button once. The motor will vibrate, and all assigned remotes will be deleted.

Maintenance Features

Handy Tips

  • Awning Protection: If used with Alpha RS001 wind-light sensors or RS005 motion sensors, the motor will automatically close the awning if it doesn't receive radio communication from the sensor for 35 minutes after opening. This indicates a potential problem or low sensor battery.
  • Limit Setting Precision: Always roll the blind down and up before setting the top limit to prevent changes in limit position due to blind tension. Setting the bottom limit first can also prevent this.
  • Button Pressing: When pressing UP and DOWN simultaneously during setup, be precise (should sound like one button click). For other button presses, a half-second press is usually sufficient, allowing 1 second between presses. Avoid holding buttons down unless specifically instructed.
  • Error Correction: If an error occurs during setup, stop and allow 10 seconds for the motor to time out, then try again.
  • Multi-channel Remotes: Ensure the correct channel is selected before assigning it to a motor to avoid common mistakes.

General Announcements

  • The RE101 remote is used as an example, but all Alpha remotes are compatible.
  • Strong local RF levels may affect setup functions; repeat the process if a step fails.
  • Proceed slowly and carefully through the setup process.
  • These motors and accessories are not toys and should not be handled by children.
  • Alpha products are subject to change without notice.

Alpha WSER UNIVERSAL MOTOR Specifications

General IconGeneral
BrandAlpha
ModelWSER UNIVERSAL MOTOR
CategoryEngine
LanguageEnglish