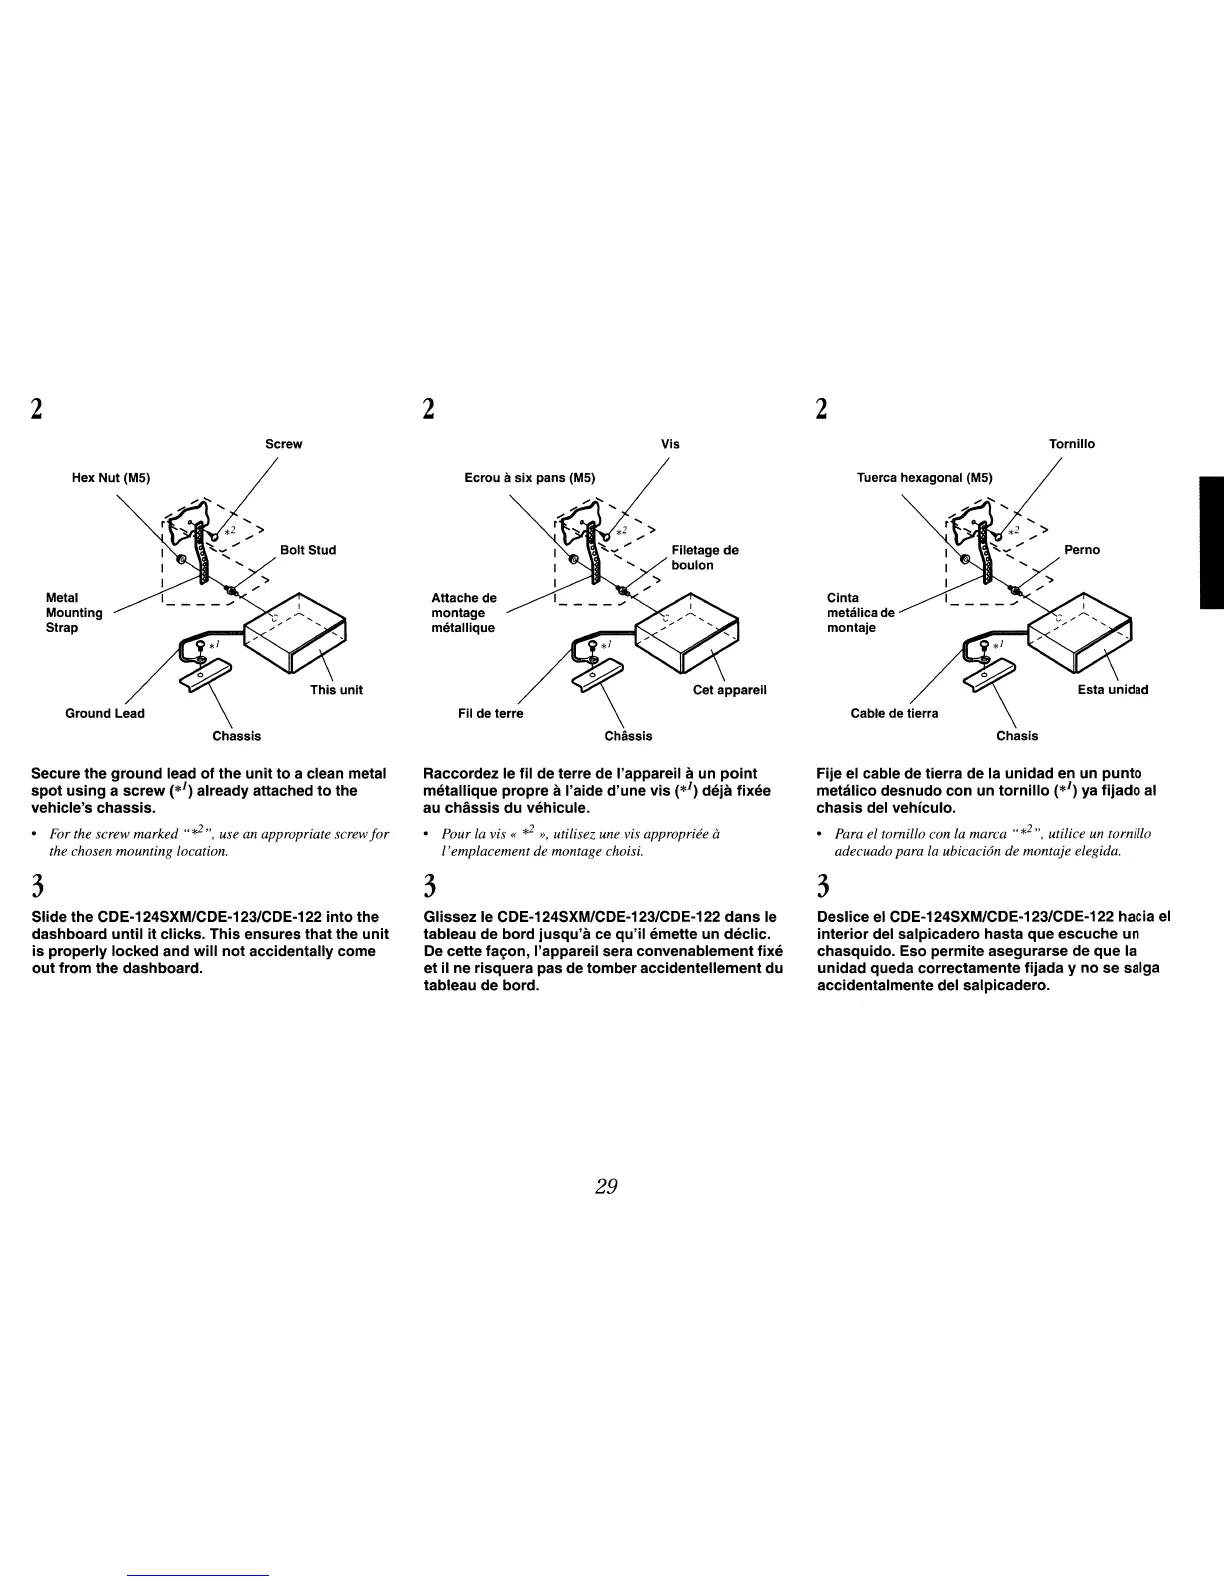
2
Screw
Hex Nut (M5)
Metal
Mounting
Strap
Chassis
Secure the ground lead
of
the
unit
to
a clean metal
spot using a screw
(*J)
already attached
to
the
vehicle's chassis.
• For the screw marked
"~",
use an appropriate screw
for
the chosen mounting Location.
3
Slide the CDE·124SXM/CDE·123/CDE-122 into the
dashboard
until
it
clicks. This ensures that the unit
is
properly locked and will not accidentally come
out
from the dashboard.
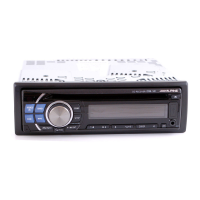
2
Vis
Ecrou it
six
pans (M5)
Attache de
montage
metallique
Fil de terre
Chassis
Raccordez
Ie
fil de terre de I'appareil it un
point
metallique propre a I'aide d'une vis
(*J)
deja fixee
au chassis du vehicule.
• Pour la vis «
~
",
utilisez une vis appropriee a
l'
empLacement de montage choisi.
3
Glissez
Ie
CDE·124SXM/CDE·123/CDE-122
dans
Ie
tableau de bord jusqu'a ce qu'il emette un declic.
De
cette
fa~on,
I'appareil sera convenablement fixe
et
iI ne risquera pas de tomber accidentellement du
tableau de
bordo
29
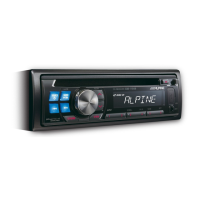
2
Tornillo
Tuerca hexagonal (M5)
Cinta
metalicade
montaje
Cable de tierra
Chasis
Fije el cable de tierra de la unidad en un punto
metalico desnudo con un tornillo
(*J)
ya
fijado al
chasis del vehiculo.
• Para el tornillo con
La
marca
"*2,,,
utiLice un tornillo
adecuado para
La
ubicacion de montaje eLegida.
3
Deslice el CDE·124SXM/CDE-123/CDE-122 hacia el
interior del salpicadero hasta que escuche
un
chasquido. Eso permite asegurarse de que la
unidad queda correctamente fijada y
no
se salga
accidentalmente del salpicadero.