Secure the ground
lead
of
the
unit
to
a
clean metal
spot
using a screw
(*
1
)
already
attached
to
the
vehicle's
chassis. Connect
all
the
leads
of
the
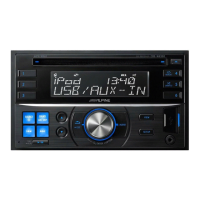
CDE-W235BT according
to
details
described in the
CONNECTIONS
section.
•
• For the screw marked
"~
",
use an appropriate screw
for
the chosen mounting location.
3
Slide
the CDE-W235BT into the dashboard
until
it
clicks. This ensures that the
unit
is
properly locked
and
will
not
accidentally
come
out
from the
dashboard.
Raccordez le fil
de terre de
l'appareil a
un point
metallique
propre
a l'aide
d'une
vis
(*
1
)
deja fixee
au
chassis du vehicule.
Raccordez
tous
les fils du
CDE-W235BT de
Ia
maniere decrite
a
Ia
section
RACCORDEMENTS.
• Pour
la
vis accompagnee du symbole
«
~
»,
procurez-vous une vis appropriee
a
['emplacement de
montage choisi.
3
Faites glisser le
CDE-W235BT dans
le tableau
de
bord jusqu'a ce
qu'il
s'enclenche.
De
cette
fa~on,
l'appareil sera convenablement
fixe
et ne risquera
pas de tomber
accidentellement
du
tableau
de
bord.
29
Fije
el cable
de tierra de
Ia
unidad
en
un punto
metalico
limpio
utilizando
un
tornillo
(*
1
)
ya
sujeto
al
bastidor
del vehlculo.
Conecte todos
los cables
del
CDE-W235BT siguiendo
las indicaciones de
Ia
secci6n CONEXIONES.
•
En el caso del tornillo marc ado con
"*
2
",
utilice
un
tornillo adecuado
para
la
ubicaci6n
de
montaje elegida.
3
Deslice el CDE-W235BT hacia
el
interior del
salpicadero hasta
que
escuche un chasquido. Eso
permite asegurarse
de
que
Ia
unidad queda
correctamente fijada y no se saldra
accidentalmente
del salpicadero.

 Loading...