EasyManua.ls Logo

Alpine i509-WRA-JK User Manual

Alpine i509-WRA-JK
114 pages
To Next Page IconTo Next Page
Page #1 background imageLoading...
Page #1 background image
Jeep Wrangler
i509-WRA-JK 20220404v1
1/22
Jeep Wrangler
i509-WRA-JK
9” Restyle Installation Manual
Model: Wrangler JK
Model Year: 2011-2018
Note:
Design and specifications are subject to change without notice for improvement.
To Ensure Safe Use, Always Follow These Precautions
The installation of this product requires specialized skills and experience. We recommend that you have the
product installed by an Alpine authorized dealer.
Before you use this product, be sure to carefully read this installation manual and the separate user's manual
so that you can use the product correctly. Alpine Electronics bears no responsibility for problems that arise as
a result of failure to follow the instructions in the manuals.
This manual includes a number of symbols that are intended to help you use the product safely, to prevent
harm to you and others, and to protect against damage to property. These symbols and their meanings are
listed below. Make sure you fully understand these symbols before you begin reading the main text.
Explanations of Injury and Damage That May Result from Incorrect Use
Warning
Ignoring the content marked by this indication and using the product incorrectly is
expected to lead to death or serious injury.
Caution
Ignoring the content marked by this indication and using the product incorrectly is only
expected to lead to injury or property damage.
Jeep
Model Year
Wrangler JK 2011 - 2018
* The specified vehicles have been tested and have met compatibility specs at the time of testing. Compatibility is
not guaranteed if the manufacturer has made production changes to the listed vehicles above.
Warning: Before you begin wiring, remove the ground wire from the negative
terminal of the battery. Failing to do so can lead to electric shock, injury or damage
to equipment.
Introduction
Congratulations on purchasing the i509-WRA-JK. This installation manual is designed to take you through the
step-by-step installation of the i509-WRA-JK into a 2011-2018 Jeep Wrangler. Please familiarize yourself with
the owners manual and if you still have additional questions please call 1-800-TECH-101.

Table of Contents

Question and Answer IconNeed help?

Do you have a question about the Alpine i509-WRA-JK and is the answer not in the manual?

Alpine i509-WRA-JK Specifications

General IconGeneral
BrandAlpine
Modeli509-WRA-JK
CategoryAutomobile Accessories
LanguageEnglish

Summary

Introduction and Precautions

Product Overview

Manual for i509-WRA-JK installation in 2011-2018 Jeep Wrangler.

Notes & Precautions

Emphasizes reading manuals, understanding symbols, and professional installation.

Injury and Damage Explanations

Defines Warning and Caution symbols for potential harm or damage.

Types of Precautions

Forbidden Actions

Indicates actions that are forbidden and must not be performed.

Mandatory Actions

Indicates actions that are mandatory and must be performed.

Tools and Accessories

Tools Required

List of tools necessary for installation.

Installation Kit Parts

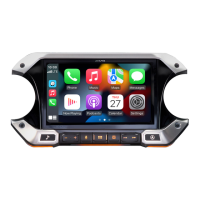
Components included in the installation kit for fitting the unit.

Accessory List Details

Head Unit Box Parts (i509)

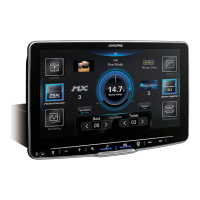
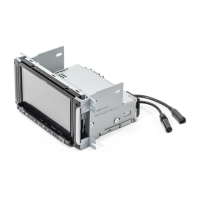
Components included within the main i509 head unit packaging.

iDatalink Maestro Box Parts

Components related to the iDatalink Maestro module for integration.

Programming the iDatalink Maestro Module

Install Weblink Plug-in & Register Account

Steps to download plug-in and create a Weblink account.

Connect Module & Log In

Physically connect the Maestro module and log into the Weblink account.

Program Your Module

The actual process of programming the Maestro module for the vehicle.

Component Locations and GPS Installation

Module and Microphone Placement

Shows recommended locations for iDatalink Maestro module and microphone.

GPS Antenna Installation

Instructions for mounting the GPS antenna on the driver side roof frame.

Factory Unit Disassembly Process

Essential Disassembly Steps

Disconnecting battery, removing panels, switches, radio, and bracket.

Installation Instructions - Part 1

Dash Panel Modification & Vent Mounting

Trimming the dash panel and mounting vents onto the new bezel.

Microphone & OBDII Connection

Mounting the microphone and connecting the OBDII port.

Maestro Module & Harness Connection

Attaching the Maestro module to the main wiring harness.

Installation Instructions - Part 2

Panel Attachment & Bracket Mounting

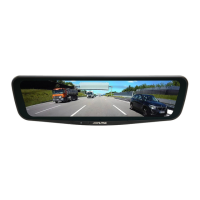
Securing the modified panel and attaching display monitor brackets.

Display & Source Unit Assembly

Connecting display/source units and routing USB cables.

Uconnect Removal & SiriusXM Connection

Uconnect Module Removal

Steps to remove climate panel, disconnect connector, and secure module.

SiriusXM Module Connection

How to integrate the antenna connection for SiriusXM.

Mounting Brackets and Bezel Wiring

Bracket Adjustment Guidance

Notes on mounting tolerance and adjusting rear/side brackets.

Exploded-View Diagram

Diagram showing assembly of bezel, source unit, and brackets.

Bezel Wiring Diagram

Harness Connections Overview

Diagram showing harness connections within the bezel.

Main Wiring Diagram

Vehicle & Maestro Connections

Diagram showing connections to vehicle, Maestro module, and transmission types.

HDMI Usage

iPhone HDMI Connection

Requirements for iPhone HDMI use, including adapters and USB power.

Android HDMI Connection

Instructions for Android HDMI connection, including Miracast options.

Wiring Diagram Details

Main Harness & Vehicle Connections

Illustrates main harness connections to vehicle inputs/outputs.

Specific Vehicle Connections

Shows connections for Maestro module, transmission type, and camera inputs.

Wire Harness Pin Outs

Primary Harness Pin Assignments

Pin details for Radio, Camera, Power, Key, and iDatalink harnesses.

Speaker & Auxiliary Connections

Pin assignments for speakers, AUX power, and audio input.

Connection Examples

HCE-TCAM1-WRA Camera Connection

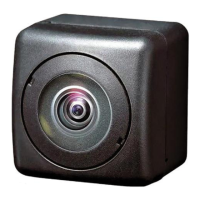
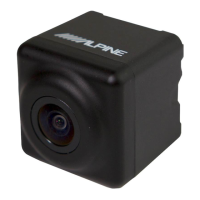
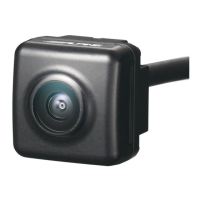
How to connect the HCE-TCAM1-WRA rear view camera.

External Amplifier Connection

Diagram showing RCA and remote turn-on connections for amplifiers.

Dash Cam Connection

DVR-C320R/C310R Dash Cam Connection

Illustrates connections for the dash cam hardwiring cable.

Steering Wheel Configuration

Button Functionality Overview

Maps steering wheel buttons to functions, press once and hold.

Advanced Camera Feature Setup

Camera Setup Navigation & Assignment

Steps to navigate camera setup and assign camera types.

Camera 2 Configuration

Configuring the second camera input and its format.

Initial Setup & Troubleshooting

Initial Setup Procedures

Steps for turning on unit, parking brake sequence, and vehicle info.

Troubleshooting Common Issues

Solutions for HDMI, iDatalink serial, and RCA output problems.

Troubleshooting Guide

Headunit & Settings Menu Issues

Resolving problems with headunit power and accessing settings.

Audio & Connectivity Problems

Troubleshooting audio, CarPlay/Android Auto, and phone recognition issues.

Camera & Navigation Issues

Solutions for rear camera activation and navigation positioning errors.

About/Software Update & Initialization

Product Information & Software Update

Checking product details and updating software via USB.

System & Sound Settings Initialization

Restoring factory settings for sound and the entire system.

Operating Instructions

Precautions & Getting Started

Safety warnings, initial setup, and location of controls.

Device & Function Setup Overview

Introduction to device and function setup menus.

Device Setup

Device List Management

Viewing, connecting, and deleting paired Bluetooth/Wi-Fi devices.

Function Setup

Smartphone Integration Setup

Configuration for Apple CarPlay, Android Auto, and phone settings.

Audio Source Setup

Settings for Radio, SiriusXM, USB, iPod, and Auxiliary audio sources.

Video & HDMI Setup

Configuration for video sources, HDMI, and display settings.

System Setup

Audio & Vehicle Settings

Adjusting sound feedback, microphone, clock, language, and vehicle type.

Display & Installation Setup

Customizing home screen, lighting, and checking installation status.

Sound Setup

Audio Enhancement Settings

Adjusting Media Xpander, Equalizer, and Bass Engine for sound quality.

Speaker & Time Correction Settings

Configuring speaker output levels, balance, and time correction.

Sound Setup - Advanced Options

Crossover & Subwoofer Settings

Configuring crossover frequencies, slopes, and subwoofer operation.

Defeat & Tone Adjustment

Disabling sound features and adjusting bass/treble levels.

Apple CarPlay (Optional)

Accessing Apple CarPlay

Steps to enable and access Apple CarPlay functionality.

Voice Recognition with Siri

Using Siri via voice commands with Apple CarPlay.

Android Auto (Optional)

Android Auto Overview & Activation

Introduction to Android Auto and steps to activate the app.

Voice Recognition with Google Assistant

Using Google Assistant via voice commands with Android Auto.

Radio/HD Radio™/RBDS Operation

HD Radio Technology & Basic Operation

Explanation of HD Radio and how to operate the radio tuner.

Radio Station Presets and Tuning

Station Presets & Tuning Modes

Manually and automatically storing stations, and tuning modes.

HD Radio Features

Using multicast channels, forced analog, and ballgame mode.

USB Flash Drive Operations

USB Audio & Video Playback

Playing music and video files from a USB flash drive.

Feature Logos Explanation

Explains logos related to HD Radio sound quality and features.

USB Playback Controls

Basic Playback Functions

Basic playback functions like repeat, shuffle, and search for USB audio.

USB Video Operations

USB Video Interface & Controls

Overview of the USB video playback screen and controls.

Video Display & Audio Switching

Changing display modes and switching audio tracks for video.

iPod Mode Operations

iPod Interface & Playback Controls

Overview of the iPod mode screen and basic playback functions.

Music File Search & Playback

How to search for and play music files from an iPod.

iPod Playback Modes

iPod Repeat & Shuffle Play

Selecting repeat and shuffle modes for iPod playback.

SiriusXM Satellite Radio Operations

SiriusXM Tuner Operation & Interface

Overview of operating the SiriusXM tuner and its main screen.

Channel Reception & Selection

How to receive and select SiriusXM channels.

SiriusXM Channel Management

Direct Channel Tuning & Category Browsing

Methods for direct channel selection and browsing by category.

Presetting & Storing Channels

Saving favorite SiriusXM channels for easy recall.

SiriusXM Listening Features

Replay & Listening Features

Using replay function and listening to recommended/related channels.

Setting Notifications & Listener Settings

Managing notifications and customizing listener preferences.

SiriusXM History and Reset

Viewing Listening History & Resetting

Accessing history, resetting recommendations and settings.

Bluetooth Operation

Bluetooth Setup & Hands-free Control

Initial Bluetooth setup and managing hands-free phone calls.

Phone Call Operations

Making calls from recent list, phone book, or keypad.

Bluetooth Phone Book Management

Phone Book Synchronization & Deletion

Synchronizing and deleting phone book entries.

Bluetooth Audio Operations

Bluetooth Audio Playback Controls

Basic playback functions for Bluetooth audio.

Bluetooth Repeat & Shuffle Play

Selecting repeat and shuffle modes for Bluetooth audio.

Searching for Bluetooth Files

Using search functions to find specific Bluetooth audio files.

Bluetooth Device Management

Connecting & Disconnecting Bluetooth Devices

Registering, connecting, and disconnecting Bluetooth devices.

Switching Bluetooth Devices

Changing the active Bluetooth connection among registered devices.

Auxiliary Device Operations

Operating Auxiliary Devices & Display Modes

Procedure for operating AUX devices and switching video display modes.

Camera Operations

Rear Camera Operation & Guide Display

Displaying rear camera view and enabling/disabling guide lines.

Camera Adjustments

Camera Display Adjustments

Adjusting caution location, hitch guide, and rear camera image patterns.

Front Camera Operation & Guide Display

Displaying front camera view and adjusting its guide lines.

Side Camera Operations

Side Camera Operation & Guide Display

Displaying side camera view and adjusting its guide lines.

iDataLink Operation

Audio Interrupt & iDataLink Mode Access

Handling audio interrupts and accessing iDataLink mode for vehicle info.

iDataLink Function Screens

Climate, Gauges, & Parking Sensor Screens

Viewing climate, gauges, and parking sensor data via iDataLink.

Vehicle Information Screen

Checking vehicle status like tire pressure and battery life.

Dash Cam (Drive Recorder) Operation

Dash Cam Operation & Setup

How to view and operate the Dash Cam from the unit.

Information - Software and Formats

Software Update & Supported Formats

Info on updating software and details of supported audio/video formats.

Information - Audio File Formats

Audio File Format Explanations (MP3, WMA)

Explanations of MP3 and WMA audio formats.

Information - File Creation and Playback

Audio File Format Explanations (AAC, FLAC, WAV, APE)

Explanations of AAC, FLAC, WAV, and APE audio formats.

File Creation & Playback Guidelines

Guidance on creating and playing back audio files from USB.

Information - File Specifications

Supported Sampling Rates & Bit Rates

Technical specifications for audio file sampling rates and bit rates.

ID3 Tags & File Playback

How ID3 tags are displayed and guidelines for playing back various file types.

Information - Media and File Systems

Media Support & File Systems

List of supported media types and file systems for USB drives.

Terminology

Audio Compression Terms

Definitions of bit rate, sampling rate, encoding, tag, and root folder.

In Case of Difficulty

Basic Troubleshooting Steps

Solutions for no function/display, no sound, or screen issues.

Radio & USB Audio Troubleshooting

Solutions for radio reception and USB audio issues.

In Case of Difficulty - Advanced Issues

Seek Mode & Broadcast Noise Issues

Troubleshooting for station tuning in seek mode and noisy broadcasts.

System & Message Handling

Guidance for system errors and handling displayed messages.

In Case of Difficulty - Connectivity Errors

Connectivity Errors (Audio/Visual/SiriusXM/HDMI)

Troubleshooting for USB, SiriusXM, and HDMI connection errors.

Specifications - Tuners and Monitor

Monitor & Tuner Specifications

Technical specs for monitor, FM, AM, and HD Radio tuners.

Specifications - Connectivity

USB, HDMI, Bluetooth, & GPS Specifications

Technical specs for USB, HDMI, Bluetooth, and GPS.

Specifications - General and Size

Wi-Fi, General, & Size Specifications

Technical specs for Wi-Fi, general, and chassis/display dimensions.

Installation and Connections

Installation Safety Warnings & Precautions

Critical safety warnings and general precautions for installation.

Expert Installation & Part Usage

Emphasizes expert installation and using specified accessory parts.

Installation Guidance

Wiring Arrangement & Location Considerations

Guidelines for wiring routing and choosing installation locations.

Installation Precautions

Battery Disconnection & Wiring Safety

Importance of battery disconnection and correct wiring for safety.

System Connections & Speaker Terminals

Advice on system connections and proper speaker terminal connection.

Unit Installation

Unit Mounting & Air Circulation Caution

Instructions for mounting the unit and avoiding fan blockage.

Installation Angle Guidelines

Recommended installation angles for optimal performance.

Antenna and HDMI Cable Installation

GPS Antenna & HDMI Cable Mounting

Instructions for mounting the GPS antenna and securing HDMI cables.

Display Position Adjustment (iLX-F509/iLX-F511)

How to adjust the front-back and vertical position of the display.

Mounting Bracket Installation Examples

Mounting Bracket Installation Examples

Examples of installing the unit using mounting brackets.

Connection Diagrams

Connection 1 Diagram

Diagram illustrating the first set of unit connections to various components.

Connection Diagrams - Part 2

Connection 2 Diagram

Diagram illustrating the second set of unit connections to various components.

AV/RCA Interface Cable Wiring

Wiring conventions for the 4-pole mini AV plug to 3-RCA cable.

External Device Connections

External Device & Amplifier Connections

Diagrams for connecting external devices and amplifiers.

Camera and Dash Cam Connections

Camera & Dash Cam Connections

Wiring diagrams for connecting cameras and a dash cam.

Related product manuals