Do you have a question about the Alpkit ORDOS 2 and is the answer not in the manual?
Tent is not fireproof; avoid open flames, heat sources, and cooking inside.
Ensure adequate ventilation to prevent suffocation and anchor tent securely.
Choose campsites wisely and keep exits clear of obstructions.
Keep hot appliances away from tent walls and supervise children.
Lay out inner tent, peg corners, assemble poles, and position over inner.
Attach outer tent, secure toggles, velcro tabs, corner tabs, and tension guylines.
Use optional footprint for protection or as a tarp tent by replacing the inner.
Clean and dry tent after use; spot clean with mild detergent; air dry.
Pack carefully to avoid punctures; use tape for field repairs; contact for service.
Details tent capacity, materials, poles, pegs, buckles, and zips.
Offers a 3-year guarantee for repair, replacement, or refund.
Encourages reusing, selling, or recycling the product after its useful life.
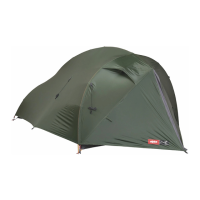
| sleeps | 2 |
|---|---|
| outer | 100% Nylon ripstop 15Dx15D/186Tx154T PU3000 mm |
| inner mesh | 20D polyester No-See-Um |
| inner panels | 15D Nylon R/S |
| floor | 20D Nylon R/S 3000 mm PU/Si |
| poles | 4 poles; DAC TH72M-6 Aluminium |
| pegs | 14 pegs, DAC TH72M-6 Aluminium J-Stake |
| buckles | Duraflex |
| zips | YKK |
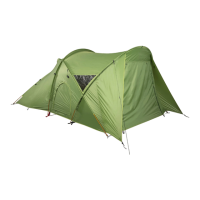
| sleeps | 3 |
|---|---|
| outer | 100% Nylon ripstop 15Dx15D/186Tx154T PU3000 mm |
| inner mesh | 20D polyester No-See-Um |
| inner panels | 15D Nylon R/S |
| floor | 20D Nylon R/S 3000 mm PU/Si |
| poles | 4 poles; DAC TH72M-6 Aluminium |
| pegs | 14 pegs, DAC TH72M-6 Aluminium J-Stake |
| buckles | Duraflex |
| zips | YKK |