5
Battery Removal, Charge and Installation
Complete the following steps for removal, charge and
installation of APS-3 batteries.
Check which battery is “in use” before removal. See battery
status in collection software to replace battery “not in use”.
See the Power or Battery Status Indicator section of this Quick
Start Guide.
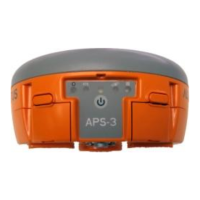
Press battery release button to open battery
compartment door (FRONT)
To replace battery, pull or slide battery out
and close the compartment door
To charge battery, plug the AC battery
charger into the wall socket and power LED
turns ON
Place APS-3 battery in charger for 2 hours or
until LED turns GREEN for full charge. RED
LED indicates battery not fully charged.
Flashing RED indicates battery fault.
To load battery in APS-3, Slide the batteries
in the slot and close compartment door.
One fully-charged battery can be used up to 5
hours.