6
ASSEMBLY INSTRUCTIONS
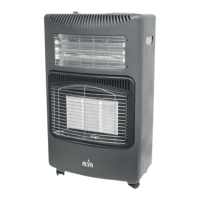
1. Remove the 2 screws and the 2 securing nuts connecting
the rear guard to the heater base. Set the 2 screws and 2
nuts aside for later use. (See Fig.B)
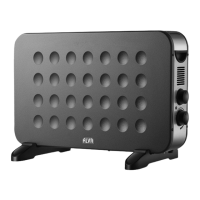
2. Remove the rear guard from the heater base and set aside.
(Fig.C)
Screws and Nuts from
Step 1 will be used in
Step 5.
Fig.B
Fig.C
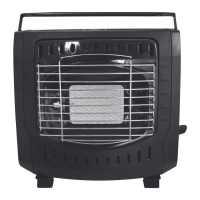
Fig.D
3. Remove the plastic twist tie
securing the castor wheel to the
3 prong plug to. Take caution
when performing this action as
the cylinder base will drop down
as soon as the tie has been
removed. (Fig.D)
 Loading...