SHOWER ENCLOSURE BLISS SLIDE SHOWER ENCLOSURE ASSEMBLY
INSTRUCTIONS BLISS SLIDE
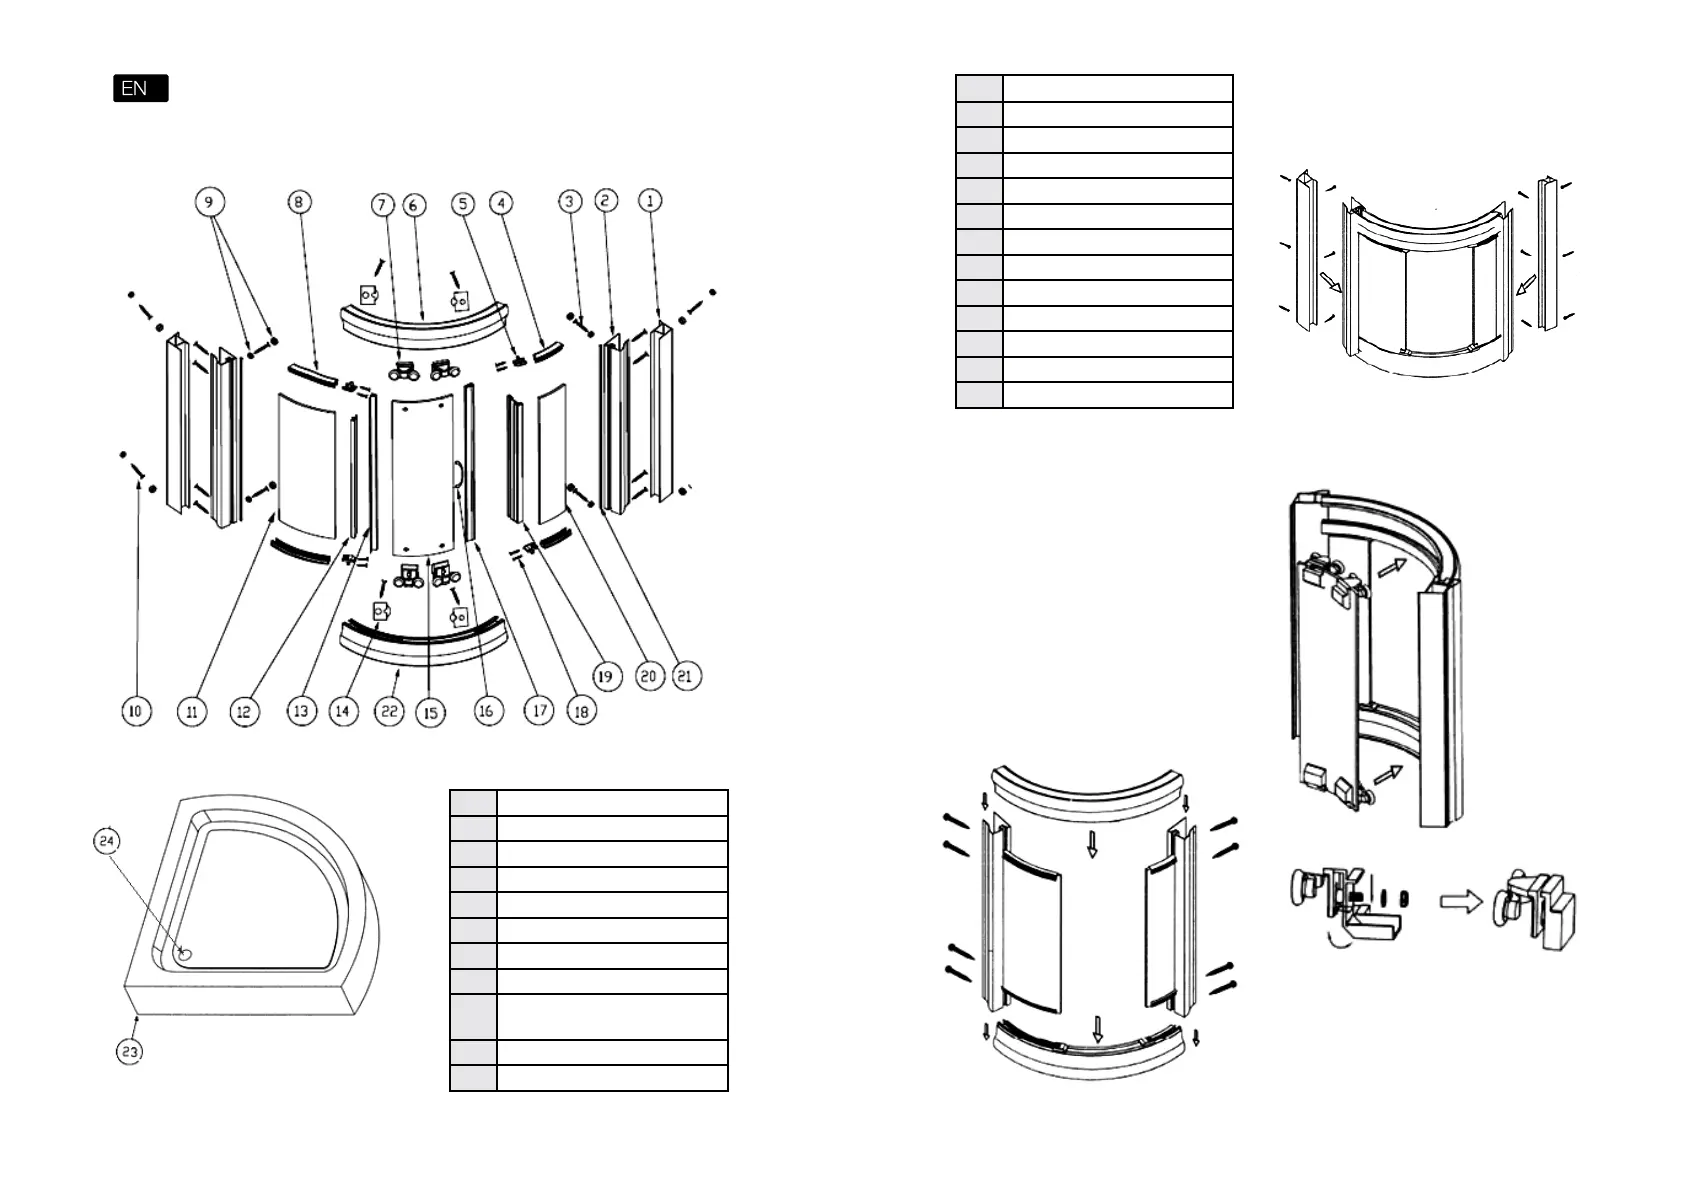
1. DELIVERY SET
1. Wall-mounted prole – 2pcs.
2. Adjustment prole – 2pcs.
3. Fixed glass tting – 8pcs.
4. Narrow xed glass sealer– 2pcs.
5. Decorative element – 4pcs.
6. Upper guiding prole – 1pce.
7. Moving roller – 4pcs.
8. Wide xed glass sealer – 2pcs.
9. Decorative elements of xed glass
tting – 8pcs.
10. Fitting elements – 12pcs.
11. Wide side xed glass – 1pce.
12. Sealer – 1pce.
13. Sealer – 1pce.
14. Stopper – 4pcs.
15. Door glass – 1pce.
16. Door handle – 1 set.
17. Sealer – 1pce.
18. Fitting element – 8pcs.
19. Sealer – 1pce.
20. Narrow side xed glass – 1pce.
21. Sealer – 2pcs.
22. Lower guiding prole – 1pce.
23. Tray – 1pce.
24. Siphon – 1pcs.
2. INSTALLATION
- install a tray into the intended place. Install a
siphon. Align a tray horizontally (controlling is
performed by carpenter’s level). Tray installation
height and its horizontal alignment are performed
with the help of the feet. Install vertical wall-mounted
proles. Fill in the joints between wall-mounted
prole and a wall by a silicone sealer (any silicone
sealer (that meets the properties of ph-neutrality,
colorlessness and antifumigal action can be used)
- install xing glasses into the guiding proles as
shown at the drawing, fasten them with the help of
tting:
- install assembled glass set onto the tray inserting it
into wall-mounted proles and fasten them with the
help of tting:
- install the door with assembled moving rollers into
the prole guide. Adjust rollers height if needed:
- adjust smoothness of the door moving if needed by
moving the door: