Do you have a question about the Amana AE and is the answer not in the manual?
Guidance for qualified technicians on familiarizing with unit specifics before service.
Crucial warnings about high voltage and proper disconnection procedures.
Explanation of LCDI power cords and their function for safety.
Overview of the installation process and adherence to codes.
Instructions for proper wall sleeve installation, ensuring correct pitch and level.
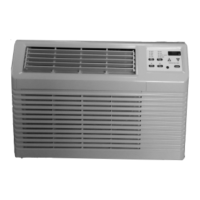
Procedure for removing the front grille for cleaning or access.
Details on connecting the grounding screw and wire for safe installation.
How to adjust horizontal and vertical louvers for air direction.
Information on rubber-grommet mounted compressor, factory set.
Prohibits the use of extension cords to avoid property damage or injury.
Emphasizes the use of only copper conductors for wiring safety.
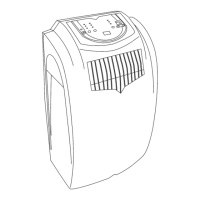
Introduction to the unit's electronic control panel and remote functions.
Explanation of remote control buttons like ON/OFF, MODE, +/-, FAN, SWING, SLEEP, TIMER.
Explains AUTO, COOL, DRY, FAN, and HEAT modes and their operations.
How to adjust fan speed in different modes, including auto and dry mode limitations.
Enabling/disabling child lock and switching between °C and °F temperature displays.
Details on enabling/disabling remote thermostat control via DIP switch.
Configuring filter reminders and temperature range limitations using DIP switches.
How to turn the unit on and adjust the desired temperature setting.
Instructions for selecting fan speeds and utilizing the auto fan feature.
Using the unit in Fan Only mode for air circulation without cooling.
How to set timer for delayed start or stop of the unit operation.
Using the heating mode and activating the sleep function for comfort.
Resetting the filter indicator and understanding fault codes for troubleshooting.
Guidance on compressor lubrication and cleaning of front panel and coils.
Description of typical sounds the unit may produce during operation.
Information on how to contact for service and authorized support.
Explains what the warranty covers, exclusions, and limitations.
Outlines owner's obligations for maintenance and proper use.
Details on warranty start date, duration, legal rights, and arbitration.
Details warranty terms for units installed in rental or non-owner occupied homes.
Lists problems and conditions not covered by this warranty.
Defines warranty coverage and exclusions for commercial property installations.
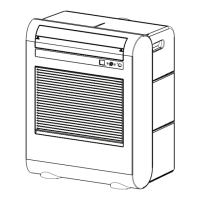
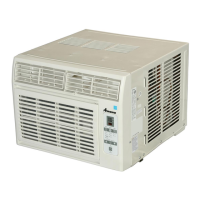
This document describes the Amana Through the Wall Room Air Conditioner with Optional Electric Heat, providing detailed information for installation, operation, and maintenance.
The Amana Through the Wall Room Air Conditioner is designed to provide cooling and, with optional electric heat, heating for a room. It circulates and conditions the air, offering various modes and settings for user comfort. The unit can be controlled via a touch pad on the unit itself or through a remote control.
| Brand | Amana |
|---|---|
| Model | AE |
| Category | Air Conditioner |
| Language | English |