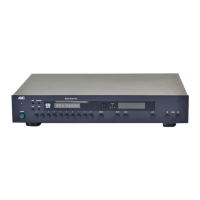
REAR PANEL CONNECTIONS
4
1. AC RECEPTACLE & FUSE(T1AL
250V)
FOR DAB/DAB+/FM+ MODULE (RIGHT
SECTION)
2. ANTENNA - DAB/DAB+/FM+
3. RS-232 - DAB/DAB+/FM+ MODULE
4. DIGITAL OUTPUT - DAB/DAB+/FM+
5. ANALOG OUTPUTS (L&R) - DAB/
DAB+/FM+
6. IR IN & IR OUT
7. TRIGGER
The AC RECEPTACLE is for you to plug in
with power cord included in the packing or
you can plug in with other power cord with
your preferences.
There is 1 Amp time-lag fuse inside the
fuse holder beneath AC Receptacle.
Please always replace with the same type
and value of the fuse.
There is DAB/DAB+/FM+ Antenna
included with the AMC XTad. Please hook
the Antenna into the F61 connector for
starting to use the DAB/DAB+/FM+
module within the area with good signal
level of DAB, DAB+ and FM+ signals. If
the signal level is not good enough,
please use 75 ohm RF cable with F59
connector to hook to the F61 Antenna
input and connected to antenna or RF
booster to stronger signal area or boost to
acceptable level by RF booster.
The DAB/DAB+/FM+ Module of the AMC
XTad Dual Stereo Tuner can be separately
hooked to a control system through the
RS-232 connector. The RS-232 can be
hooked up to USB Hub or Ethernet Switch
through RS232 to USB or RS232 to
Ethernet adaptor. Through the RS232
connector, the DAB/DAB+/FM+ module
can accept commands from your system
controller and feed back status to your
controllers and touch panels. For details of
RS-232 commands, please refer to the
RS-232 appendix.
This RCA connector is with Audio SPDIF
digital output of DAB/DAB+/FM+ Module.
Connect standard audio cables from the L
and R output jacks to the Tuner inputs on
your preamplifier or system controller. You
may connect the audio outputs to any line-
level inputs, even if the input isn't label
"TUNER".
IR signal from rooms or IR OUT of other
units can be connected to the 3.5mm mini
IR IN jack on the rear panel of XTad. So,
XTad can be controlled by the IR remote
control in each room through IR sensor.
There is IR OUT as buffered output of IR
IN for controlling units hooking up to XTad
or operating as daisy chain for the IR
signal passing through the system.
For convenience the XTad can be
triggered to turn on automatically when a
suitable voltage is applied to its Trigger IN
jack. When automatic turn on is selected,
the XTad front panel Power button is
disabled so that on/off is determined solely
by the triggering preamp or controller.
MAN. (Manual) Position
When the MAN/AUTO switch is in its MAN
(Manual) position, the auto turn on
function is disabled and the XTad must be
turned on and off manually with the Power
button on its front panel.
AUTO Position
When the MAN/AUTO switch is set to its
AUTO (Automatic) position, the XTad will
be turned on and off by external dc or ac
voltage of 3.3V to 30V from your controller
or preamplifier. When external voltage
becomes low, the XTad will be turned off
immediately. The AUTO switch position
disables the front panel Power button.
 Loading...