EasyManua.ls Logo

Ameristar M4AC3024B1000NA User Manual

Default Icon
24 pages
To Next Page IconTo Next Page
Page #1 background imageLoading...
Page #1 background image
INSTALLATION INSTRUCTIONS
Split System Air Conditioner
WARNING
These instructions are intended as an aid to qualified
licensed service personnel for proper installation, adjust-
ment and operation of this unit. Read these instructions
thoroughly before attempting installation or operation.
Failure to follow these instructions may result in improper
installation, adjustment, service or maintenance possibly
resulting in fire, electrical shock, property damage,
personal injury or death.
RECOGNIZE THIS SYMBOL AS AN INDICATION OF IMPORTANT SAFETY INFORMATION
DO NOT DESTROY THIS MANUAL
Please read carefully and keep in a safe place for future reference by a serviceman.
1.5-5 Tons
NOTE: Appearance of unit may vary.
13 SEER
R410A
Question and Answer IconNeed help?

Do you have a question about the Ameristar M4AC3024B1000NA and is the answer not in the manual?

Ameristar M4AC3024B1000NA Specifications

General IconGeneral
BrandAmeristar
ModelM4AC3024B1000NA
CategoryAir Conditioner
LanguageEnglish

Summary

1.0 SAFETY

Safety Alert Symbol and Signal Words

Explains safety alert symbols and signal words like DANGER, WARNING, CAUTION for injury prevention.

General Safety Warnings

Warnings about improper installation, adjustment, alteration, service, or maintenance causing injury or damage.

Fire and Electrical Hazards

Warns that failure to follow safety can cause serious injury, death, or property damage from fire or electrical hazards.

Refrigerant Line Brazing Safety

Caution regarding brazing existing refrigerant lines; only use brazed joints, not soldered.

3.0 UNIT INSTALLATION

3.1 LOCATION

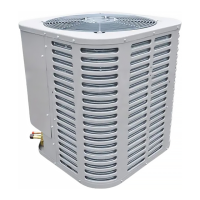
Select suitable location for indoor/outdoor units, observe clearances, air entry, discharge, and service access.

3.2 GROUND INSTALLATION

Install on a solid, level base that won't shift. Maintain clearances and avoid noise issues.

3.5 UNIT MOUNTING

3.6 FACTORY-PREFERRED TIE-DOWN METHOD

Tie-Down Procedure Steps

Steps for securing the unit to a pad using brackets and fasteners for high wind areas.

3.7 PRECAUTIONS DURING LINE INSTALLATION

3.8 PRECAUTIONS DURING BRAZING OF LINES

Brazing Material and Procedure

Use phosphorous-copper alloy (Silfos-5) for brazing; do not use soft solder. System charge is in outdoor unit.

Nitrogen Purge for Brazing

Use dry nitrogen during brazing to prevent oxidation. Use pressure regulator and safety valve.

3.9 PRECAUTIONS DURING BRAZING SERVICE VALVE

4.0 INTERCONNECTING TUBING

5.0 EVACUATION

Evacuation Procedure and Leak Testing

Evacuate system to 350 microns or less. Use nitrogen for leak testing and monitor micron gauge.

6.0 ELECTRICAL CONNECTIONS

6.2 FIELD CONNECTIONS POWER WIRING

Install disconnect switch, run power wiring, route through opening, and make supply connections.

6.3 REMOVING THE TOP PANEL AND MOTOR

7.0 CHECKING REFRIGERANT CHARGE

7.1 CHARGING BY LIQUID PRESSURE

Charge system by comparing measured liquid pressure to target pressure based on outdoor ambient temperature.

7.2 CHARGING BY WEIGHT

7.3 FINAL LEAK TESTING

System Leak Detection

Use a halogen leak detector to check all piping for leaks after evacuation and charging. Recover refrigerant if leak is found.

9.0 WIRING DIAGRAM

TABLE 5. Troubleshooting

System Faults and Causes

Lists system faults (refrigerant, electrical, defrost) and their primary/secondary causes.

TABLE 6. Operational And Checkout Procedures

Related product manuals