Do you have a question about the Ameristar M4AH3048B1000AA and is the answer not in the manual?
Understand safety symbols (DANGER, WARNING, CAUTION) and their meanings for personal injury.
Warnings about improper installation, adjustment, or service causing injury or damage.
Warnings about electrical hazards, fire risks, and brazing precautions for refrigerant lines.
Use of phosphorous-copper alloy, avoiding soft solder, and using dry nitrogen during brazing to prevent oxidation.
Evacuating the system to 350 microns or less and leak testing using dry nitrogen.
Verifying electrical supply, using copper conductors, and ensuring proper grounding as per codes.
Procedure for charging the system by measuring liquid pressure against outdoor temperature.
Adjusting charge by weight based on calculated requirements for new installations.
Common refrigerant circuit faults and their primary/secondary causes.
Common electrical faults, including thermostat, compressor, and fan issues, and their causes.
This document provides comprehensive installation and maintenance instructions for the Ameristar 13 SEER Split System Air Conditioner, designed for 1.5-5 ton capacities and utilizing R410A refrigerant. The manual emphasizes safety, proper installation techniques, and routine maintenance to ensure optimal performance and longevity of the unit.
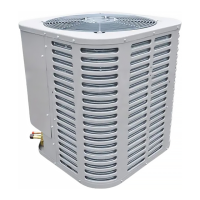
The primary function of this device is to provide cooling for residential and multi-family applications. It operates as a split system, meaning it consists of an outdoor condensing unit and an indoor coil, which work in conjunction to circulate refrigerant and condition the air within a space. The unit is designed to be connected to a matching indoor coil using field-supplied refrigerant-grade copper tubing.
The installation process begins with selecting a suitable location for both the indoor and outdoor units, ensuring adequate clearance for air intake, discharge, and service access. For ground installations, the unit should be placed on a solid, level base to prevent shifting and potential refrigerant line strain. Roof installations require a structure capable of supporting the unit's total weight, often utilizing a padded frame or rails to minimize sound and vibration transmission. Elevated installations are recommended in areas with anticipated snow accumulation to prevent air entrance blockage.
Proper unit mounting is crucial. If elevating the unit, either on a flat roof or a slab, stringers (e.g., 4"x4") should be used to evenly distribute weight and prevent noise and vibration. It's important not to block the base pan drain openings. For high-wind areas, a factory-preferred tie-down method is outlined, involving L-shaped brackets and concrete fasteners to secure the unit to a cement slab. Care must be taken not to over-tighten fasteners to avoid weakening the concrete.
Refrigerant line installation requires meticulous attention to detail. Lines should be installed with as few bends as possible to prevent damage or kinking. Clean, hard-drawn copper tubing is preferred, but if soft copper is used, sharp bends must be avoided to prevent restrictions. The lines should not obstruct service access to the coil, air handling system, or filter. To minimize noise transmission, refrigerant lines must be isolated from the equipment and structure. The suction line must be insulated, and metal-to-metal contact should be avoided. For underground installations, PVC piping should be used as a conduit, and buried lines should be kept as short as possible to minimize liquid refrigerant buildup during long periods of shutdown. Sealing material like perma gum should be packed around refrigerant lines where they penetrate a wall to reduce vibration and maintain flexibility.
Brazing of lines is a critical step. All copper-to-copper connections should be brazed with a phosphorous-copper alloy material (e.g., Silfos-5). Soft solder should not be used. Dry nitrogen must be supplied through the tubing during brazing to prevent oxidation of the copper. A pressure regulator and safety valve should be used to ensure low-pressure dry nitrogen flow, which displaces air and prevents oxidation. Precautions must be taken to prevent heat damage to service valves by wrapping them with a wet rag during brazing. After brazing, joints should be cooled with a wet rag. The service valves are reusable and provided for evacuation and charging.
Electrical connections must comply with all national, state, and local codes. All field wiring must use copper conductors and the unit must be grounded with a separate ground wire. A weatherproof disconnect switch should be installed outdoors and within sight of the unit. Power wiring is routed from the disconnect switch to the unit's control box. Proper size time-delay fuses or circuit breakers must be installed. If equipped, the crankcase heater should be energized to preheat compressor oil while other installation steps are completed.
After installation, the system must be evacuated to 350 microns or less. If a leak is suspected, a dry nitrogen leak test should be performed, and any leaks repaired before re-evacuation. A steady rise in micron gauge readings indicates a leak, while a rise that levels off suggests a leak-free system but possibly residual moisture requiring further evacuation.
Charging the system involves checking the refrigerant charge against the Charging Chart or by weight. For new installations, the factory refrigerant charge is sufficient for 15 feet of standard-size interconnecting liquid line. For longer lines or different sizes, the actual charge must be calculated. When charging by liquid pressure, specific conditions must be met, including outdoor and indoor temperature ranges, complete installation with brazed joints, and a visually inspected drier. The unit should run in cooling mode for at least 20 minutes, and outdoor ambient temperature and suction line pressure should be measured to determine the target liquid pressure. For charging by weight, an accurate scale is used to adjust the charge difference.
Regular maintenance is essential for the unit's efficient operation and longevity. Dirt should not be allowed to accumulate on the indoor or outdoor coils or other parts of the air circuit. Cleaning should be performed as often as necessary using a brush, vacuum cleaner attachment, or other suitable means. The outdoor fan motor is permanently lubricated and does not require periodic oiling. Users should refer to the furnace or air handler instructions for filter and blower motor maintenance. The indoor coil and drain pan should be inspected and cleaned regularly to ensure proper drainage.
The manual also includes a troubleshooting guide for common system faults, categorized by refrigerant circuit and electrical issues. This guide helps identify primary and secondary causes for problems like high or low head pressure, high or low suction pressure, liquid refrigerant floodback, indoor coil frosting, and compressor or fan malfunctions.
Finally, the document outlines operational and checkout procedures to ensure proper performance. After installation, a comprehensive system check is recommended, including verifying unit suspension, proper insulation of suction lines and fittings, secure and isolated refrigerant lines, tight electrical connections, open and unrestricted duct outlets, tight drain line joints, and the installation of a return air filter. The complete system should be operated in all modes to verify proper performance, including supplementary electric heater operation.
| Model | M4AH3048B1000AA |
|---|---|
| Type | Air Conditioner |
| Refrigerant | R-410A |
| Compressor Type | Scroll |
| Voltage | 208/230V |
| Phase | 1 |
| Frequency | 60 Hz |
| HSPF Rating | Not Applicable |
| Heating Capacity | Not Applicable |
| Cooling Capacity | 48000 BTU/h |
| Stages | Single |