31
ameriwoodhome.com
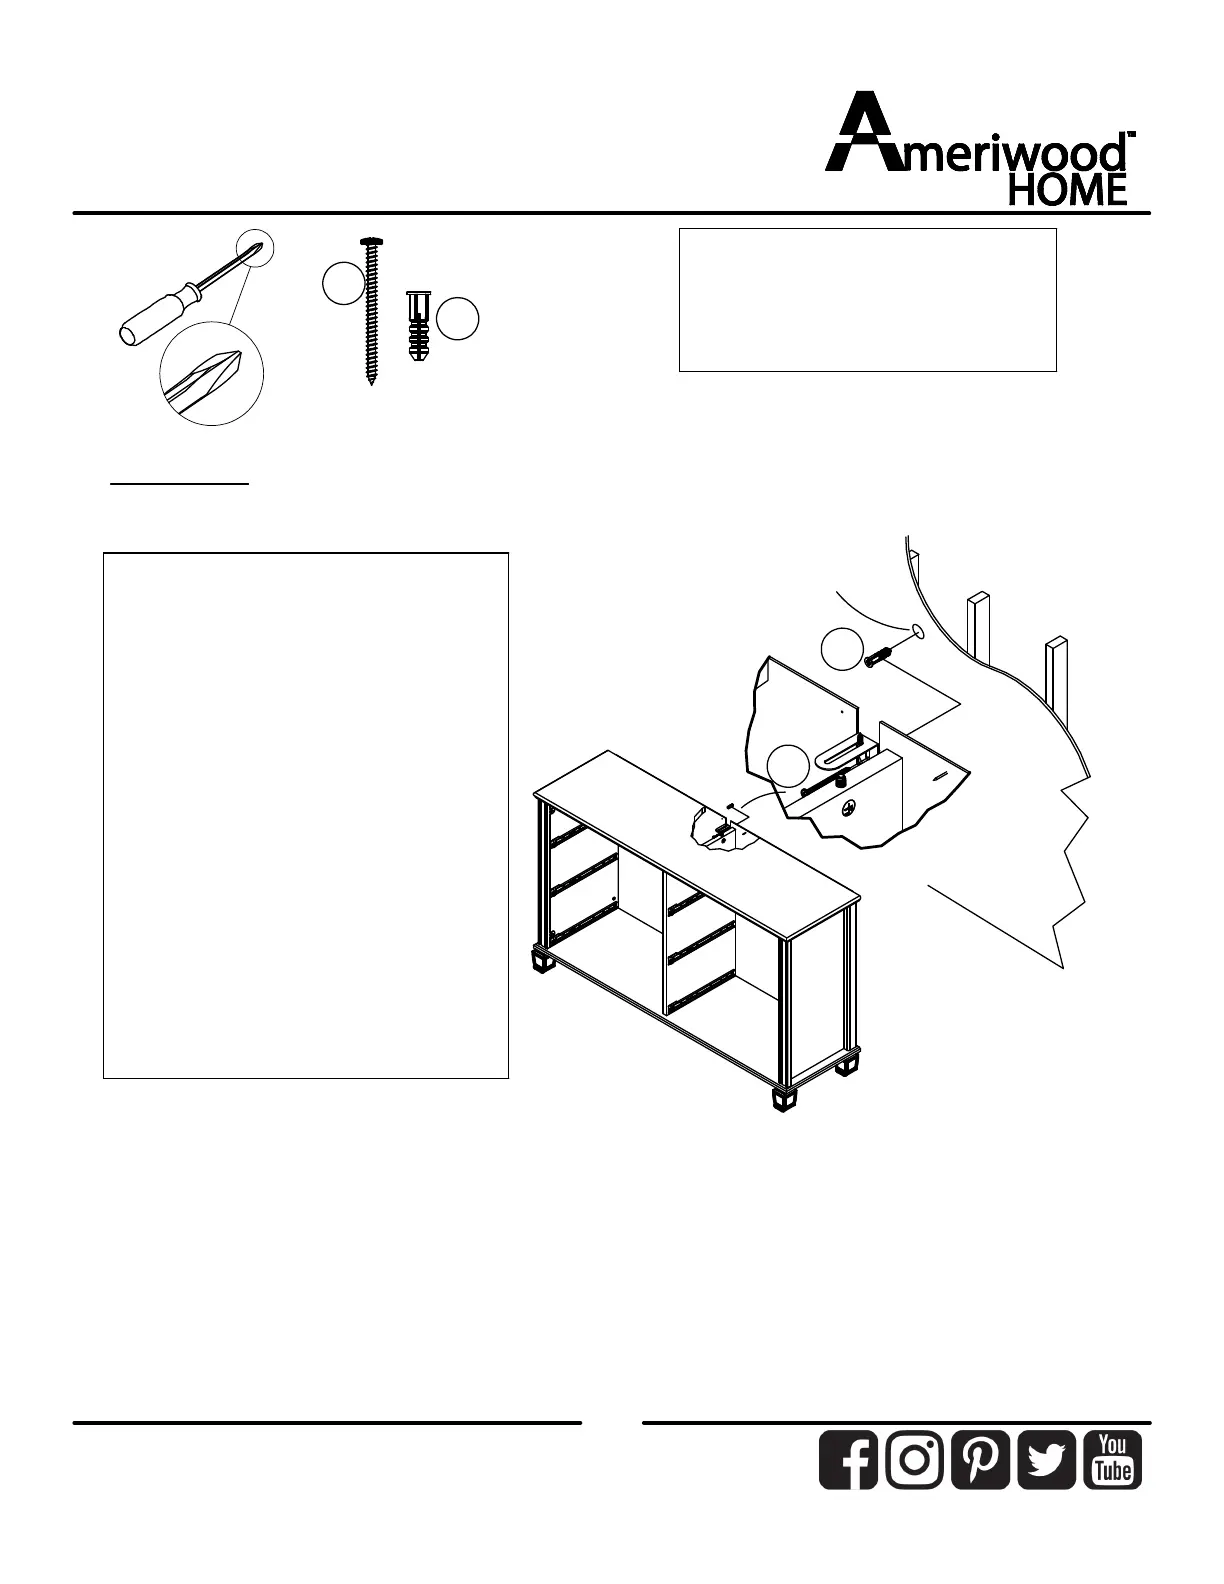
STEP24
For Masonry, Concrete, or other
wall materials:
Consult your local hardware store
for appropriate anchors to securely
attach the safety bracket.
IMPORTANT:THISUNITMUSTBESECURETOTHEWALLTOHELPPREVENTTIPOVER.FOLLOW
THESEINSTRUCTIONSTOINSTALLTHEANTI‐TIPPINGSAFETYBRACKETPROVIDEDWITHTHIS
PRODUCT.
WARNING
Seriousorfatalcrushinginjuriescan
occurfromfurnituretipover.
Topreventtipover:
*Installtipoverrestraintprovided
*Placeheaviestitemsin
thelowest
drawers
*Unlessspecificallydesignedto
accommodate,donotsetTVsor
otherheavyobjectsonthetopofthis
product
*Neverallowchildrentoclimbor
hangondrawers,door,orshelves
*Neveropenmorethanone
draweratatime
Useoftipoverrestraintsmayonly
reduce,
butnoteliminatetherisk
oftipover.
OPTION1:Attachmentintoawallstud(preferredmethod)
Usingastudfinder,locateastudinth e wa ll.Place yourun itagainstthew all,withthesaf e tybracketaligned
inthislocatio n.Tomakedrivingthe screweasier,youcandrilla1/8"diameterpilot hole(3mm)throughthe
safetybracketintothestud.Drivethescrewthr o ughthe
safetybracketintothewallstud.Tightenthescre w
thatwasnotfullytight enedinstep11.
OPTION2:Attachmentintodrywall
Locateyou runitwheredesiredagainstawallandmarkthewallthroughthesafetybracket,thenmoveyour
unitaside.Dr illa3/16"diameterhole(5mm)intothewallboard.Tapthewallanchorint otheholeuntilitis
flush.Moveyourunitinto locationand fastenthewallbracket
to the wallanchorwiththescrew.Tightenthe
screwtha twasnotfully tig ht e nedinstep 11.
14c
14d
stud
wallboard
hole
14d
14c
(x1)
#A84050