EasyManua.ls Logo

Ameriwood HOME 5206301PCOM User Manual

Ameriwood HOME 5206301PCOM
15 pages
To Next Page IconTo Next Page
Page #1 background imageLoading...
Page #1 background image
WARNING ADVERTENCIA AVERTISSEMENT
Unit can tip over causing severe injury
or death.
Anchor unit to stud or wall.
DO NOT allow children to climb on unit.
Put heavy items on lower shelves or drawers.
Read and follow all assembly instructions.
Este mueble puede caerse por encima
causando daño serio o la muerte
Anolar el mueble a un espárrago muro.
NO dejar que los niños suben por encima del mueble.
Poner los articulos mas pesados en los tableros o cajones inferiores.
Leer y sequir todos de los instucciones para el montaje.
L'unité peut basculer et causer des
blessures graves ou la mort.
Fixez l'unité au mur ou à un montant.
Ne laissez PAS les enfants grimper sur le meuble
Déposez les pièces lourdes sur les tablettes ou tiroirs
du bas.
Lire et suivre toutes les instructions d'assemblage.
STOP
ALTO
ARRÊT
DO NOT RETURN PRODUCT TO THE STORE
NO REGRESAS ESTA PRODUCTO A LA TIENDA
NE RETOURNEZ PAS LE PRODUIT AU MAGASIN
Individual stores do not stock parts.
Las tiendas no tiene partes.
Les magasins individuels ne gardent pas de pièces.
If a part is missing or damaged, please visit our website or call our toll-free customer
service line. We will gladly ship your replacement parts FREE of charge.
Si las partes están perdidas o dañadas Por favor visite nuestra página de Internet o
llame a nuestra línea de teléfono gratis de Servicio al Cliente. Nosotros le enviaremos
sus repuestos sin cargo adicional, serán totalmente gratis.
Si une pièce est manquante ou endommagée, veuillez visiter notre site web ou appelez
sans frais notre Service à la clientèle. Nous expédierons avec plaisir vos pièces de
rechange GRATUITEMENT.
Need Parts or
Assistance?
Nesacitas partes o
Asistancia?
Besoin de Pièces ou
d'assistance?
WWW.AMERIWOODHOME.COM/PARTS
or call toll free:
o llame a nuestra línea gratis:
ou appelez sans frais:
1-800-489-3351
For prompt, reliable service; please have your assembly manual ready.
Para servicio mas rapido y reliable por favor tenga esta manual listo.
Pour un service rapide et fiable, s'il vous plaît ayez votre livret d'assembage en
main.
-KEEP FOR REFERENCE- -GUARDAR PARA REFERENCIA-
-GARDEZ POUR RÉFÉRENCE-
B345206301PCOM
2
5206301PCOM
Date of Purchase ___ / ___ / ___
Lot Number:
THIS INSTRUCTION BOOKLET CONTAINS IMPORTANT SAFETY INFORMATION.
PLEASE READ AND KEEP FOR FUTURE REFERENCE.
Question and Answer IconNeed help?

Do you have a question about the Ameriwood HOME 5206301PCOM and is the answer not in the manual?

Ameriwood HOME 5206301PCOM Specifications

General IconGeneral
BrandAmeriwood HOME
Model5206301PCOM
CategoryIndoor Furnishing
LanguageEnglish

Summary

Product Safety and Customer Support

General Safety Warnings

Crucial warnings about unit tipping, injury risks, and prevention methods.

Customer Support and Parts Information

Information on obtaining replacement parts and customer service assistance via website or phone.

Assembly Preparation Guidelines

Before Starting Instructions

Guidance on reading instructions, checking parts, workspace preparation, and required tools before assembly.

Product Components Identification

Parts Identification

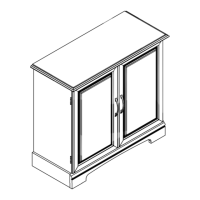
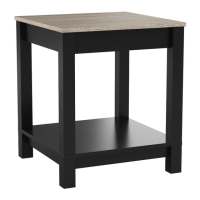
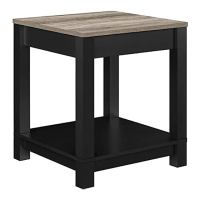
Visual guide and labels for all included furniture components (A-J).

Hardware and Fastening Systems

Hardware List and Identification

Detailed list and visual identification of all screws, bolts, dowels, and other hardware.

CAM Fastening System Explanation

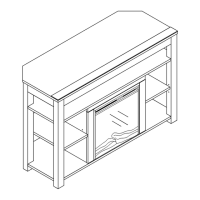
Illustration and explanation of how the CAM fastening system is used for assembly.

Assembly Instructions

Step 1: Attach CAM Hardware to Side Panels

Attaching CAM bolts and locks to the left (A) and right (B) side panels.

Step 2: Attach Shelves and Hardware

Installing CAM locks, bolts, and connection hardware to top (E) and bottom (D) panels.

Step 3: Install Top Panel

Inserting CAM bolts into the top panel (C) for subsequent connection.

Step 4: Attach Support Brackets

Securing angle brackets (8) to the bottom (D) and top (C) panels using screws (7).

Step 5: Assemble Main Cabinet Body

Connecting the main cabinet panels (A, B, E, D, I) using screws and cam locks.

Step 6: Attach Top Rails

Fastening the top rails (H) to the side panels (A) and internal structure (C).

Step 7: Install Back Panel

Securely attaching the back panel with nails (6), emphasizing its structural importance.

Step 8: Install Knobs and Hinges

Attaching the knobs (2) and hinge kits (11, 12) to the left (F) and right (G) doors.

Step 9: Install Doors

Mounting the left (F) and right (G) doors onto the assembled cabinet using hinge hardware.

Product Specifications

Weight Limits

Specifies the maximum weight capacity for the top, middle shelf, and bottom of the unit.

Compliance Information

Certificate of Conformity

Details product compliance with regulations, including lead-containing paint ban and manufacturer information.

Related product manuals