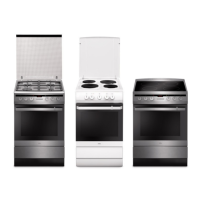
Do you have a question about the Amica 500 and is the answer not in the manual?
Identifies the location of the product's information label on the back wall.
Explains how to find and understand the appliance serial number for parts matching.
Breaks down the components of the serial number for date and batch identification.
Step-by-step guide to safely detach the appliance door by releasing hinge locks.
Instructions for removing the oven door seal by unhooking seal holders.
Details on how to disassemble gas cooker knobs by prying and squeezing parts.
Guide to removing oven shelf support runners from their mounting holes.
Instructions for removing the gas hob assembly by undoing screws and sliding.
Procedure for replacing the gas safety thermocouple by sliding it from the burner guide.
Steps to remove the front panel by undoing screws after door removal.
Guide to removing the electronic oven programmer by prying and unhooking it.
Instructions for replacing control panel buttons by prying their catches.
Steps for removing igniter connectors from the valve stem, including washer removal.
Procedure for removing the oven temperature regulator by undoing screws.
Instructions for removing the oven function switch by undoing screws.
Steps for removing the rotisserie motor by dismantling the rear wall and undoing screws.
Guide to removing the convection fan and its drive by bending locking tabs.
Procedure for removing the oven's bottom heating element after accessing the rear.
Steps for removing the convection fan heating element using a socket head wrench.
Procedure for removing the oven's top heating element by undoing nuts.
Instructions for removing the appliance's front wall by drilling out rivets.
Steps for removing and replacing a gas burner body, including disconnecting the gas pipe.
Procedure for replacing the gas valve assembly by removing screws and lifting.
Guide to removing and installing ceramic hob cooking zones by pressing springs.
Steps to remove and replace the energy metering device by undoing screws.
Instructions for replacing electric hob cooking zones by undoing nuts.
Procedure for removing the electric hot plate cam connector by undoing screws.
| Brand | Amica |
|---|---|
| Model | 500 |
| Category | Kitchen Appliances |
| Language | English |