16 N5X Construction guide
Mounting the transformers
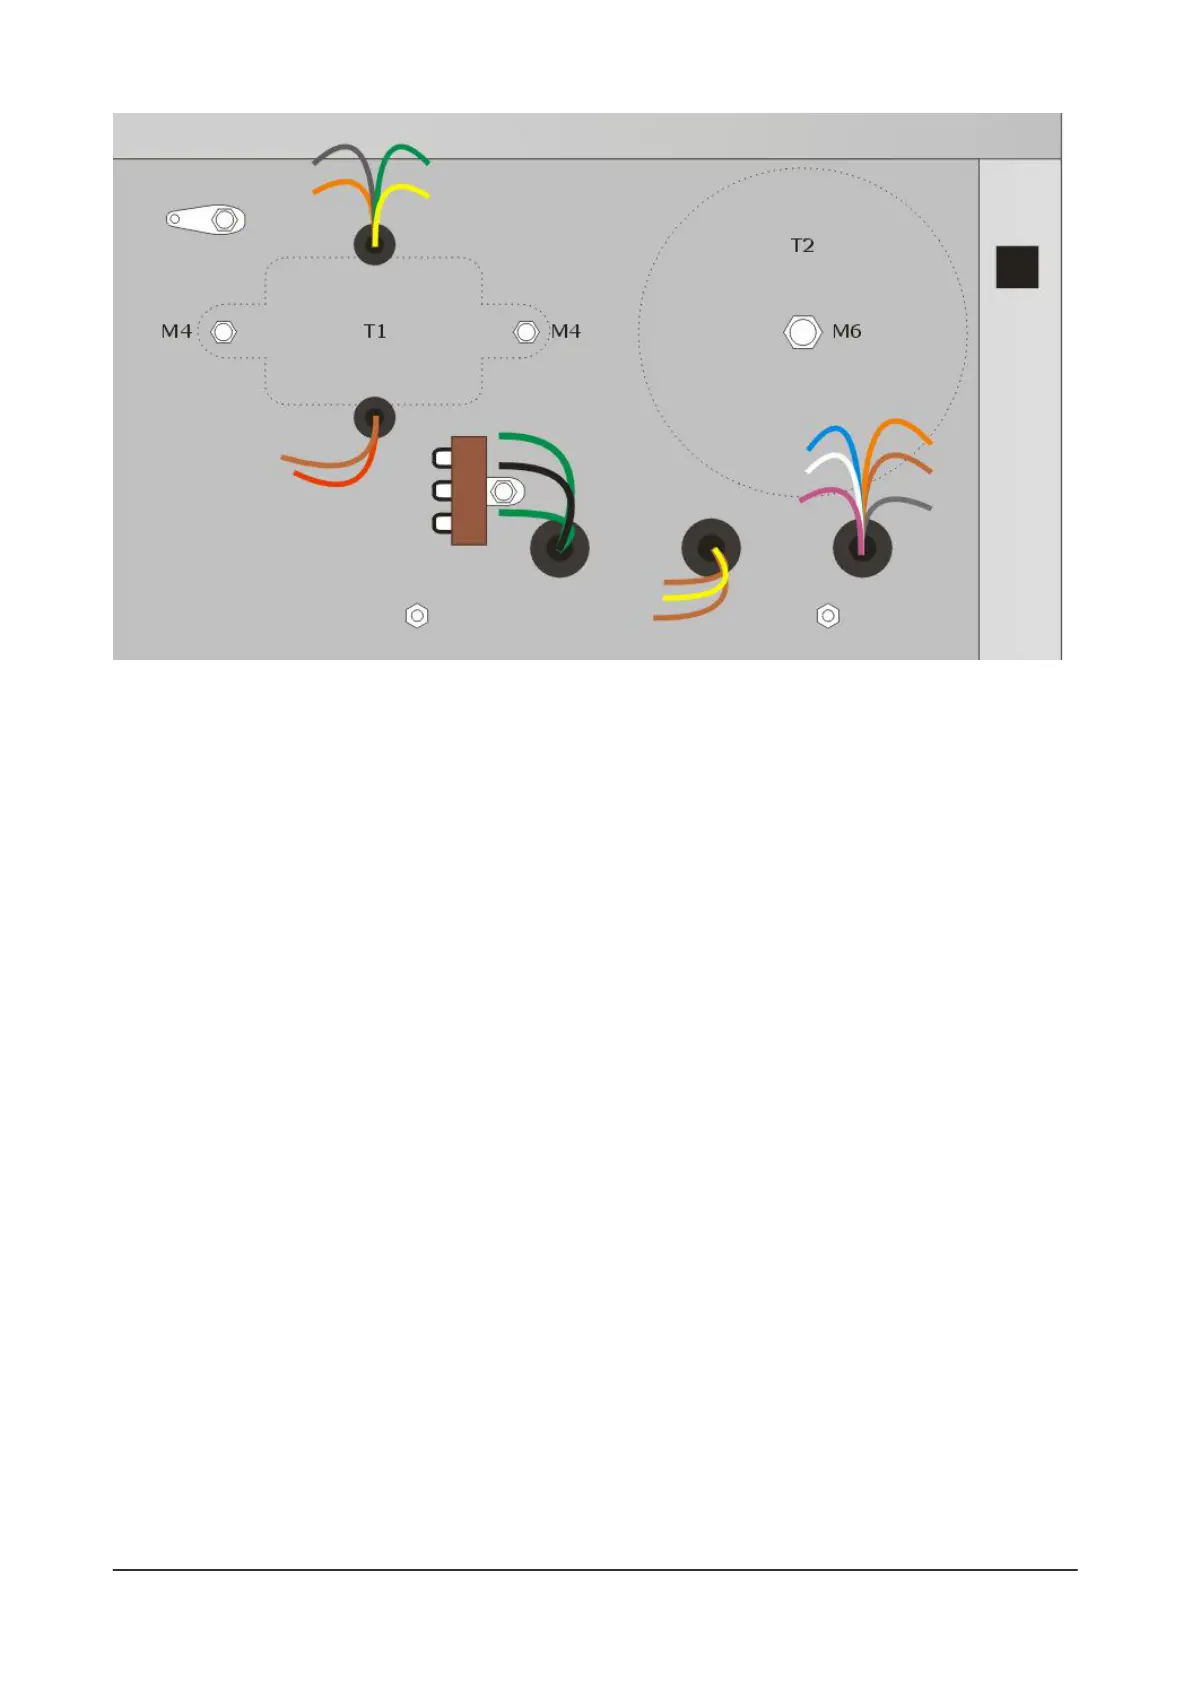
Add the output transformer, T1, orientating it to so that the speaker wires (orange, yellow, green and
grey) from its secondary winding pass through the grommet closest to the back panel, with the brown
and red wires of the primary passing through the other grommet. Secure this transformer with M4
hardware.
Now add the power transformer, T2, on the outside of the chassis. Start by removing the M6 nut to
allow the M6 bolt to pass through the hole in the chassis. Then rotate the toroid so that the wires are in
roughly the correct positions. For the N5X amplier layout, the thicker green wires of the heater supply
go through the rubber grommet that's closest to the centre of the chassis, with the brown + yellow +
brown wires of the high-voltage supply going the centre grommet and the six wires of the mains-side
primary going through the grommet closest to the edge of the chassis.
This is a bit tricky and rather ddly. :) Take your time and insert the wires rst and then gently lower
the toroid down on to the chassis. Make sure that the second rubber pad sits properly between the
bottom of the toroid and the chassis surface. The toroid is secured by adding the M6 shakeproof washer
on the inside of the chassis and then the M6 nut.
 Loading...