DQ-7000-1-EAMP 7 Series Countertop / Mobile Terminal Quick Reference Guide
Advanced Mobile Payment Inc.
DQ-7000-1-EAMP 7 Series Countertop / Mobile Terminal Quick Reference Guide
Advanced Mobile Payment Inc.
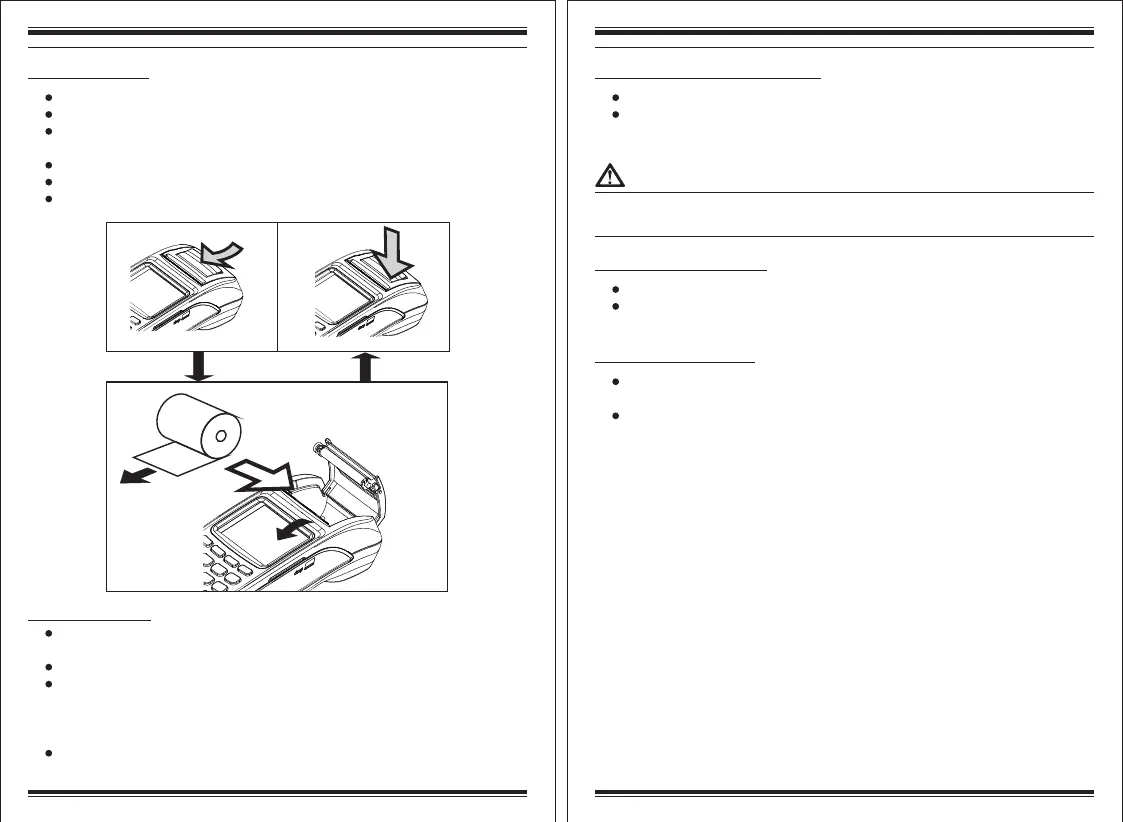
Paper roll installation
Gently pull upwards on the lever located on the middle of the printer door.
Discard any packing material from the paper roll.
Put and fit the roll as shown in the figure below and notice the correct orientation
of the paper while fitting it in.
Pull the paper round 10cm until protrudes from the top of the terminal.
Close the printer door and gently push it until a 'click' sound is heard.
Remove the excess paper by tearing along the serrated edge.
Charging the terminal
Insert the power supply plug directly into the power port located at the back of
the terminal and then plug the power supply into the electrical outlet.
Charging the battery will take 2 to 4 hours.
Battery charging status is indicated in the top right hand corner of the display
when the terminal is switched on and also in the LED at left side of the terminal
when the terminal is in off state. The LED lit Red when the battery is charging
and turns to Green after the battery is fully charged.
When terminal is not in use leave it connected to the power supply to maintain
charge.
Loading thermal
paper roll figure
a
b
c
Establishing Telephone line connections
Place the terminal face down.
Connect the telephone cord to the LAN port on the terminal, and then route it
directly to a telephone wall jack (see below Figure). This is a direct connection
and the line is dedicated to the terminal.
To reduce the risk of fire, use only No. 26AWG or larger UL Listed or CSA.
Certified Telecommunication Line Cord.
Establishing LAN connections
Place the terminal face down.
Connect the Ethernet cable to the LAN port on the terminal, and then route it
directly to a LAN jack.
Optional device connections
This terminal has a port that can operate either as a PIN pad port or a RS-232 port,
depending on the power source available.
Please refer to the User Manual for the procedures on how to connect a PIN pad to
the device.
 Loading...