Appendix B – Replacing Battery on CPU
242
Hardware Reference Manual – Enova DGX 100 Series Digital Media Switchers
The remaining steps are not optional (except for Steps 22 and 23). They must be completed to set the date and
time information on the CPU’s clock.
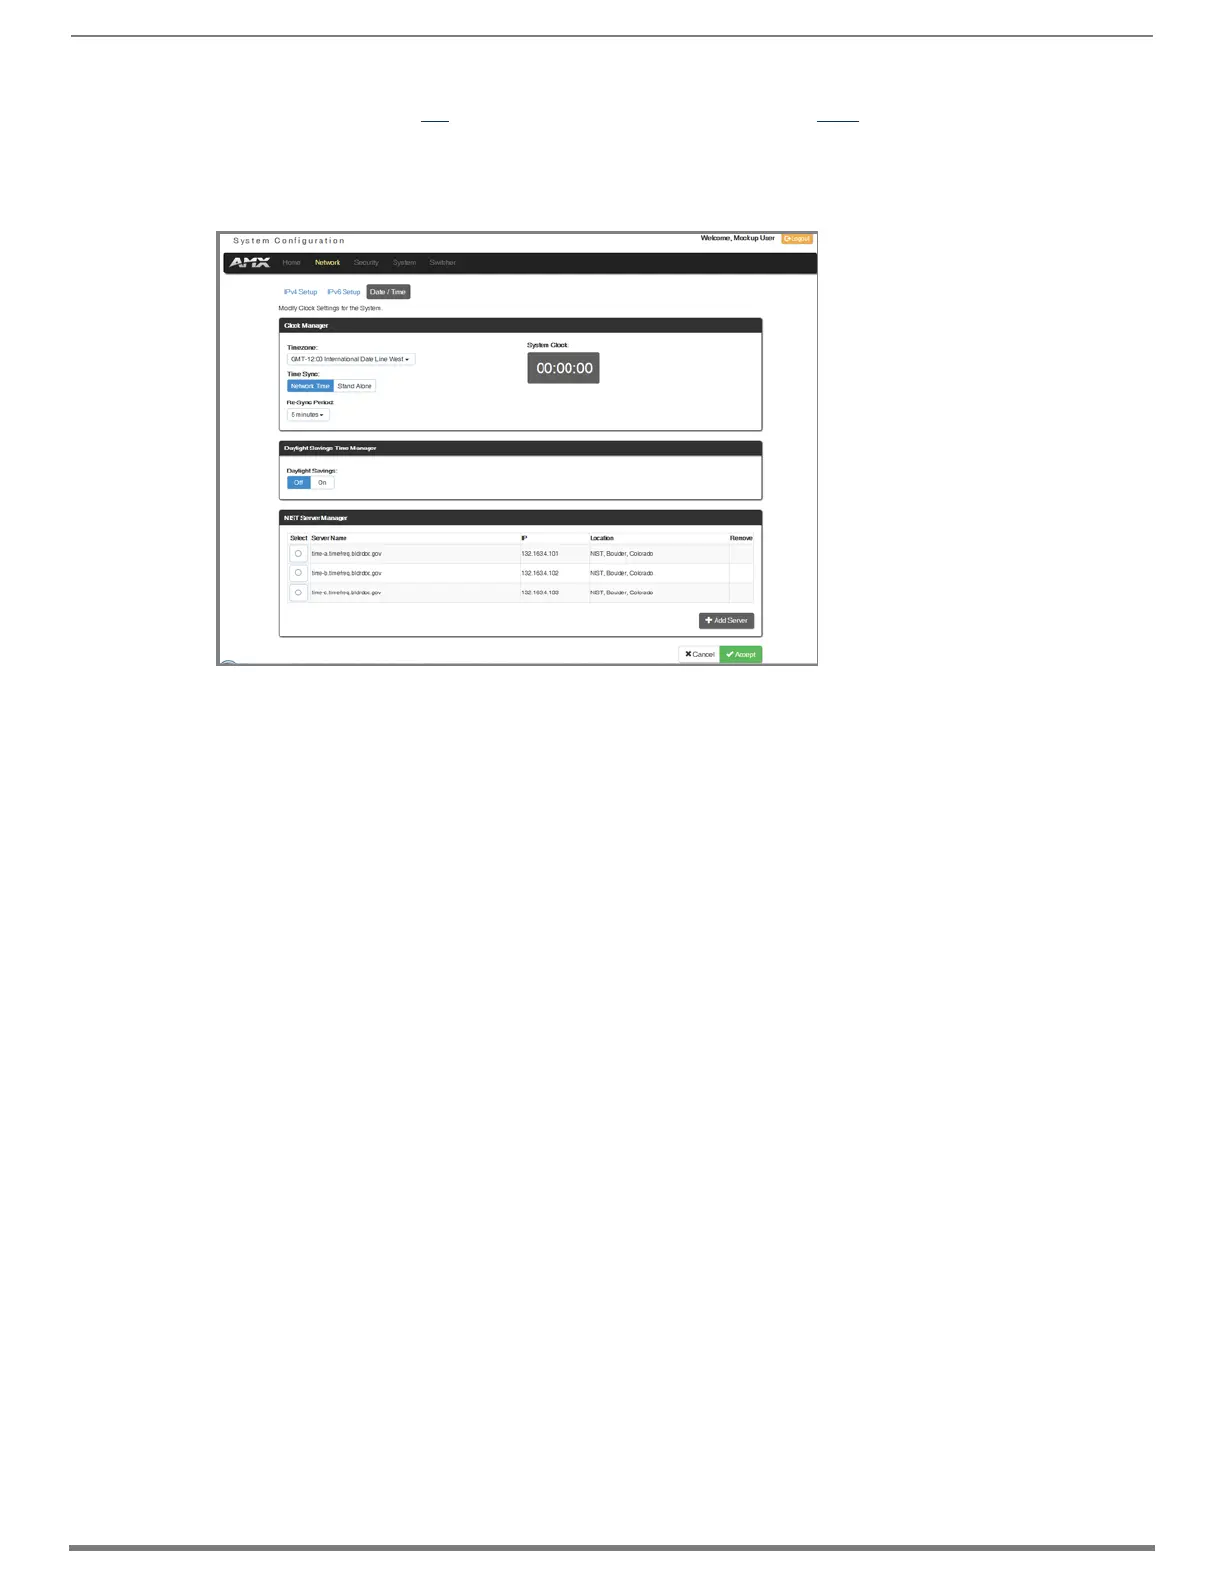
17. Open the System Configuration interface (type the integrated Master’s IP address* in the address bar of the browser and
press the Enter key).
18. From the Network drop-down menu, select Date / Time.
19. Under Clock Manager, select the desired Timezone from the drop-down list.
20. Under Time Sync, select either Network Time or Stand Alone (if Stand Alone, enter additional information).
21. Under Re-Sync Period, select the desired length of time from the drop-down list.
22. Optional – under Daylight Savings Time Manager, select either Off or On (if On, select additional options).
23. Optional – Under NIST Server Manager, select a Server Name (or add a server using the +Add Server button on the right).
24. Click Accept.
* The IP address is available through the Control Panel’s LCD menu: Function/Setup Options/Master Info/IP Address.
CPU Troubleshooting
First:
□ Check all cable connections, check the System Status LED, and execute a test switch.
If the System Status LED is still not illuminated or the test switch does not work:
□ Remove and re-seat the CPU board to see if the CPU establishes the connection.
If the System Status LED on the CPU does not display normal indications:
□ Contact technical support (see page 61).
 Loading...


